Introduction
Ever wondered if your green thumb is more suited for wishful thinking than actual indoor gardening success? Do you eye those vibrant herb gardens on social media with a mix of admiration and a touch of skepticism, convinced they require professional-level expertise or a dedicated greenhouse? Well, hold onto your gardening gloves because I’m here to tell you that cultivating a thriving indoor herb haven is not only achievable but surprisingly simple, even for complete beginners. Imagine fresh basil for your pasta, mint for your tea, or chives for your scrambled eggs, all grown right in your kitchen, requiring minimal space and effort. This guide will walk you through everything you need to know to transform that skeptics’ view into a flourishing reality, proving that anyone can master the art of indoor gardening with these easy-to-grow herbs.
Tools & Materials Needed
To kickstart your indoor gardening adventure, you don't need a massive investment. The beauty of growing herbs indoors is its accessibility. Here’s a detailed rundown of what you’ll need:
- Pots: Choose pots with drainage holes to prevent waterlogging, which is a common herb killer. Terracotta pots (porous and excellent for air circulation) or plastic pots are both great. For an eco-friendly angle, consider repurposing old coffee cans or plastic bottles by drilling drainage holes – just make sure they're thoroughly cleaned!
- Potting Mix: This is crucial. Don't use garden soil, as it can compact, drain poorly, and introduce pests. Opt for a high-quality, well-draining potting mix specifically designed for containers. Look for mixes that contain perlite or vermiculite, which improve aeration.
- Seeds or Starter Plants: For ultimate control and satisfaction, seeds are a fantastic, budget-friendly option. If instant gratification is more your style, starter plants from a local nursery will get you growing faster.
- Small Shovel/Trowel: A hand trowel makes transferring soil and plants a breeze.
- Watering Can: A small watering can with a fine spout allows for precise watering without disturbing delicate seedlings.
- Grow Lights (Optional but Recommended): If your home lacks abundant natural light, a simple LED grow light can make all the difference. Modern grow lights are energy-efficient and relatively inexpensive. This is especially true in regions with shorter daylight hours.
- Pruning Shears/Scissors: For harvesting and maintaining plant shape.
- Saucers/Trays: To catch excess water and protect your surfaces.
Time & Effort Overview
One of the greatest appeals of indoor gardening, particularly with herbs, is its low time commitment. Planting usually takes no more than 30-60 minutes, depending on whether you’re starting from seeds or transplanting starter plants. Most of these herbs will show signs of germination within 7-14 days. Compared to slower-growing vegetables, which can take months to mature, herbs offer relatively quick rewards. For example, a basil plant can be ready for its first harvest in just 3-4 weeks from a starter. This is approximately 50% faster than something like a tomato plant from seed, though indoor gardening basil typically grows about 25% faster than its outdoor counterpart due to controlled conditions.
The daily effort involves about 5-10 minutes for watering and checking on your plants. Weekly, you might spend another 15-20 minutes for minor pruning or assessment. Overall, this is a beginner-level project, perfect for those new to gardening. The consistent care pays off quickly, boosting your confidence.
Step-by-Step Gardening Process
Let's get your hands dirty! Follow these simple steps to cultivate your thriving indoor herb garden.
Step 1: Choosing Your Herbs
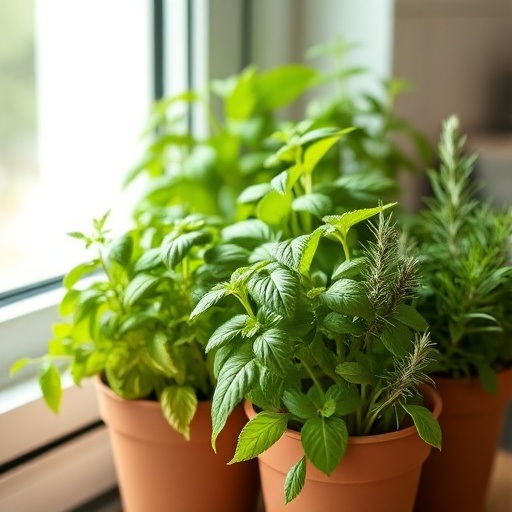
For your first indoor gardening venture, stick to easy-to-grow varieties like basil, mint, chives, parsley, oregano, thyme, rosemary, or cilantro. Each has slightly different needs, but all are forgiving newcomers.
Step 2: Preparing Your Pots
Ensure your chosen pots have drainage holes. Place a small layer of gravel or broken pot shards at the bottom to prevent soil from escaping and improve drainage further. Fill the pots with your high-quality potting mix, leaving about an inch of space from the rim.
Step 3: Planting Seeds or Starter Plants
If planting seeds, follow the package instructions for planting depth and spacing. Typically, this involves making small indentations, dropping in a few seeds, and lightly covering them with soil. If using starter plants, gently remove them from their nursery pots, loosen any circling roots, and place them in the prepared holes. Backfill with soil, gently firming it around the base of the plant.
Step 4: Initial Watering
After planting, give your herbs a good drink. Water thoroughly until you see water draining from the bottom of the pot. This helps settle the soil around the seeds or roots. Don’t worry if the soil looks a bit saturated; the initial watering is meant to ensure good contact.
Step 5: Providing Light and Warmth
Place your newly planted herbs in a location that receives at least 4-6 hours of indirect sunlight daily. A south-facing window is often ideal. If natural light is scarce, set up your grow light, positioning it about 6-12 inches above the plants for 12-14 hours a day. Optimal temperatures for most herbs are between 65-75°F (18-24°C).
Step 6: Ongoing Care and Observation
This is where the magic happens! Check your plants daily. Water them when the top inch of soil feels dry to the touch – consistency is key. Observe new growth, slight wilting, or discolored leaves, as these are your plants’ ways of communicating their needs. Early detection is crucial for healthy indoor gardening!
Growth & Care Tips
Successful indoor gardening is all about understanding what your plants need to thrive.
- Watering Frequency: Most herbs prefer consistently moist, but not soggy, soil. Overwatering is a leading cause of root rot, impacting up to 60% of struggling houseplants. Stick your finger an inch into the soil; if it feels dry, it's time to water. Reduce watering in winter when plants are less active.
- Sunlight Exposure: Herbs demand light! Aim for at least 6 hours of bright, indirect light daily. If leaves look leggy or pale, it’s a sign they need more light. Rotate pots every few days to ensure all sides get exposure, promoting even growth. Basil, for instance, thrives with at least 8 hours of light and will grow faster and more robustly.
- Pruning: Regular pruning encourages bushier growth and prevents herbs from "bolting" (going to seed) too quickly, especially for basil and cilantro. For most herbs, pinch off the top set of leaves once the plant reaches 6-8 inches tall. Harvest only about one-third of the plant at a time to ensure continuous growth.
- Fertilization: Indoor herbs generally don't need heavy feeding. A diluted liquid fertilizer (half-strength) every 4-6 weeks during the growing season (spring and summer) is usually sufficient. Over-fertilizing can burn roots.
- Pest Prevention: Indoor plants are less susceptible to pests, but they aren't entirely immune. Watch out for spider mites or aphids. A simple solution of neem oil and water can be sprayed on leaves to deter them. Good air circulation also helps.
Eco-Friendly & Sustainable Alternatives
Embracing sustainability in your indoor gardening not only benefits the planet but also often leads to healthier, more robust plants.
- Composting: Turn your kitchen scraps (excluding meat and dairy) into nutrient-rich compost. A small countertop compost bin is perfect for urban gardening. This "black gold" can be mixed into your potting soil, reducing the need for chemical fertilizers.
- Natural Fertilizers: Beyond compost, consider using diluted fish emulsion, worm castings, or even aged coffee grounds (in moderation) to enrich your soil. These provide slow-release nutrients without harsh chemicals.
- Water Conservation: Implement smart watering techniques. Water deeply and less frequently rather than shallowly and often. Collect rainwater if possible, as it's naturally soft and free of chlorine. Using self-watering planters can also significantly reduce water waste.
- DIY Planters: As mentioned, repurpose items like plastic containers, old boots, or tin cans. Get creative with what you have!
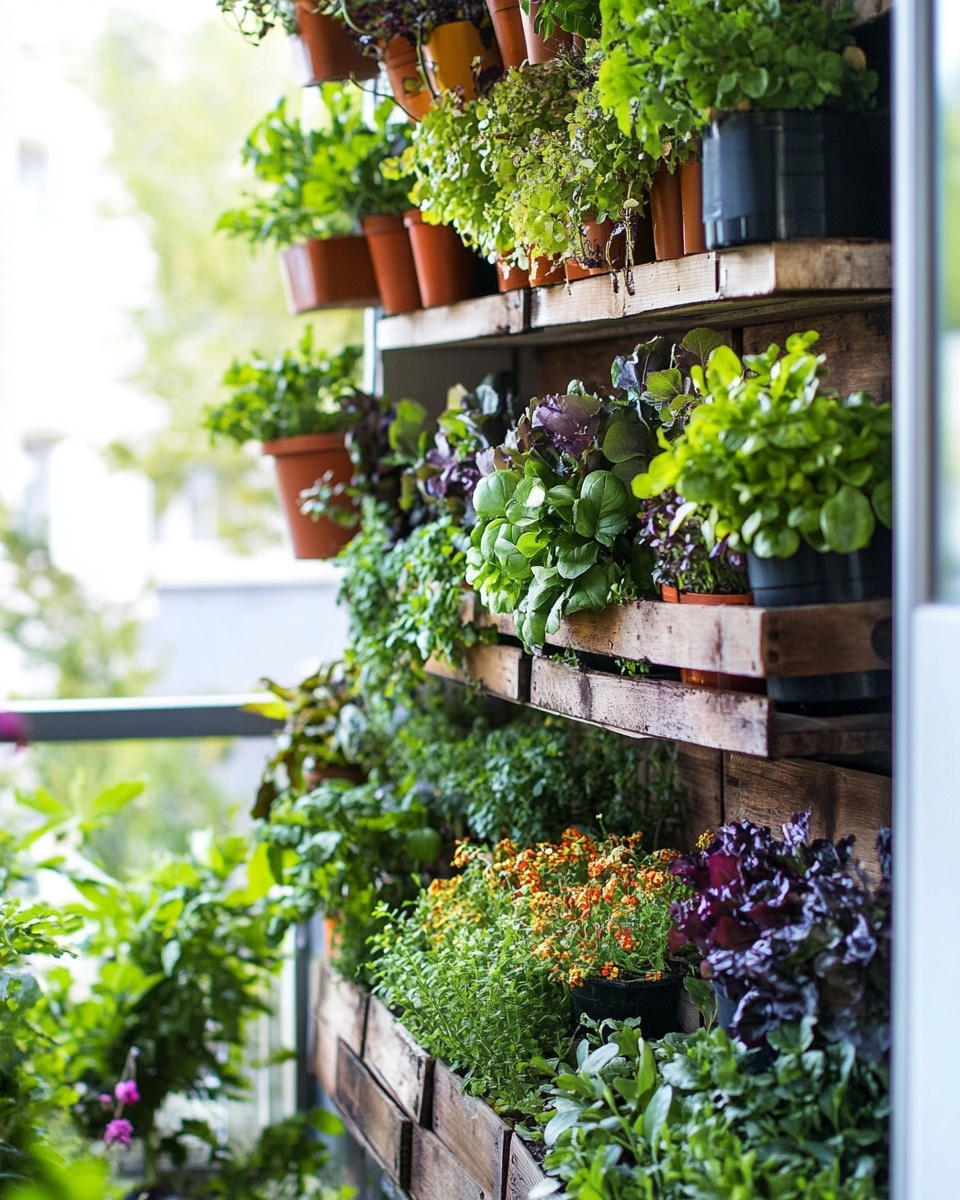
- Small Spaces Solutions: Don't let limited space deter you. Vertical gardens, tiered shelving units, or hanging baskets are excellent ways to maximize growing area in apartments or compact homes. Consider a window box inside your kitchen for easy access while cooking.
Creative Ideas & Uses
Your indoor herb garden isn't just a source of fresh ingredients; it's also a vibrant element of your home decor and a gateway to new culinary delights.
- Aesthetic Groupings: Arrange your herb pots by size, color, or texture to create interesting visual displays. A collection of small terra cotta pots on a windowsill, or a minimalist row of sleek ceramic planters, can elevate any kitchen or living space.
- Repurposed Containers as Decor: Instead of traditional pots, use vintage teacups, colorful ceramic bowls, or even elegantly painted tin cans (with drainage holes added, of course!). This adds a personal and eclectic touch.
- Herb Pillars/Vertical Gardens: If floor space is a premium, consider a vertical setup. Stackable planters or wall-mounted pockets turn a blank wall into a living green art piece. Imagine a "living wall" of fragrant herbs near your dining area!
- Gifts from the Garden: Freshly grown herbs make thoughtful and unique gifts. Pot up a small rosemary plant for a friend, or create a unique herb-infused olive oil using your homegrown basil or oregano. For more ideas check out this source: https://www.pinterest.com/janatjanay47/
- Culinary Explorations: Don't just use your herbs for garnishes! Experiment with homemade herb butters, infused oils and vinegars, herbal teas, or fresh pesto. The flavor difference between store-bought and fresh-from-the-pot herbs is incomparable.
Common Mistakes to Avoid
Even seasoned gardeners make mistakes, especially when venturing into indoor gardening. Knowing these common pitfalls can save you a lot of heartache (and dead plants).
- Overwatering: This is by far the most common error. We covered it in the growth tips, but it bears repeating. Soggy soil suffocates roots, leading to root rot. Approximately 60% of houseplant fatalities are attributed to overwatering. Always check soil moisture before watering.
- Insufficient Light: Herbs are sun-lovers. Placing them in a dimly lit corner will result in weak, leggy growth. While some low-light plants exist, most culinary herbs need ample light. Don't be afraid to invest in a grow light if your natural light isn't enough.
- Lack of Drainage: Pots without drainage holes are death traps for most plants. Excess water has no escape, leading to root rot. Always ensure your pots have proper drainage.
- Ignoring Pests: It’s easy to assume indoor plants are pest-free. However, pests can sneak in on new plants or even through open windows. Regular inspection (checking under leaves!) helps catch infestations early before they become a major problem.
- Fertilizing Too Much or Too Little: While herbs appreciate nutrients, too much fertilizer can burn roots, and too little can stunt growth. Stick to a diluted, balanced fertilizer during the growing season.
- Using Garden Soil: Garden soil is heavy, compacts easily in pots, and can harbor pests and diseases. Always use a sterile, well-draining potting mix.
Maintenance & Storage Tips
Maintaining your herbs extends their lifespan and keeps them productive.
- Long-Term Plant Health: Regularly inspect your plants for signs of stress, pests, or disease. Promptly remove any yellowing or diseased leaves. Repot your herbs into slightly larger containers every 12-18 months, or if they appear root-bound (roots growing out of drainage holes).
- Harvesting for Longevity: Continuous, strategic harvesting encourages more growth. For bushy herbs like basil and mint, pinch off the top leaves and stems regularly. For chives, snip off the outer stalks.
- Seasonal Care: In colder months, your indoor herbs may slow their growth. Reduce watering and fertilization accordingly. Ensure they still receive adequate light, supplementing with grow lights if days are shorter.
- Solving Common Issues:
- Yellow Leaves: Could indicate overwatering (most common), under-watering, or a nutrient deficiency. Check soil moisture and nutrient levels.
- Wilting: Usually a sign of under-watering, but can also be caused by severe overwatering. Feel the soil.
- Leggy Growth: Insufficient light. Move to a brighter spot or add a grow light.
- Poor Soil Drainage: Repot the plant with fresh, well-draining potting mix and ensure your pot has ample drainage holes. You might need to add more perlite to your mix next time.
Conclusion
Embarking on your indoor gardening journey, especially with these wonderfully easy-to-grow herbs, is more than just cultivating plants; it's about nurturing well-being, enhancing your culinary adventures, and adding a touch of natural beauty to your home. We've debunked the myth that a green thumb is a prerequisite, proving that with the right tools, a bit of patience, and a dash of consistent care, anyone can enjoy the fresh, vibrant flavors of homegrown herbs. From the initial planting to harvesting your first fragrant leaves, you'll discover a rewarding and accessible hobby. So, what are you waiting for? Grab those seeds, find a sunny spot, and start planting today! Share your progress pictures with us in the comments – we'd love to see your thriving indoor herb gardens!
FAQ
Q1: How often should I water my indoor herbs?
A1: Water when the top inch of soil feels dry to the touch. This can vary from every 2-3 days to once a week, depending on the herb, pot size, humidity, and temperature. Overwatering is a common problem in indoor gardening, so always check the soilfirst.
Q2: Which herbs are best for beginners in indoor gardening?
A2: Basil, mint, chives, parsley, and oregano are excellent choices for beginners. They are generally tolerant of minor fluctuations in care and prove very rewarding for your first indoor gardening experience.
Q3: Do I need special grow lights for my indoor herbs?
A3: If you don't have a spot that receives at least 6 hours of bright, indirect sunlight daily, a simple LED grow light is highly recommended. It ensures vigorous growth and prevents leggy, weak plants, making your indoor gardening efforts more successful.
Q4: My herbs are looking leggy and pale. What's wrong?
A4: Leggy and pale growth is a classic sign of insufficient light. Move your plants to a brighter location, closer to a window, or invest in a supplementary grow light. This is a common issue with indoor gardening during winter months.
Q5: Can I use regular garden soil for my potted herbs?
A5: No, it's best to use a high-quality potting mix specifically designed for containers. Garden soil can be too dense, retain too much water, and introduce pests or diseases into your indoor environment, hindering your indoor gardening success.
Q6: How do I harvest my herbs to encourage more growth?
A6: For bushy herbs like basil, pinch off the top sets of leaves just above a leaf node. For chives and similar herbs, snip off the outer stalks near the base. Always aim to harvest only about one-third of the plant at a time to ensure continuous production.
Q7: My herb leaves are turning yellow. What does that mean?
A7: Yellowing leaves often indicate overwatering, but can also be caused by under-watering or a nutrient deficiency. Check the soil moisture first; if it's soggy, reduce watering. If dry, water thoroughly. If neither, consider a diluted feed.
You may also enjoy reading about how to grow your own healthy vegetables using {"loc":["https://pincraftpro.com/how-to-grow-tomatoes-in-pots-2/"],"lastmod":["2025-10-08T15:09:24+00:00"]}. Explore more ideas for fresh homemade foods and get inspired by other gardening enthusiasts.


