Introduction
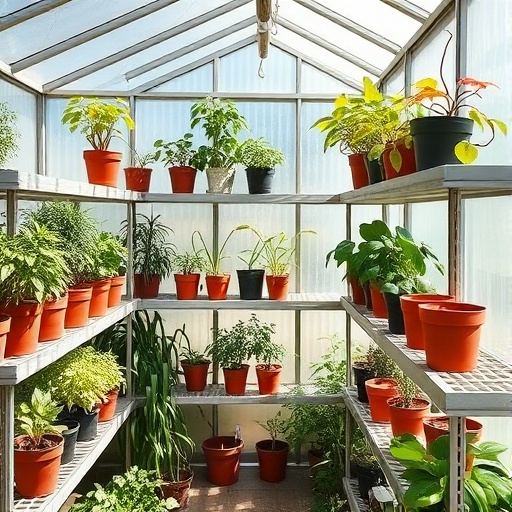
Have you ever looked at your existing garden layouts and wondered if you're truly maximizing every square inch of your green sanctuary? Many gardeners, perhaps like you, find that less than 30% of usable greenhouse space is optimized for vertical growth, overlooking a goldmine of potential. This oversight can lead to cramped plants battling for light and resources, severely limiting your yield and variety. But what if there was a way to double, even triple, your planting capacity without expanding your greenhouse footprint? The secret lies in smart, space-saving greenhouse shelving. By strategically utilizing verticality, you can transform your greenhouse into a highly efficient growing machine, making every plant thrive and every harvest bountiful.
Tools & Materials Needed
To embark on your greenhouse shelving journey, you'll need a mix of practical tools and adaptable materials. For a sturdy, long-lasting setup, consider:
- Measuring Tape: Essential for precise measurements to avoid wasted materials and ensure a perfect fit.
- Pencil/Marker: For marking cut lines accurately.
- Saw (Hand Saw or Miter Saw): Depending on your material choice, a miter saw offers cleaner, more precise cuts for wood or PVC.
- Drill with Various Bits: For pre-drilling holes and securing fasteners.
- Level: To ensure your shelves are perfectly horizontal.
- Safety Glasses and Gloves: Always protect yourself!
- Wood (Pressure-Treated Pine or Cedar): A classic choice. Pressure-treated pine resists rot and insects, while cedar is naturally durable and aesthetically pleasing. Look for reclaimed wood from local suppliers for an eco-friendly option.
- PVC Pipes and Fittings: An excellent budget-friendly, lightweight, and rust-proof alternative. Easy to assemble and reconfigure.
- Heavy-Duty Wire Shelving Units: Ready-made, adjustable, and provide good air circulation.
- Strong Fasteners (Screws, Bolts, Nuts): Ensure they are suitable for the material you choose and can support the weight of wet soil and plants. Stainless steel is best for greenhouses to prevent rust.
- Shelf Brackets: Choose heavy-duty options if building from scratch.
- Plywood or Slatted Wood for Shelf Surfaces: If using a frame, you’ll need a surface. Slatted wood allows for better drainage and air flow, which is crucial for plant health.
For eco-conscious choices, opt for recycled plastic lumber, which is highly durable and requires minimal maintenance. You can also repurpose old wooden pallets (check for heat treatment, not chemical) or even old wire refrigerator shelves for a truly resourceful approach.
Time & Effort Overview
Creating your space-saving greenhouse shelving can range from a quick afternoon project to a weekend endeavor, depending on your chosen complexity. A simple, ready-made wire shelving unit can be assembled in under an hour, making it ideal for beginners. Building custom wooden shelves, however, might take 4-6 hours, including measuring, cutting, and assembly. This project is generally classified as beginner to intermediate difficulty. While it requires basic tool handling, it’s far less labor-intensive than, say, preparing a new raised garden bed from scratch or intricate landscaping. Many gardeners report increased efficiency within their greenhouses by up to 40% after implementing vertical solutions, and the organizational benefits are almost immediate.
Step-by-Step Gardening Process
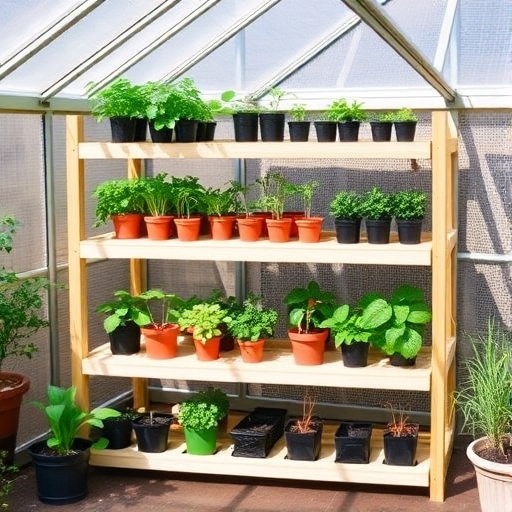
Step 1: Design Your Layout and Measure Your Space
Before cutting anything, visualize different garden layouts. Assess your greenhouse's dimensions. Note any windows, vents, or doors that shelving might obstruct. Consider the plants you intend to grow: taller plants need higher clearance. Sketch out your ideal shelving arrangement. Think about how sunlight moves through your greenhouse throughout the day – you’ll want to maximize sun exposure for all levels. Measure the height, width, and depth available for your shelves. This planning stage is critical for efficient use of your space.
Step 2: Choose Your Materials and Gather Tools
Based on your design and budget, select your materials. Wood offers a classic look and sturdiness, while PVC is lightweight and easy to modify. Metal shelving is great for durability and ventilation. Gather all your tools, ensuring they are in good working order. Having everything on hand before you start will make the process flow smoothly.
Step 3: Cut and Prepare Your Materials
Carefully cut your chosen materials according to your measurements. If using wood, sand any rough edges to prevent splinters. For PVC, you can use a PVC cutter or a hacksaw. Ensure all pieces are cut to the exact lengths required by your design. Don’t worry if your first cut isn’t perfect; it’s all part of the learning curve! Remember the adage: measure twice, cut once.
Step 4: Assemble the Shelf Frames
Begin assembling the frame of your shelving units. If using wood, pre-drill pilot holes before screwing pieces together to prevent splitting. For PVC, simply connect pipes using appropriate fittings. Make sure all connections are secure and stable. Use your level frequently to ensure your frames are straight and true. This foundational stability is key to supporting your plants.
Step 5: Install Shelf Surfaces
Once the frames are stable, attach your shelf surfaces. If using slats, space them evenly to allow for airflow and drainage. For solid surfaces like plywood, consider drilling a few drainage holes. Ensure these surfaces are securely fastened to the frame. Remember, wet soil can be surprisingly heavy, so robust construction is essential.
Step 6: Anchor Shelves for Stability
It's crucial to anchor your shelves. While free-standing units are an option, anchoring them to the greenhouse frame or a sturdy wall provides superior stability and safety, especially in windy conditions or with heavy plant loads. Use appropriate hardware for your greenhouse structure. This prevents accidental tipping and protects your precious plants.
Step 7: Arrange Plants on Shelves
Now for the fun part! Arrange your plants, making sure smaller plants with lower light requirements are on lower shelves, and sun-lovers are closer to the light source. Distribute weight evenly across the shelves. Consider rotating plants occasionally to ensure all sides get adequate light. Here’s how to fix common issues: if a plant looks leggy, it’s probably reaching for light – move it higher or closer to a window.
Growth & Care Tips
Optimizing your greenhouse environment is key to thriving plants on shelves. Watering frequency is paramount; elevated plants tend to dry out faster due to increased air circulation. Monitor soil moisture daily, especially during warmer months. Generally, plants in small pots on upper shelves might need watering every 1-2 days, while those on lower, shadier shelves might only need it every 3-4 days. Sunlight exposure is crucial; different plants have different needs. South-facing shelves typically receive the most intense direct light, ideal for sun-loving edibles like tomatoes and peppers. East or west-facing shelves offer dappled morning or afternoon sun, perfect for herbs and leafy greens. North-facing shelves are best for shade-tolerant plants.
Regular pruning encourages bushier growth and improves air circulation, which can reduce instances of fungal diseases. For example, pinching back basil can increase yield by up to 25%. Fertilization should be tailored to your plants' specific needs; a balanced liquid fertilizer applied every 2-4 weeks during the growing season is a good general approach. Data suggests that proper nutrient management can increase plant biomass by 15-20%. Finally, pest prevention is easier with good air circulation provided by slatted shelves. Regularly inspect leaves for signs of pests. Introducing beneficial insects like ladybugs can be a highly effective organic pest control method. Consider adding small fans for air movement, which not only helps with temperature regulation but also strengthens plant stems.
Eco-Friendly & Sustainable Alternatives
Embracing sustainability in your greenhouse shelving enhances both your garden and the environment. Consider using recycled and repurposed materials for your shelves. Old wooden doors, reclaimed pallet wood (ensure it's heat-treated and not chemically treated), or even sturdy plastic crates can be creatively transformed into shelving. This reduces waste and adds a unique, rustic charm.
For natural fertilizers, explore composting your garden waste and kitchen scraps to create nutrient-rich compost. This free, organic amendment improves soil structure and vitality. Companion planting, where specific plants are grown together to deter pests or enhance growth, reduces the need for chemical pesticides.
For water conservation, implement drip irrigation systems or self-watering planters. These methods deliver water directly to the plant roots, minimizing evaporation and runoff. Collecting rainwater in barrels is another excellent way to reduce your municipal water usage.
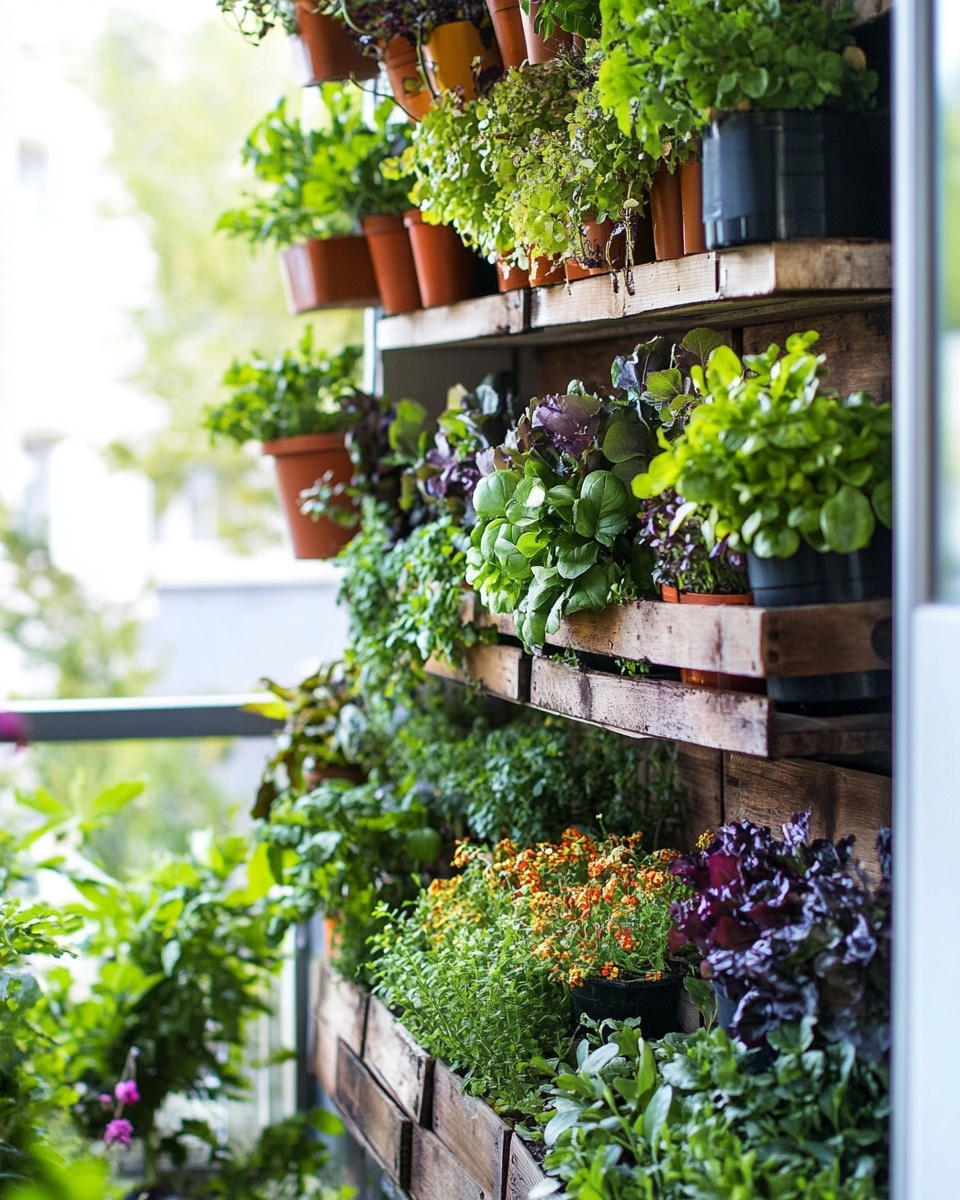
If you’re working with limited space beyond your greenhouse, explore vertical garden layouts for balconies or patios. Vertical planters, tiered herb towers (check out our guide on vertical balcony herb garden design ideas), or even hanging baskets (like DIY hanging herb planters for balconies) can expand your growing potential significantly. Even a small urban balcony can become a thriving food source with clever planning.
Creative Ideas & Uses
Greenhouse shelving doesn't just hold plants; it's an opportunity for aesthetic expression and functional innovation.
- Decorate with Plants: Group plants by foliage color or texture for visual interest. Consider adding trailing plants like String of Pearls or small ferns that can gracefully cascade from higher shelves, softening the lines of your structure. Incorporate decorative pots that complement your greenhouse's aesthetic, perhaps ceramic or terracotta for a natural feel.
- Repurpose Materials Artfully: Transform old wooden crates into modular shelving units, stacking them in various garden layouts. Old ladders can be converted into unique tiered plant stands. Even vintage birdcages can hold small air plants or succulents, adding an antique touch to your green space.
- Combine Plants Aesthetically and Functionally: Pair plants with similar light and watering needs. For example, succulents and cacti thrive together on a sunny shelf, while ferns and orchids prefer a shadier, more humid spot. Consider an "edible wall garden" where different culinary herbs (like the best herbs to grow on a sunny balcony) are arranged for easy access and a delightful aroma.
- Integrated Lighting: For darker corners or to extend growing hours, integrate LED grow lights beneath certain shelves. This not only boosts plant growth but also creates a warm, inviting glow within your greenhouse during cooler evenings.
- Miniature Landscapes: Dedicate a shelf to a miniature garden or terrarium. This allows for intricate designs and a chance to experiment with small-scale landscaping, bringing an element of artistry to your functional shelving.
- Seasonal Displays: Use your shelves to highlight seasonal blossoms or vegetables. In spring, showcase seedlings; in summer, vibrant flowers; and in autumn, decorative gourds or colorful foliage. This keeps your greenhouse dynamic and engaging year-round. For more inspiration, you might find creative ideas on garden decor on Pinterest: https://www.pinterest.com/janatjanay47/
Common Mistakes to Avoid
Even seasoned gardeners can fall prey to common shelving pitfalls. Being aware of these can save you time, effort, and heartache.
- Overcrowding Plants: This is arguably the most frequent error. While the goal is to maximize space, stuffing too many plants together reduces air circulation, blocks light, and increases competition for resources. Data shows that densely packed plants are 70% more susceptible to mold and fungal diseases. Give your plants room to breathe and grow!
- Ignoring Weight Capacity: Don't underestimate the weight of wet soil, pots, and mature plants. A shelf rated for light decorative items will buckle under the weight of several gallon-sized pots. Always check the load capacity of your shelving materials and brackets. Structural failures lead to significant plant damage and potential injury.
- Poor Drainage: Without adequate drainage, pots sit in standing water, leading to root rot in a staggering 60% of cases. Ensure your shelves are slatted or have drainage holes, and use drip trays to protect lower plants from overflow.
- Uneven Light Distribution: Placing light-loving plants in shaded spots or vice-versa will hinder their growth. Observe the light patterns in your greenhouse over a day and throughout the seasons. Rotate plants if necessary to ensure even exposure.
- Lack of Accessibility: While maximizing vertical space is good, remember you need to reach your plants for watering, pruning, and harvesting. Design your shelf height and depth with your reach in mind. Shelves that are too deep can make tending to back-row plants cumbersome.
- Using Non-Greenhouse-Friendly Materials: Untreated wood can quickly rot in the humid greenhouse environment, and non-galvanized metal will rust. Invest in materials suited for high humidity and moisture to ensure longevity.
- Forgetting Air Circulation: Good airflow is vital to prevent fungal diseases and improve plant health. Ensure your shelves don't create stagnant air pockets. Consider adding small fans to circulate air, especially between densely packed layers of garden layouts.
Maintenance & Storage Tips
Maintaining your greenhouse shelves ensures their longevity and your plants' health. Regularly inspect shelves for signs of wear, rot, or rust. Tighten any loose screws or bolts. Clean shelves annually with a mild disinfectant to prevent disease buildup and keep them looking fresh. If you have adjustable shelving, reconfigure your garden layouts as your plants grow or as seasonal needs change.
For long-term plant health, consider a crop rotation system on your shelves, just as you would in an outdoor garden. This helps replenish nutrients and prevents specific pest infestations from becoming chronic. If you grow seasonal plants, clear shelves can be valuable storage. Store trays, unused pots, and gardening tools neatly on empty shelves. For seed storage, ensure a cool, dry, dark spot, ideally in an airtight container to maintain viability.
In case of common issues:
- Yellow Leaves: Often points to either overwatering or nutrient deficiency. Check soil moisture first. If dry, water. If wet, let it dry out more. Then consider a balanced liquid feed.
- Poor Soil Drainage: Repot with a better-draining potting mix, adding perlite or coarse sand. Ensure pots have sufficient drainage holes.
- Pests: Isolate affected plants immediately. Use organic pest control like neem oil spray or insecticidal soap, following product instructions carefully. Regularly wipe down leaves to remove dust and deter pests.
Conclusion
Optimizing your greenhouse with intelligent space-saving shelving is more than just a DIY project; it's an investment in the efficiency and bounty of your garden. By meticulously planning your garden layouts, selecting the right materials, and implementing thoughtful design, you can transform a cramped space into a thriving, verdant oasis. From maximizing sunlight to ensuring proper air circulation, these strategies empower you to grow more, more healthily, and more sustainably. Don't let valuable vertical space go to waste any longer! Take the first step today to revolutionize your growing potential. Share your progress, challenges, and triumphs with us. We'd love to see your innovative greenhouse shelving solutions!
FAQ
Q1: What's the best material for greenhouse shelving in terms of durability and cost?
A1: For durability, heavy-duty wire shelving or aluminum are excellent choices due to their rust resistance and strength. For a budget-friendly option, PVC pipes offer a good balance of cost-effectiveness, lightweight nature, and rust-proof qualities, making them highly suitable for various garden layouts.
Q2: How do I ensure my shelved plants get enough light?
A2: Position taller shelves with light-loving plants in the sunniest parts of your greenhouse, typically south-facing. Rotate plants regularly to ensure even light exposure, and consider supplementary LED grow lights for lower or shaded shelves, especially during shorter daylight hours. Proper consideration of garden layouts for light is crucial.
Q3: Can I use existing household shelves in my greenhouse?
A3: It depends on the material. Standard indoor shelving made of particleboard or untreated wood will quickly deteriorate due to high humidity and moisture in a greenhouse. Opt for materials designed for outdoor or humid environments, such as pressure-treated wood, PVC, or galvanized/powder-coated metal.
Q4: How do I prevent pests and diseases on stacked plants?
A4: Good air circulation is key! Use slatted shelves, space plants adequately, and consider a small oscillating fan. Regularly inspect your plants for early signs of pests, remove any affected leaves, and use organic pest control methods like neem oil or insecticidal soap. A well-planned garden layout can also improve airflow.
Q5: What's the ideal spacing between shelves for most plants?
A5: A general rule of thumb is to allow at least 12-18 inches (30-45 cm) of vertical space between shelves, more for taller plants like tomatoes or peppers. This allows for future growth, good air circulation, and ease of maintenance. Adjust based on the mature size of the specific plants in your garden layouts.
Q6: What plants are best suited for greenhouse shelving?
A6: Most compact plants like herbs (check out guides like how to grow herbs indoors and move them to balcony or compact balcony herb garden layout plan), lettuce, spinach, microgreens, and smaller varieties of strawberries or peppers thrive on shelves. Trailing plants also do well from upper shelves. Ensure the light requirements for your chosen plants match their shelf placement.
Continue Your Gardening Journey!
Loving these tips for maximizing your growing space? Dive deeper into optimizing your garden with these related articles:
- Ready for more ways to make the most of small spaces? Learn how to start your very own balcony herb garden for beginners.
- If you're eager to attract beneficial visitors to your garden, explore how to attract butterflies and bees with flowers.
- Discover beautiful and practical ways to arrange your blooms with our expert advice on layered flower bed design tips.
