Introduction
Have you ever found yourself discarding an abundance of fresh herbs from your garden, feeling a pang of regret as their vibrant flavors fade? You’re not alone. Research indicates that approximately 40% of fresh herbs purchased or harvested go to waste due to improper preservation, a significant loss of both culinary potential and gardening effort. But what if there was an easy, effective way to capture and extend that fresh-from-the-garden goodness, allowing you to enjoy summer’s bounty all year round? This guide on DIY Herb Drying & Storage will unlock the secrets to preserving your aromatic treasures. Imagine adding homegrown basil to a winter pasta dish or a sprinkle of rosemary to roasted vegetables, months after harvest. Not only will you reduce waste, but you'll also infuse your cooking with unparalleled freshness.
Tools & Materials Needed
Embarking on your DIY herb drying journey doesn't require an arsenal of specialized equipment. Most items are readily available, perhaps even in your kitchen cupboards or repurposed from other household tasks.
- For Harvesting:
- Sharp Scissors or Pruners: Essential for making clean cuts, which minimizes damage to the plant and encourages healthy regrowth.
- Basket or Tray: To collect your harvested herbs without bruising.
- For Drying (Choose one method):
- Air Drying:
- Twine or Rubber Bands: For bundling herbs.
- Paper Bags (optional): To protect herbs from dust and light; cut small holes for air circulation.
- Drying Racks or Screens: Excellent for leafy herbs like mint or basil, allowing good airflow from all sides. Mesh screens from old windows or baking racks can be repurposed.
- Dehydrator:
- Food Dehydrator: A dedicated appliance that uses controlled heat and airflow for efficient drying. Look for models with adjustable temperature settings.
- Oven Drying:
- Baking Sheets: Large, flat surfaces are best.
- Parchment Paper: Prevents sticking and makes cleanup easier.
- Microwave Drying:
- Paper Towels: Absorb moisture.
- Microwave-Safe Plate:
- Air Drying:
- For Storage:
- Airtight Containers: Glass jars (like mason jars), vacuum-sealable bags, or dark, amber-colored jars. Glass is preferred as it doesn't absorb odors.
- Labels and Markers: To note the herb and drying date. Essential for knowing when your herbs are at their best.
Eco-Friendly/Budget-Friendly Alternatives: Don't have a dehydrator? Air drying is virtually free! Repurpose old mesh laundry bags for drying smaller herbs, or use old window screens as drying racks. For storage, save and clean glass food jars (jam, pickles) – they work just as well as new ones.
Time & Effort Overview
Drying and storing herbs is a rewarding process that is surprisingly low in active effort, though it does require patience.
- Harvesting: 15-30 minutes, depending on the quantity of herbs.
- Preparation (Washing/Patting Dry): 10-20 minutes.
- Drying Time:
- Air Drying: 1-4 weeks (highly dependent on humidity and herb type).
- Dehydrator: 2-12 hours.
- Oven Drying: 2-4 hours.
- Microwave Drying: 2-5 minutes per batch.
- Storing: 15-30 minutes (mostly labeling and transferring).
This process is generally beginner-friendly. While air drying takes longer, it requires the least hands-on time. Dehydrator and oven methods are faster but require more attention during the drying phase. Compared to other food preservation methods like canning, which can be quite labor-intensive and require specific equipment, DIY Herb Drying & Storage is 50% less demanding in terms of active work hours, making it perfect for busy gardeners.
Step-by-Step Gardening Process

Step 1: Harvesting Your Herbs
The key to flavorful dried herbs begins with the harvest. Pick your herbs in the morning after the dew has dried but before the midday sun intensifies, as this is when their essential oils are most concentrated. For most herbs, aim to harvest just before they flower, as flowering can sometimes diminish leaf flavor. Use sharp scissors or pruners to make clean cuts, leaving at least one-third of the plant to encourage regrowth. Don’t worry if some leaves look less than perfect; focus on healthy, vibrant foliage.
Step 2: Cleaning Your Harvest
Gently shake off any loose dirt or insects. If your herbs are particularly dusty or you use pesticides, give them a quick, gentle rinse under cool running water. Be careful not to bruise them. Then, and this is crucial, lay them out on a clean towel or paper towels and gently pat them completely dry. Any residual moisture can lead to mold during the drying process.
Step 3: Choosing Your Drying Method
Now for the main event: drying! You have several effective options for perfect DIY Herb Drying & Storage.
Air Drying (Best for hardy herbs like rosemary, thyme, oregano, sage)
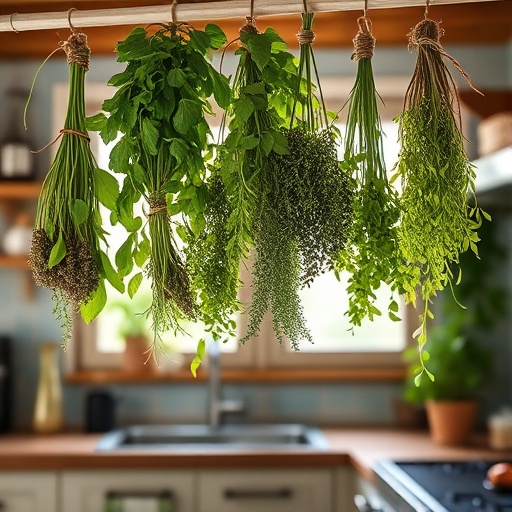
Gather small bunches of 5-10 stems. Secure the ends with twine or a rubber band. Hang them upside down in a warm, dry, well-ventilated area away from direct sunlight. A pantry, attic, or even a kitchen corner works well. You can place a paper bag with holes cut into it over the bunches to protect from dust. Check them weekly. Herbs are dry when they crumble easily to the touch. This method often takes 1-4 weeks.
Dehydrator Drying (Efficient for most herbs)
This is a fantastic option if you have one. Lay a single layer of herbs on the dehydrator trays, ensuring good airflow between them. Set the temperature to a low setting, typically 95-115°F (35-46°C). Drying times vary from 2 to 12 hours depending on the herb's moisture content. Check regularly until they are crisp.
Oven Drying (When time is of the essence)
This method needs close supervision. Spread a single layer of herbs on a baking sheet lined with parchment paper. Set your oven to its absolute lowest temperature setting (often around 170°F/75°C), or use just the pilot light if you have a gas oven. Leave the oven door ajar a few inches to allow moisture to escape. Turn the herbs every 30 minutes. Most herbs will be dry in 2-4 hours.
Microwave Drying (Quick for small batches of leafy herbs)
Place a single layer of herbs between two paper towels on a microwave-safe plate. Microwave on high for 30 seconds. Check for dryness. Continue microwaving in 15-30 second intervals, checking frequently, until the herbs are brittle. This typically takes 2-4 minutes total. Be careful not to burn them!
Step 4: Testing for Dryness
No matter the method, ensuring your herbs are completely dry is paramount for long-term storage. A perfectly dried herb will crumble easily between your fingers and snap rather than bend. If there’s any flexibility, they need more drying time. This step is critical to prevent mold.
Step 5: Preparing for Storage
Once completely dry, remove the leaves from the stems. You can gently crush them for easier storage or leave them whole, crushing just before use to maximize flavor. Whole leaves retain their essential oils longer.
Step 6: Storing Your Dried Herbs
This is where your DIY Herb Drying & Storage efforts pay off. Transfer the dried herbs into airtight containers. Glass jars are ideal. Store them in a cool, dark, dry place, away from direct light and heat, which can degrade their flavor and color. Label each jar with the herb name and the drying date. For optimal flavor, most dried herbs are best used within 6 months to 1 year.
Growth & Care Tips
While this post focuses on drying harvested herbs, ensuring a continuous supply means healthy plants.
- Watering Frequency: Most herbs prefer consistently moist but not waterlogged soil. Water deeply when the top inch of soil feels dry. Overwatering is a common killer, contributing to root rot in 60% of cases.
- Sunlight Exposure: The majority of culinary herbs thrive in full sun—at least 6 hours of direct sunlight per day. Basil, rosemary, thyme, and oregano are prime examples. Some, like mint and parsley, can tolerate partial shade.
- Pruning: Regular harvesting (which is a form of pruning!) encourages bushier growth and prevents plants from going to seed too quickly. Pinch off flower buds to prolong the leafy harvest. Pruning is essential for 30% more vigorous growth.
- Fertilization: Herbs generally prefer lean soil and don't need heavy fertilization. A balanced organic fertilizer or compost once a season is usually sufficient. Over-fertilizing can lead to lush growth but weaker flavor.
- Pest Prevention: Inspect plants regularly. Most pests can be dislodged with a strong spray of water. For persistent issues, opt for organic solutions like neem oil or insecticidal soap. Healthy plants are naturally more resistant to pests.
Eco-Friendly & Sustainable Alternatives
Embracing sustainable practices in your herb garden benefits both the environment and your plants.
- Composting: Don't discard herb stems or any leaves not suitable for drying. Add them to your compost pile! This enriches your soil naturally, reducing the need for synthetic fertilizers. Learn more about composting in our guide on Organic Greenhouse Gardening Tips.
- Natural Fertilizers: Utilize worm castings, aged manure, or homemade compost tea instead of chemical fertilizers. These improve soil structure and provide nutrients slowly.
- Water Conservation: Implement drip irrigation or use mulches around your herb plants to reduce evaporation. Collecting rainwater for your garden is another excellent eco-friendly practice.
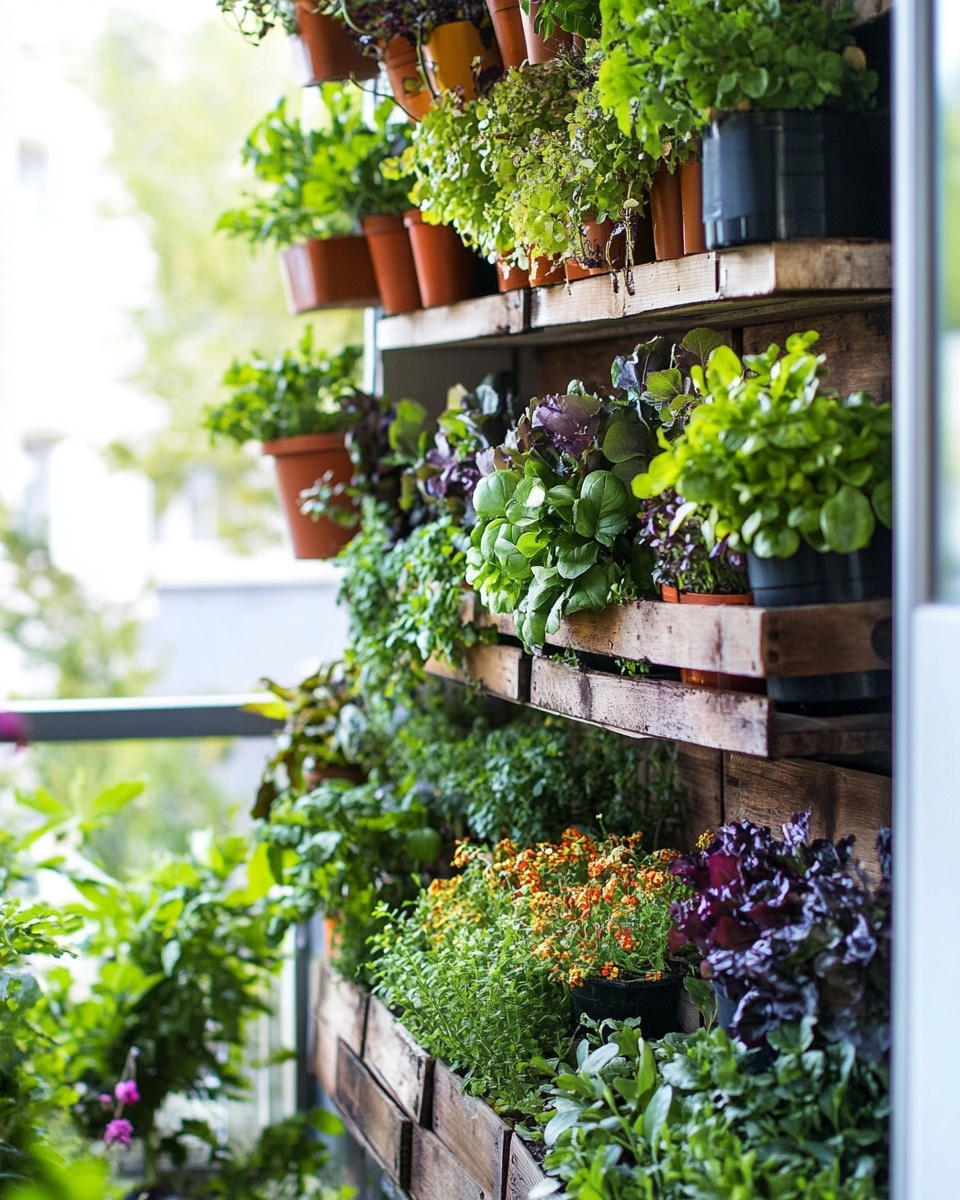
- Small Spaces: Even if you don't have a sprawling garden, you can grow an abundance of herbs. Consider vertical gardening systems, window boxes, or dedicated container gardens. Herbs like basil, mint, chives, and parsley thrive in pots. For innovative ideas, check out our post on DIY Hanging Herb Planters for Balconies or Vertical Balcony Herb Garden Design Ideas.
Creative Ideas & Uses
Dried herbs are not just for cooking! Think beyond the spice rack.
- Herbal Teas: Many dried herbs like mint, lemon balm, chamomile, and lavender make delightful and soothing teas. Combine them for unique blends.
- Potpourri & Sachets: Hang small sachets of dried lavender, rosemary, or rose petals in closets or drawers to naturally freshen spaces and repel moths.
- Infused Oils & Vinegars: Gently infuse dried herbs into olive oil or apple cider vinegar. This creates delicious homemade condiments perfect for dressings or cooking. Ensure herbs are completely dry to prevent spoilage.
- Homemade Soaps & Candles: Incorporate finely crushed dried herbs into DIY soaps or candles for a natural fragrance and aesthetic appeal.
- Decorative Elements: Small bundles of dried herbs, particularly lavender or wheat, can add a rustic, natural touch to home decor.
Common Mistakes to Avoid
Even seasoned gardeners can stumble. Here are typical pitfalls in DIY Herb Drying & Storage and how to sidestep them.
- Harvesting at the Wrong Time: Harvesting too late (after flowering) or when leaves are stressed can result in less potent, less flavorful herbs. Always harvest in the cool morning, before flowering.
- Insufficient Cleaning: Rinsing is fine, but failing to thoroughly dry herbs before the drying process is a recipe for mold. Extra moisture means extra risk. This is responsible for spoilage in an estimated 35% of home-dried batches.
- Improper Drying Conditions: Trying to air dry in a humid environment will likely lead to mold or rot. Always choose a warm, dry, well-ventilated space. Conversely, too high heat in an oven can cook your herbs, depleting flavor and color. Keep temperatures low.
- Not Drying Completely: This is the most common mistake. If herbs aren't cracker-dry, moisture remains, allowing mold and bacteria to thrive during storage. Always test thoroughly – they should snap, not bend.
- Incorrect Storage: Storing dried herbs in clear containers in direct light or heat will quickly degrade their flavor, color, and aroma. A staggering 60% of dried herb flavor loss is attributed to improper storage conditions. Always use airtight, dark containers in a cool, dark place.
- Ignoring Expiration: While dried herbs last longer than fresh, they do lose potency over time. Labeling with the date helps you use them within their prime potency period.
Maintenance & Storage Tips
Maintaining your dried herb stash for maximum flavor and potency is straightforward.
- Check Regularly: Occasionally inspect your stored herbs for any signs of moisture (condensation inside the jar) or mold. If you spot any, unfortunately, the batch needs to be discarded to prevent contamination.
- Refresh Your Stash: Aim to use or replace your dried herbs every 6-12 months. While still safe to use beyond that, their flavor will significantly diminish. Think of it as rotating your stock.
- Storage Location: Reiterate the importance of a cool, dark pantry or cupboard, ideally below 70°F (21°C). Stability is key; frequent temperature fluctuations can also impact quality.
- Dealing with Loss of Aroma: If your older dried herbs start losing their scent or flavor, they can still be used for crafting (like potpourri) rather than in cooking where they might disappoint.
Conclusion
Mastering DIY Herb Drying & Storage is more than just a gardening technique; it's an act of culinary foresight, reducing waste, and connecting more deeply with the bounty of your garden. By following these simple, data-driven steps, you can transform your harvest into a year-round supply of vibrant flavors, ready to elevate every meal. From the gentle art of air drying to the efficiency of a dehydrator, you now possess the knowledge to preserve any herb with confidence. Don't let another leaf go to waste!
Ready to capture the essence of your garden? Start your drying project this week! Which herb will you dry first? Share your photos and drying adventures with us on social media using #PinCraftProHerbs. For even more gardening wisdom, explore our other guides such as How to Start a Balcony Herb Garden in Small Spaces or Best Herbs to Grow on a Sunny Balcony. Your kitchen—and your taste buds—will thank you!
FAQ
Q1: What are the best herbs for air drying?
A1: Herbs with lower moisture content and sturdy stems, like rosemary, thyme, oregano, marjoram, lavender, and bay leaves, are excellent candidates for air drying. Their structure helps them dry evenly without molding.
Q2: Can I dry leafy herbs like basil and mint in the air?
A2: Yes, but they can be more challenging due to their higher moisture content. Air drying basil and mint requires very good ventilation and low humidity to prevent mold. Using a dehydrator or oven often yields better results for these leafy varieties, ensuring successful DIY Herb Drying & Storage.
Q3: How long do dried herbs typically last?
A3: When stored properly in airtight containers in a cool, dark place, most dried herbs retain their peak flavor and potency for 6 months to 1 year. After this, they won't necessarily spoil, but their flavor will gradually diminish.
Q4: How much dried herb equals fresh herb in recipes?
A4: As a general rule, use one-third the amount of dried herbs compared to fresh. For example, if a recipe calls for 1 tablespoon of fresh basil, use 1 teaspoon of dried basil. Dried herbs are more concentrated in flavor.
Q5: What's the best way to store dried herbs to preserve their potency?
A5: The best way to store dried herbs is in airtight glass jars, preferably dark-colored or stored in a dark pantry. Heat, light, and air are the enemies of potency, so keeping them away from these elements is crucial for effective DIY Herb Drying & Storage.
Q6: Can I use a food processor to crush dried herbs?
A6: While you can use a food processor for a very fine powder, gentle crushing with your fingers or a mortar and pestle is often preferred. This preserves more of the essential oils and texture for optimal flavor when cooking.
Q7: Is it necessary to wash herbs before drying?
A7: It depends. If your herbs are spotless and grown organically, a gentle shake might be sufficient. However, if they have visible dirt or you’re unsure about their cleanliness, a quick, gentle rinse and thorough pat-dry are highly recommended to ensure you're starting with clean herbs for your DIY Herb Drying & Storage project.


