Introduction
Have you ever considered that over 70% of culinary herbs sold in grocery stores travel hundreds, sometimes thousands, of miles to reach your kitchen, losing freshness and nutritional value along the way? Imagine snipping vibrant, fragrant basil or robust rosemary directly from your own kitchen counter, instantly elevating your meals and reducing your carbon footprint. Creating an Indoor Herb Garden DIY project is not just a trend; it's a practical, rewarding endeavor that provides year-round access to fresh herbs, even in the smallest of urban kitchens. This guide will walk you through every step of building your own flourishing indoor herb sanctuary, making fresh, homegrown flavors a constant in your culinary adventures.
Tools & Materials Needed
Embarking on your DIY indoor herb garden journey requires a few essential items. No need for expensive gadgets or elaborate setups; simplicity and effectiveness are key.
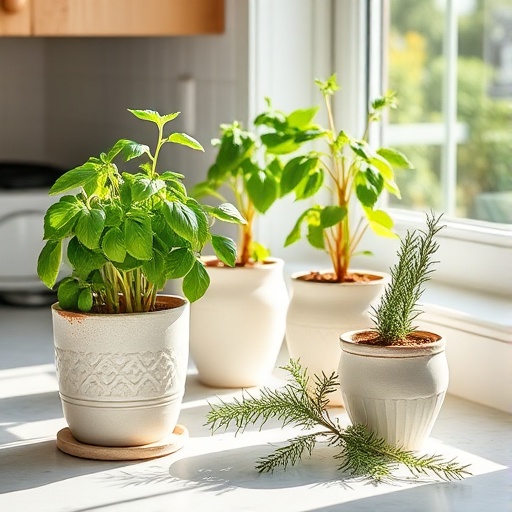
- Pots/Containers: Choose pots with drainage holes at the bottom to prevent root rot. Terracotta pots are excellent for wicking away excess moisture, while ceramic or plastic options are also viable. For an eco-friendly touch, consider repurposing old coffee cans (with drainage holes added), glass jars (use with a layer of pebbles at the bottom), or even old plastic soda bottles cut in half. Aim for pots at least 6 inches in diameter for most herbs.
- Quality Potting Mix: This is crucial. Don't use garden soil, as it can compact and harbor pests. A good organic potting mix provides the right balance of nutrients, drainage, and aeration. Look for blends specifically designed for container gardening or herbs.
- Herb Seeds or Seedlings: For beginners, starting with seedlings can significantly reduce the waiting time. Popular choices for an Indoor Herb Garden DIY include basil, mint, thyme, rosemary, parsley, and chives. If starting from seed, ensure they are fresh for better germination rates.
- Small Shovel/Trowel: For scooping soil and planting. A strong spoon can work in a pinch!
- Watering Can with a Fine Rose: This allows for gentle, even watering without disturbing delicate seedlings or washing away soil.
- Grow Lights (Optional but Recommended): While natural light is ideal, many kitchens lack sufficient direct sunlight (at least 6 hours daily). Compact LED grow lights are energy-efficient and can make a huge difference, especially during shorter winter days.
- Mister Bottle: For humid-loving herbs or to gently moisten seeds during germination.
- Labels/Markers: To keep track of what you've planted, especially if you're growing multiple varieties.
Time & Effort Overview
Creating your Indoor Herb Garden DIY is a surprisingly quick and gratifying project. Initial setup can take as little as 30-60 minutes, depending on how many herbs you plan to plant. Germination for seeds typically ranges from 7-21 days, while seedlings will establish themselves much faster, usually within a week.
In terms of growth, herbs like basil and mint grow rapidly, often ready for their first harvest within 3-4 weeks after sprouting or planting. This is significantly faster than many outdoor garden vegetables, which can take 60-90 days. Other herbs, like rosemary and thyme, are slower growers but are incredibly hardy indoors.
The difficulty level for an Indoor Herb Garden DIY is definitively beginner. With proper care, even those with no prior gardening experience can achieve success. Daily maintenance is minimal, usually involving a quick check for soil moisture and light adjustment.
Step-by-Step Gardening Process
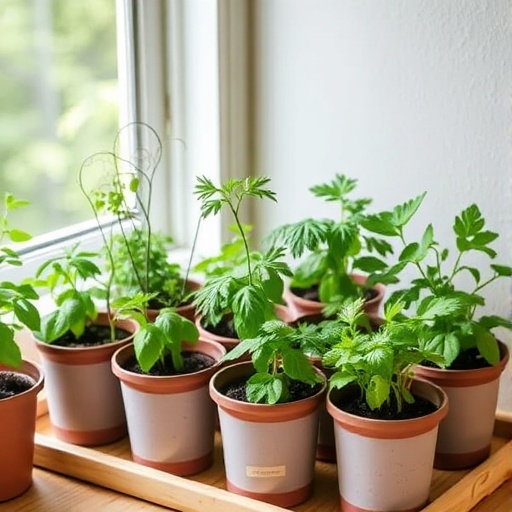
Ready to get your hands dirty? Let's build your vibrant Indoor Herb Garden DIY!
Prepare Your Pots and Soil
First, ensure your chosen pots are clean. If reusing, wash them thoroughly with warm, soapy water and rinse well. Place a small piece of mesh screen or a coffee filter over the drainage hole to prevent soil from escaping while still allowing water to drain freely. Fill each pot 3/4 full with your quality potting mix. Don't worry if it seems a little loose; it will settle.
Plant Your Seeds or Seedlings
If using seeds, follow the package instructions for depth and spacing. Generally, small seeds are barely covered with soil, while larger seeds might need to be planted a quarter to half-inch deep. Spritz the top layer of soil gently with water from your mister bottle. For seedlings, carefully remove them from their nursery pots, gently tease apart any circling roots, and plant them in the pre-dug hole in your new pot. The top of the seedling's root ball should be level with the surrounding soil.
Water Thoroughly
After planting, give your herbs a good watering. Use your watering can with a fine rose to thoroughly saturate the soil until water trickles out of the drainage holes. This ensures the soil settles around the roots and eliminates air pockets. Be careful not to overwater initially; just get it consistently moist.
Provide Adequate Light
This is the most critical step for an indoor herb garden. Place your pots in a location that receives at least 6 hours of direct sunlight daily – a south-facing window is usually best. If natural light is limited, position your grow light about 6-12 inches above your herbs for 12-16 hours a day. Modern LED grow lights are very efficient and won't heat up your kitchen.
Label Your Herbs
Using your labels, clearly mark each pot with the name of the herb. This simple step prevents confusion, especially when you have multiple young plants that look similar.
Ongoing Care and Monitoring
Once planted, your Indoor Herb Garden DIY will need consistent attention. Check the soil moisture every day by sticking your finger about an inch deep. If it feels dry, it's time to water. Regularly rotate your pots to ensure even light exposure, especially if relying on a single window. Don’t worry if some initial leaves yellow; it’s a natural adjustment process. Just remove them gently.
Growth & Care Tips
Consistent care is the secret to a thriving Indoor Herb Garden DIY.
- Watering Frequency: Most herbs prefer consistently moist, but not soggy, soil. Overwatering is the number one killer of indoor plants, causing root rot in an estimated 60% of cases. Allow the top inch of soil to dry out between waterings. Herbs like rosemary and thyme prefer slightly drier conditions, while basil and mint appreciate more moisture.
- Sunlight Exposure: As mentioned, 6 hours of direct sunlight is optimal. If using grow lights, aim for 12-16 hours daily. Look for full-spectrum LED grow lights for the best results, as they mimic natural sunlight.
- Pruning for Bushiness: Regular pruning encourages bushier growth and delays flowering, which can make herbs bitter. Once your herb plant has developed a few sets of true leaves, start pinching off the top growth just above a leaf node. For most herbs, you can harvest about 1/3 of the plant at a time.
- Fertilization: Indoor herbs will deplete soil nutrients over time. After about 4-6 weeks, start feeding them a diluted liquid organic fertilizer once every 2-4 weeks. Follow package instructions carefully; less is often more with indoor plants.
- Pest Prevention: Indoor herbs are less prone to pests than outdoor ones, but they can still occur. Watch out for common culprits like spider mites and aphids. If you spot them, wipe them off with a damp cloth or spray with a diluted neem oil solution. Good air circulation also helps deter pests.
Eco-Friendly & Sustainable Alternatives
Making your Indoor Herb Garden DIY even greener is simple and impactful.
- Compost Tea: Instead of chemical fertilizers, use homemade compost tea. It's a nutrient-rich liquid feed that boosts plant health naturally.
- Rainwater Harvesting: Collect rainwater to water your herbs. It's naturally soft and free from chlorine and other chemicals found in tap water.
- Repurposed Containers: Beyond the initial setup, keep an eye out for interesting containers you can upcycle. Old colanders make great draining planters, and wooden crates can be lined and used.
- Seed Saving: If your herbs go to seed, try collecting them for your next planting cycle. This closes the loop and saves money.
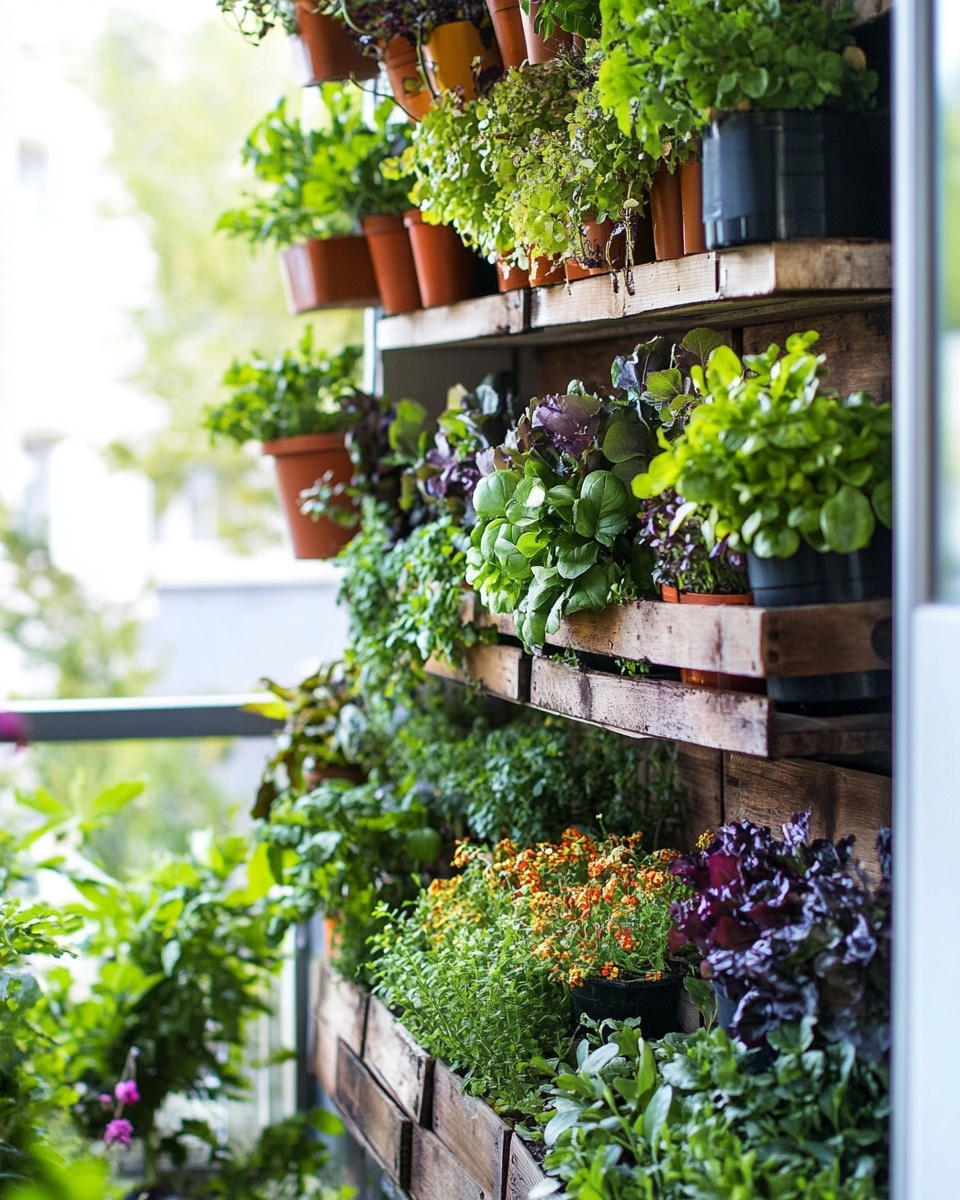
- Vertical Gardening: For truly tiny kitchens, consider vertical planters or wall-mounted pockets. These maximize space and can turn an unused wall into a vibrant herb display. Check out our guide on vertical balcony herb garden design ideas for inspiration adaptable to indoor spaces.
Creative Ideas & Uses
Your Indoor Herb Garden DIY isn't just about fresh flavors; it’s also a beautiful and aromatic addition to your home.
- Decorative Groupings: Arrange different herbs in varying pot sizes and textures for an appealing visual display. A mix of terracotta, ceramic, and even sleek metal containers can create an artistic focal point.
- Kitchen Shelf Styling: Use open shelves in your kitchen to showcase your herbs. Interspersed with cookbooks and kitchenware, they add life and color. For more display ideas, consider designs like those you'd find on inspiring Pinterest boards (e.g., pinterest.com/janatjanay47/).
- Herb Bouquets: Harvest larger quantities of herbs and tie them into small bouquets for decorative accents on your dining table or kitchen island. Not only do they look charming, but they also release a wonderful natural fragrance.
- Homemade Flavored Oils & Vinegars: Use excess herbs to infuse olive oils, vinegars, or even make herb butter. These make fantastic homemade gifts.
- Companion Planting for Aesthetics: Some herbs look great together! Pair variegated (multi-colored leaf) sage with dark green rosemary for a textural contrast. Just ensure their growing needs are similar.
Common Mistakes to Avoid
Even seasoned green thumbs make mistakes. Here are some pitfalls to sidestep with your Indoor Herb Garden DIY:
- Overwatering: As mentioned, this is huge. Always check soil moisture before watering. A moisture meter can be a helpful tool for beginners.
- Insufficient Light: Herbs are sun-lovers. If they're stretching and pale, they’re not getting enough light. Yellowing lower leaves can also indicate a lack of light.
- Ignoring Drainage: Pots without drainage holes will inevitably lead to waterlogging and root rot. If your favorite decorative pot lacks holes, use it as a cachepot (a decorative outer pot) and keep your herb in a smaller pot with drainage inside it.
- Not Pruning: Unpruned herbs become leggy and produce fewer leaves. Regular harvesting and pinching back not only give you fresh herbs but also maintain a compact, productive plant.
- Using Garden Soil: Garden soil is too dense for containers and can introduce pests and diseases into your indoor environment. Stick to a high-quality potting mix.
Maintenance & Storage Tips
Long-term success with your Indoor Herb Garden DIY means understanding sustained care.
- Seasonal Rotation: If you have outdoor space, consider moving some hardy herbs like rosemary or thyme outside during warmer months to give them a boost, then bringing them back in before the first frost.
- Repotting: As your herbs grow, they may become root-bound. This usually happens every 6-12 months. When you see roots circling the drainage holes or the plant looks generally stunted, it's time to move it to a pot that is 1-2 inches larger in diameter.
- Dealing with Yellow Leaves: Yellow leaves often signal overwatering, underwatering, or nutrient deficiency. Assess your watering schedule first. If the soil is routinely dry, you need to water more. If it’s always soggy, cut back. If that doesn't fix it, consider a light dose of fertilizer.
- Poor Soil Drainage Solutions: If water drains too slowly, your potting mix might be too dense, or the drainage holes are blocked. Gently aerate the soil with a chopstick or pencil. If the problem persists, repot with a better-draining mix, perhaps adding some perlite or vermiculite.
- Seed Storage: If you bought extra seeds, store them in a cool, dark, and dry place (like a refrigerator in an airtight container) to maintain their viability for future plantings.
Conclusion
Creating your own Indoor Herb Garden DIY is more than just a project; it's an ongoing source of fresh flavors, a touch of green beauty, and a continuous connection to nature right in your kitchen. From the invigorating scent of fresh basil to the earthy aroma of thyme, these living ingredients will transform your cooking and invigorate your space. With a little effort and consistent care, you'll be snipping and savoring your homegrown herbs in no time. So, why wait? Grab those pots, pick your favorite herbs, and start planting today! Share your journey with us – tag us on social media with your thriving indoor herb gardens!
FAQ
Q1: What are the easiest herbs to grow in an Indoor Herb Garden DIY?
A1: Basil, mint, chives, parsley, and cilantro are generally considered the easiest herbs for a DIY indoor herb garden. They sprout quickly and are relatively forgiving of minor watering inconsistencies.
Q2: How much sunlight does an indoor herb garden truly need?
A2: Most herbs require at least 6 hours of direct sunlight daily to thrive. If you don't have a south-facing window, supplementing with a full-spectrum LED grow light for 12-16 hours a day is highly recommended to ensure healthy growth for your indoor herb garden.
Q3: Can I grow herbs from kitchen scraps for my Indoor Herb Garden DIY?
A3: Yes, some herbs can be regrown from scraps! Green onions, romaine lettuce, and basil stems (placed in water until roots form) are good candidates. This is a wonderfully sustainable approach for your indoor herb garden.
Q4: How often should I water my indoor herbs?
A4: The golden rule is to check the soil. Stick your finger about an inch deep into the soil. If it feels dry, it's time to water. This usually translates to every 2-4 days, but it depends on your pot size, herb type, and ambient temperature/humidity. Overwatering is more damaging than underwatering for an indoor herb garden.
Q5: Why are my indoor herb leaves turning yellow?
A5: Yellowing leaves in an indoor herb garden are commonly a sign of overwatering, inconsistent watering (both too much and too little), or a lack of light. Check your soil moisture first, then assess your light conditions. Nutrient deficiency is another possibility after a few months of growth.
Q6: Do I need special soil for an indoor herb garden?
A6: Absolutely! Use a high-quality potting mix specifically designed for containers or herbs. Garden soil is too dense, can compact, and may contain pests or diseases unsuitable for an indoor herb garden environment.
Q7: How do I keep my herbs from getting leggy in my Indoor Herb Garden DIY?
A7: Leggy growth indicates insufficient light or a lack of pruning. Ensure your herbs are getting enough direct light (at least 6 hours, or use a grow light) and regularly prune or pinch back the top growth to encourage a bushier, more compact plant.
Looking for more ways to incorporate fresh greenery into your home? Discover creative solutions with our guide on How to Start a Balcony Herb Garden in Small Spaces. If you're interested in alternative indoor growing methods, explore our post on Vertical Indoor Garden Ideas for Small Spaces for inventive designs that make the most of every inch. For those just starting their indoor gardening adventure, don't miss our comprehensive overview of Easy Indoor Gardening Setup for Beginners.
