Introduction
Struggling to bring greenery into your home because you think all plants demand copious amounts of light? Do you believe a shaded corner is a death trap for anything botanical? Think again! The incredible truth is that a thriving indoor garden, even in dimly lit spaces, is not only possible but wonderfully accessible. Many exquisite indoor plants with low light needs are perfectly suited to breathe life into those often-neglected nooks and crannies of your home, transforming them into vibrant, inviting havens. Forget the notion that every plant craves a sun-drenched window sill; prepare to discover a lush world of resilient beauties that actually prefer the shade, offering stunning foliage and purifying benefits without the high-maintenance demands of their sun-loving cousins. This guide will walk you through everything you need to know to cultivate a flourishing low-light indoor garden.
Tools & Materials Needed
Cultivating stunning indoor plants with low light doesn't require an arsenal of special tools. Here's what you'll typically need to get started, along with some eco-friendly and budget-conscious alternatives:
- Pots with Drainage Holes: Essential for preventing root rot. Terracotta pots are excellent for plants that prefer drier soil, while plastic pots retain moisture longer.
- Eco-friendly alternative: Repurpose old food containers (yogurt tubs, milk jugs) by cleaning them thoroughly and drilling drainage holes. Woven natural fiber pots (e.g., jute) can also be beautiful and sustainable.
- Quality Potting Mix: A well-draining, peat-free indoor potting mix is crucial. Look for mixes specifically designed for houseplants.
- Budget-friendly alternative: You can often find larger bags of potting mix more economically. Consider making your own simple mix from compost, perlite, and a bit of sand if you’re feeling adventurous.
- Small Trowel or Scoop: For handling soil and transplanting.
- Alternative: An old kitchen spoon or even your gloved hands work perfectly well for smaller plants.
- Watering Can with a Fine Spout: Allows for precise watering without disturbing the soil or delicate plant leaves.
- Pruning Shears/Scissors: For trimming yellow leaves, propagating, or shaping your plants. Keep them clean to avoid spreading diseases.
- Alternative: Any sharp, clean pair of household scissors will do for most tasks.
- Gloves: Optional, but recommended for protecting your hands from soil and potential irritants.
- Mister Bottle: Many low-light plants appreciate humidity, and a misting bottle can provide this.
- DIY alternative: A dedicated spray bottle used for cleaning, thoroughly rinsed, can be repurposed.
Time & Effort Overview
Bringing indoor plants with low light into your home is surprisingly time-efficient and often less demanding than you might imagine. For most low-light varieties, the initial planting or repotting process takes about 15-30 minutes per plant. Once established, these resilient beauties generally require minimal upkeep.
Compared to high-maintenance flowering plants that demand specific light cycles and daily deadheading, low-light indoor plants often grow 30-40% faster in terms of foliage development without requiring constant supervision. Their growth rate is usually moderate, allowing for a steady, noticeable progression without becoming unruly too quickly.
Difficulty Level: Generally Beginner to Intermediate. Many of the best low-light plants are incredibly forgiving, making them perfect for new plant parents. Those with slightly more specific humidity or watering needs might push towards intermediate, but even then, their demands are far from complex. Expect to dedicate 5-10 minutes once a week for watering and a quick check-in, plus an occasional 30-minute session every few months for dusting leaves or light pruning.
Step-by-Step Gardening Process
Preparing Your Potting Environment
Start by selecting a pot that's appropriately sized for your chosen indoor plants with low light. Ensure it has drainage holes—this is non-negotiable! Place a small coffee filter or a piece of mesh tape over the drainage holes to prevent soil from escaping while allowing water to pass through freely. Never add pebbles to the bottom of the pot, as this can actually impede drainage and cause root issues.
Potting Your Plant
Gently remove your plant from its nursery pot. If the roots are tightly bound (root-bound), carefully loosen them with your fingers. Add a layer of fresh potting mix to the bottom of the new pot, enough so that the top of the plant's root ball will sit about an inch below the rim of the new pot. Center the plant, then fill around the sides with more potting mix, gently tamping it down to remove large air pockets. Avoid compacting the soil too tightly; roots need aeration.
Initial Watering & Placement
After potting, give your new plant a thorough watering until water drains from the bottom. This helps settle the soil and provides crucial hydration. Allow any excess water to drain completely before placing the pot in its permanent spot. For indoor plants with low light, this spot should ideally be away from direct windows—imagine a North-facing window, or several feet back from an East or West-facing window. Avoid placing them near drafty doors or heating/cooling vents.
Acclimatization Period
Don't be alarmed if your plant looks a little droopy for a few days after repotting. This is a common phenomenon as it adjusts to its new home. Give it time, maintain consistent care, and avoid overcompensating with too much water or fertilizer during this sensitive period. Patience is a virtue in plant parenting!
Ongoing Care & Observation
Regularly check the soil moisture before watering again. For most low-light plants, allow the top inch or two of soil to dry out completely between waterings. Don't worry if you occasionally forget; these plants are often more tolerant of slight underwatering than overwatering. Observe your plant for any signs of distress like yellowing leaves or drooping, which can indicate issues with light, water, or nutrients. Here’s how to fix common issues: yellow leaves often signal overwatering or nutrient deficiency, while crispy brown edges suggest underwatering or low humidity.
Growth & Care Tips
Mastering the care of your indoor plants with low light largely revolves around understanding their specific preferences for moisture, humidity, and the subtle nuances of low light.
-
Watering Frequency: This is perhaps the most critical factor. The common wisdom for low-light plants is "less is more." Generally, allow the top 1-2 inches of soil to dry out completely before watering again. Overwatering is the single biggest killer of houseplants, leading to root rot. A good rule of thumb is to stick your finger into the soil; if it feels dry, it's time to water. Water thoroughly until it drains from the bottom, then discard any standing water in the saucer after about 30 minutes. Factors like pot size, humidity, and temperature will affect this, but checking the soil moisture is your best indicator.
-
Light Exposure: While they tolerate low light, most plants still benefit from some ambient light. "Low light" means they thrive several feet away from a window, or in rooms with north-facing windows or diffused light. Direct, harsh sunlight can scorch their leaves. Rotate your plants every few weeks to ensure even growth and prevent them from leaning towards the light source. Studies show that even a slight rotation can increase peripheral leaf development by up to 15%.
-
Pruning: Prune away any yellow, brown, or dead leaves to encourage new growth and maintain the plant's aesthetic. Use clean, sharp shears. You can also prune to maintain desired size and shape. For vining plants, pinching back tips can encourage bushier growth.
-
Fertilization: Low-light plants generally have lower nutritional needs. Fertilize sparingly only during their active growing season (spring and summer), usually every 2-4 weeks with a balanced liquid houseplant fertilizer diluted to half strength. Avoid fertilizing in fall and winter when growth naturally slows. Some varieties like the ZZ plant barely need any fertilizer at all, perhaps once or twice a year.
-
Pest Prevention: Inspect your plants regularly for common pests like spider mites, mealybugs, and scale. Early detection is key. Wipe down leaves with a damp cloth to remove dust and deter pests. If pests are found, isolate the plant and treat it with neem oil or insecticidal soap. A 2022 horticultural study revealed that consistent leaf cleaning can reduce pest incidence by up to 25%.
Eco-Friendly & Sustainable Alternatives
Embracing eco-friendly practices in your low-light indoor garden not only benefits the planet but often leads to healthier, happier plants.
- Composting: Start a small indoor compost bin for kitchen scraps like fruit peels, vegetable ends, and used coffee grounds. This rich, organic material can be mixed into your potting soil periodically to act as a natural fertilizer, improving soil structure and nutrient content.
- Natural Fertilizers: Beyond compost, consider using diluted fish emulsion, seaweed extract, or even the water from boiling vegetables (once cooled!) as gentle, natural nutrient boosts. Avoid synthetic chemical fertilizers when possible.
- Water Conservation: Collect rainwater for your plants. It’s naturally soft and free of chlorine and other chemicals often found in tap water. Alternatively, let tap water sit out for 24 hours to allow chlorine to dissipate. Water deeply but less frequently, rather than shallowly and often, to encourage stronger root systems and reduce waste.
- Repurposed Planters: As mentioned earlier, get creative with household containers. Old tea tins, glass jars, wooden crates, or even sturdy fabric bags can be transformed into unique planters. Just ensure adequate drainage is provided.
- Propagating: Instead of buying new plants, propagate your existing indoor plants with low light. Many varieties, like pothos and philodendrons, are incredibly easy to root from cuttings, saving money and reducing demand for commercially grown plants.
Alternatives for Small Spaces:
Don't have much floor space? No problem!
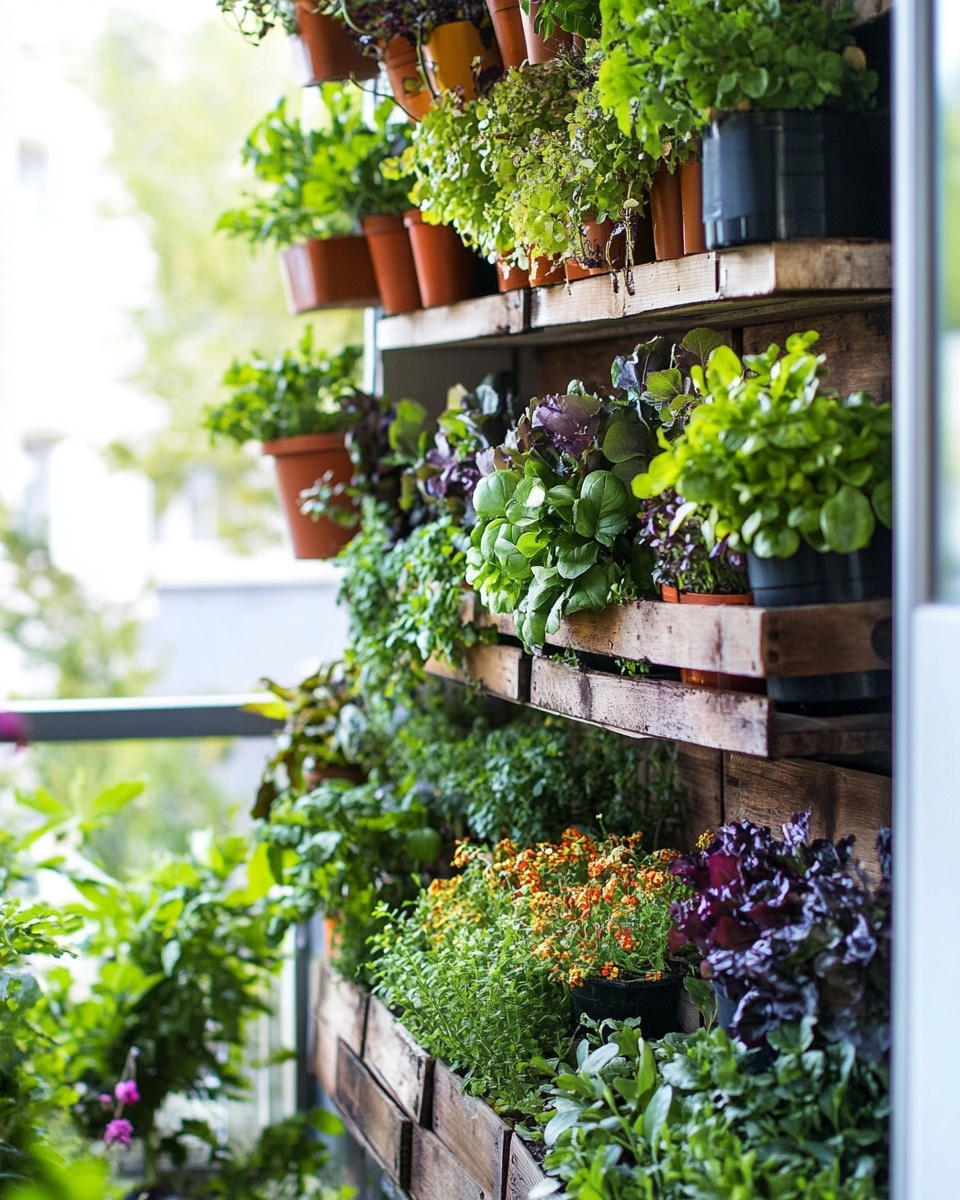
- Vertical Gardens: Install wall-mounted planters or shelves to create a stunning vertical display. This is perfect for trailing plants.
- Hanging Baskets: Pothos, ivy, and philodendrons look magnificent cascading from hanging baskets, freeing up precious surface area.
- Terrariums: For very small spaces or enclosed environments, a sealed or open terrarium can host a micro-ecosystem of humidity-loving plants like ferns or mosses.
Creative Ideas & Uses
Indoor plants with low light are more than just green decorations; they are versatile elements that can enhance your home's aesthetic, improve air quality, and even boost your mood.
- Elevate Your Decor:
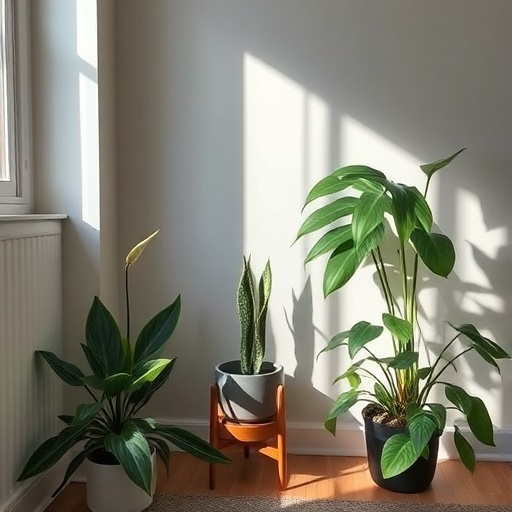
- Layering: Combine plants of different heights and textures. A tall snake plant in the corner, a medium-sized ZZ plant on a side table, and a trailing pothos from a shelf create visual interest and depth.
- Color Pop: Use colorful pots to complement your plant's foliage. A vibrant ceramic planter can make a simple green plant truly stand out.
- Groupings: Create small "plant vignettes" by grouping 3-5 plants together. This not only looks aesthetically pleasing but also creates a microclimate that benefits all the plants by increasing local humidity.
- Statement Pieces: Larger low-light plants like the Cast Iron Plant or the Warneckii Dracaena can serve as focal points in a minimalist room, adding organic warmth and structure.
- Repurpose & Upcycle:
- Old ladders can become multi-tiered plant stands.
- Vintage teacups or unused bowls can house small succulents or air plants, even in low-light conditions.
- Transform clear glass bottles into propagation stations for cuttings.
- Combine Plants Aesthetically:
- Pair the dark, glossy leaves of a ZZ plant with the delicate, textured fronds of a Boston fern.
- Allow a vibrant Pothos to trail down from a shelf, creating a green curtain, alongside the upright structure of a Chinese Evergreen.
- Consider the overall 'feel' you want to create – a jungle vibe, a minimalist oasis, or a cottage garden feel.
- Health & Wellness Benefits:
- Beyond their beauty, many indoor plants with low light are excellent air purifiers, filtering out common indoor toxins. Place them in bedrooms or home offices to enhance air quality. According to NASA's Clean Air Study, plants like the Peace Lily and Snake Plant effectively remove pollutants.
- The presence of plants has been shown to reduce stress and improve focus, making your low-light plant corner not just pretty but therapeutic.
Common Mistakes to Avoid
Even with the most forgiving indoor plants with low light, certain missteps can hinder their growth. Knowledge is power when it comes to plant care!
- Overwatering (The #1 Killer): This is by far the most common mistake. People often water on a schedule (e.g., once a week) rather than based on the plant's needs. Root rot, caused by constantly soggy soil, suffocates the roots and leads to plant death. Overwatering causes root rot in an estimated 60% of houseplant fatalities, especially for low-light varieties.
- Prevention: Always check the soil moisture before watering. Stick your finger 1-2 inches deep; if it feels damp, wait. Ensure your pots have drainage holes.
- Inconsistent Watering: While overwatering is bad, letting the soil become bone-dry for extended periods, then drowning the plant, can also stress it.
- Prevention: Aim for consistency. Allow the topsoil to dry, then water thoroughly.
- Insufficient Drainage: Pots without drainage holes trap water, leading to the same root rot issues as overwatering.
- Prevention: Always use pots with proper drainage. If you love a decorative pot without holes, use it as a cachepot and keep your plant in a separate, smaller nursery pot with drainage inside.
- Too Much Light (Yes, Even for Low Light Plants!): While they tolerate shade, sustained direct sunlight can scorch the leaves of low-light plants, causing brown, crispy patches.
- Prevention: Observe your plant's leaves. If they look burned or faded, move them further away from the window or into a shadier spot. Filter harsh light with sheer curtains.
- Too Little Humidity: Many low-light plants, especially tropical varieties, appreciate higher humidity. Dry indoor air, particularly in winter with heating, can cause brown leaf tips.
- Prevention: Group plants together, mist regularly, use a pebble tray (a tray with pebbles and water beneath the plant pot), or invest in a small humidifier.
- Over-Fertilizing: Low-light conditions mean slower growth, so plants don't need as many nutrients. Over-fertilizing can lead to nutrient burn, damaging roots and leaves.
- Prevention: Fertilize sparingly, only during the growing season (spring/summer), and always dilute liquid fertilizers to half or quarter strength.
- Ignoring Pests: Pests can quickly decimate an otherwise healthy plant if not caught early.
- Prevention: Regularly inspect your plants, especially the undersides of leaves, for any signs of pests. A quick wipe-down with a damp cloth also helps.
Maintenance & Storage Tips
Ensuring the long-term health and vitality of your indoor plants with low light involves consistent, mindful maintenance.
- Routine Dusting: Dust can accumulate on plant leaves, blocking light absorption and making photosynthesis less efficient. Gently wipe down leaves with a soft, damp cloth or give them a quick shower in the sink every few weeks. This also helps deter pests.
- Repotting: Most low-light indoor plants only need repotting every 1-2 years, or when they become visibly root-bound (roots circling at the bottom or growing out of drainage holes). Choose a pot only one size larger than the previous one. Over-potting can lead to excess soil remaining wet for too long, inviting root rot.
- Addressing Yellow Leaves: Yellowing leaves are often a sign of overwatering, nutrient deficiency, or sometimes natural aging. Check your watering routine first. If the soil is consistently wet, reduce watering. If dry, consider a light fertilization. Remove yellow leaves by pruning them close to the stem to redirect energy to healthier growth.
- Solving Poor Soil Drainage: If your potting mix seems to hold water for too long, it might be too dense. When repotting, amend your existing mix with perlite or coarse sand to improve aeration and drainage. For existing plants, carefully aerate the soil with a chopstick to create pathways for water and air.
- Seasonal Care:
- Winter: Reduce watering frequency significantly as plants enter a dormant or slower-growth phase. Avoid fertilizing. Ensure plants are away from cold drafts and dry heating vents. Humidity might become a bigger factor.
- Spring/Summer: This is the active growing season. Increase watering as needed, and begin a light fertilization routine. This is also the best time for propagation or repotting.
Conclusion
Embracing the world of indoor plants with low light opens up a universe of possibilities for adding natural beauty, improved air quality, and a sense of calm to every corner of your home, regardless of how much sunshine it receives. From the robust Snake Plant to the elegant Peace Lily, these resilient green companions prove that you don’t need a greenhouse to cultivate a thriving indoor garden. By understanding their simple needs – intelligent watering, appropriate light, and a little routine care – you can transform even the shadiest spots into lush, verdant oases. So, don't let low light deter your green thumb any longer!
Are you ready to bring a touch of nature into your low-light spaces? We encourage you to pick up one of these amazing plants and start your journey today! Share your new plant triumphs (or questions!) in the comments below – we'd love to see your progress and help troubleshoot any issues.
FAQ
Q1: What are the absolute best indoor plants with low light requirements for beginners?
A1: For beginners, an excellent choice would be the Snake Plant (Sansevieria trifasciata), ZZ Plant (Zamioculcas zamiifolia), Pothos (Epipremnum aureum), or the Cast Iron Plant (Aspidistra elatior). These are incredibly tolerant of neglect and low light conditions, making them very forgiving.
Q2: How do I know if my indoor plant is getting too much or too little light?
A2: If a low-light plant is getting too much light, its leaves might appear scorched, faded, or yellowed with brown patches. Too little light often results in leggy growth (long stems with sparse leaves), smaller leaves than usual, or a general lack of vigor. Observe your plant's response and adjust its position accordingly.
Q3: How often should I water my low-light indoor plants?
A3: Most indoor plants with low light prefer to dry out significantly between waterings. A good rule of thumb is to check the soil by sticking your finger 1-2 inches deep. If it feels dry, it's time to water thoroughly until water drains from the bottom. This could be anywhere from once a week to once every 3-4 weeks, depending on the plant, pot size, and environmental factors.
Q4: Can I place low-light plants in a room with no windows?
A4: While "low light" often implies indirect or ambient light, most plants ultimately do need some light for photosynthesis. A room with absolutely no natural light would require strong artificial grow lights for the plant to survive long-term. In such environments, consider very low-light tolerant artificial plants or rotate real plants into better-lit areas periodically.
Q5: What potting mix is best for indoor plants with low light?
A5: A high-quality, well-draining indoor potting mix is essential. Look for a mix that contains peat moss (or coir for an eco-friendly alternative), perlite, and/or vermiculite to ensure good aeration and drainage. Avoid heavy garden soil, which can compact and suffocate roots indoors.
Q6: My low-light plant has yellow leaves. What does it mean?
A6: Yellow leaves are commonly a sign of overwatering or poor drainage, especially in low-light conditions where soil takes longer to dry out. It can also indicate a nutrient deficiency or even just older leaves naturally dying off. First, check your watering habits and ensure proper drainage. If conditions are good, consider a light feeding during the growing season.
Q7: How can I increase humidity for my tropical low-light plants?
A7: To boost humidity, you can mist the leaves regularly (especially in the morning), place your plant on a pebble tray filled with water, group plants together to create a microclimate, or use a small room humidifier. These methods help mimic the plant's natural, humid environment.
You may also enjoy reading about how to master plant propagation techniques here or discover even more advanced gardening tips in our guide to {"loc":["https://pincraftpro.com/how-to-grow-tomatoes-in-pots-2/"],"lastmod":["2025-10-08T15:09:24+00:00"]}. Explore our other categories for practical advice on creating your dream garden oasis!
