Introduction
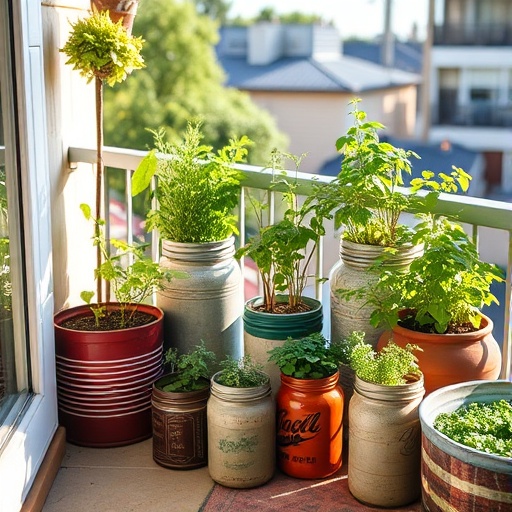
Ever wonder if transforming your compact balcony into a thriving herb oasis is truly achievable without breaking the bank or harming the planet? Many aspiring gardeners believe a lack of space or resources is a major barrier, but I’m here to tell you that’s simply not the case! In fact, embracing Recycled Garden Projects is one of the most rewarding and sustainable ways to get started. Imagine plucking fresh, aromatic herbs for your culinary creations just steps from your kitchen, all grown in repurposed containers you might otherwise discard. This guide will walk you through creating your very own DIY balcony herb garden using everyday items, proving that gardening can be both accessible and eco-chic. Let’s dive into how you can make your green dreams a reality with smart, earth-friendly choices.
Tools & Materials Needed
To embark on your sustainable gardening adventure, gathering the right tools and materials is your first step. Don’t worry; most of these items are likely already in your home or can be sourced sustainably.
- Recycled Containers: Think outside the box! Plastic soda bottles (2-liter or larger), milk jugs, tin cans, old plastic food containers, and even sturdy laundry detergent bottles make excellent planters. Ensure they’re thoroughly washed.
- Eco-Friendly Tip: For an alternative, consider terracotta pots from thrift stores or biodegradable seed starting pots made from peat or coir.
- Drill or Awl: Essential for creating drainage holes in your chosen containers. A hot nail held with pliers can also work on plastic.
- Potting Mix: A good quality, lightweight potting mix is crucial. Look for organic options.
- Budget-Friendly Alternative: You can mix your own by combining equal parts compost, coco coir (a sustainable alternative to peat moss), and perlite for aeration. This also makes excellent use of kitchen scraps for composting.
- Herb Seeds or Seedlings: Start with easy-to-grow herbs like basil, mint, parsley, chives, oregano, or thyme. Seedlings offer quicker gratification, while seeds are more economical.
- Small Shovel or Trowel: For scooping soil. A sturdy old kitchen spoon can double as a trowel.
- Watering Can or Spray Bottle: A small watering can with a fine rose is ideal for delicate seedlings. A repurposed plastic bottle with holes poked in the lid works too.
- Gloves (Optional): To keep your hands clean.
- Labels (Optional but Recommended): Ice cream sticks, popsicle sticks, or even strips of plastic cut from other containers can be used with a permanent marker.
Time & Effort Overview
Creating your recycled container herb garden is surprisingly time-efficient and a wonderfully low-effort project, especially perfect for beginners.
- Setup Time: Expect to spend about 1-2 hours on the initial setup, including preparing your recycled containers, potting soil, and planting the seeds or seedlings. This can vary slightly depending on how many containers you decide to prepare.
- Growth Rate: Most culinary herbs germinate within 7-14 days and are ready for their first harvest in 3-4 weeks. For instance, basil can often be picked about 25% faster than slower-growing herbs like rosemary from seed.
- Daily Maintenance: Once established, your herb garden will require about 5-10 minutes of daily attention for watering and quick checks. This is significantly less than a traditional in-ground garden.
- Difficulty Level: Beginner. This is an absolutely perfect Recycled Garden Project for anyone new to gardening, offering high reward for minimal initial effort. Even if you’ve never touched soil before, you’ll find this project highly forgiving and enjoyable.
Step-by-Step Gardening Process
Let’s get those hands dirty! Follow these simple steps to bring your balcony herb garden to life.
Prepare Your Recycled Containers
First, gather your chosen recycled items. Wash them thoroughly with soap and water and let them dry. Now, drainage is key! Use your drill, awl, or heated nail to create several small holes (at least 3-5, about ¼ inch in diameter) at the bottom of each container. Without proper drainage, your herbs will suffer from root rot. Don’t worry if the holes aren’t perfectly uniform; functionality is what matters here.
Add Your Potting Mix
Place a small layer of gravel, broken pottery shards, or even leftover coffee filters at the bottom of each container before adding soil. This prevents the potting mix from washing out prematurely. Then, fill your containers with your chosen potting mix, leaving about an inch of space from the rim. Gently pat the soil down.
Plant Your Herb Seeds or Seedlings
If planting seeds, create small depressions in the soil according to the seed packet instructions (usually a quarter to half an inch deep). Place a few seeds in each depression and lightly cover them with soil. If using seedlings, gently remove them from their nursery pots, loosen any bound roots, and place them into holes slightly larger than their root ball. Gently backfill with soil, ensuring the plant is at the same level it was in its original pot.
Water Thoroughly
Immediately after planting, water your containers thoroughly until water drains from the bottom holes. This helps settle the soil around the seeds or roots. Use a gentle stream from your watering can or spray bottle to avoid dislodging seeds or delicate seedlings.
Label Your Herbs
It’s easy to forget what you planted where, especially if you’re using similar-looking seedlings. Use your labels to clearly mark each container with the name of the herb and the planting date. This simple step will save you confusion later on.
Position for Sunlight
Finally, place your newly planted herb garden in a spot on your balcony that receives adequate sunlight. Most herbs thrive with at least 6 hours of direct sunlight per day. Observe your balcony throughout the day to find the optimal sunny spot.
Growth & Care Tips
Once your herbs are happily planted, consistent care will ensure a bountiful harvest.
- Watering Frequency: Herbs generally prefer consistently moist, but not waterlogged, soil. Check the top inch of soil daily; if it feels dry, it's time to water. Overwatering is a common mistake that leads to root rot in a significant portion of container plants, estimated to be around 60%. Adjust watering based on weather – more water on hot, sunny days, less on cool or overcast days.
- Sunlight Exposure: As mentioned, 6+ hours of direct sunlight is ideal. A south-facing balcony is often best. If you notice leggy growth (stems stretching tall with sparse leaves), it's a sign your plant is reaching for more light.
- Pruning for Bushiness: Regular pruning encourages bushier growth and a higher yield. Once your herbs have grown several sets of true leaves, pinch off the top set of leaves just above a node (where leaves emerge from the stem). For example, pruning basil by 1/3 of its height every 2-3 weeks maximizes leaf production.
- Fertilization: Herbs aren’t heavy feeders, especially in fresh potting mix. After about a month, you can start using a diluted liquid organic fertilizer every 2-4 weeks. Avoid over-fertilizing, which can lead to excessive leaf growth at the expense of flavor.
- Pest Prevention: Inspect your herbs regularly for signs of pests like aphids or spider mites. A strong spray of water can dislodge many pests. For more persistent issues, a diluted neem oil solution or insecticidal soap can be effective. Companion planting, such as marigolds, can also deter pests naturally.
Eco-Friendly & Sustainable Alternatives
Making your garden sustainable isn't just a trend; it's a commitment to a healthier planet. Your Recycled Garden Projects are already a fantastic start!
- Composting Your Scraps: Divert kitchen waste (vegetable peels, coffee grounds, eggshells) into a small-scale worm bin or compost tumbler. This black gold will enrich your soil naturally, reducing the need for purchased fertilizers.
- Natural Fertilizers: Beyond compost, consider using diluted fish emulsion, seaweed extract, or even fermented rice water as organic nutrient boosts for your herbs. Used coffee grounds can also be sprinkled on the soil surface to add nitrogen.
- Water Conservation: Collect rainwater in a bucket or strategically place your plants to benefit from natural rainfall. Mulching the top of your soil with shredded leaves or straw can reduce evaporation significantly, meaning less frequent watering.
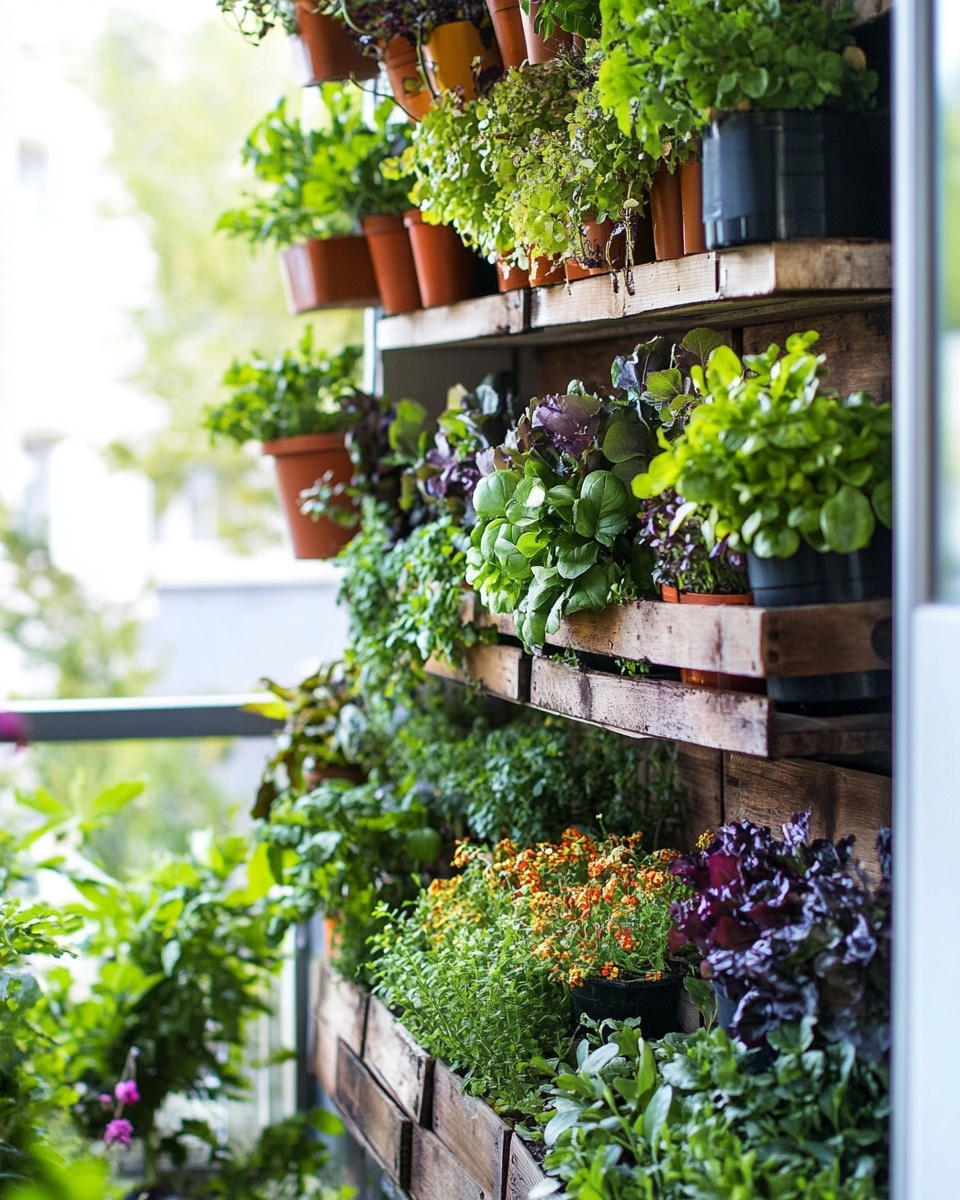
- Vertical Gardening: If balcony space is truly limited, explore vertical gardening options using repurposed pallets or hanging planters made from plastic bottles. This maximizes your growing area while keeping with the theme of Recycled Garden Projects. For more inspiration, check out our guide on vertical indoor garden ideas for small spaces.
Creative Ideas & Uses
Your balcony herb garden built on the foundation of Recycled Garden Projects doesn't just nourish your body; it can also be a feast for the eyes and a source of creative inspiration!
- Decorate with Intention: Instead of just placing containers, arrange them aesthetically. Use varying heights with crates or old wooden boxes to create visual interest. Paint your recycled containers vibrant colors or stencil designs on them for a personalized touch.
- Repurpose Garden Materials: An old step ladder can become a multi-tiered herb display. Sections of PVC pipe can be cut and stacked as modular planters. Even old tires, cleaned and painted, can make large, striking herb beds.
- Combine Plants Aesthetically: Don't be afraid to mix and match. Planting herbs with contrasting leaf colors or textures, such as purple basil alongside green chives, can be visually appealing. Consider adding a small annual flower like nasturtiums (which are also edible!) to attract pollinators and add a pop of color.
- Culinary Delights: Your fresh herbs are culinary gold. Imagine homemade pesto with your balcony basil, refreshing mint tea, or a sprinkle of chives over your scrambled eggs. The flavor difference from store-bought herbs is immense.
- Aromatic Ambiance: Beyond cooking, simply brushing against fragrant herbs like rosemary or lavender can release soothing aromas, transforming your balcony into a sensory retreat.
Common Mistakes to Avoid
Even seasoned gardeners make mistakes. Knowing what to watch out for can save you a lot of heartache and ensure your Recycled Garden Projects flourish.
- ** inadequate Drainage:** This is arguably the biggest killer of container plants. Without drainage holes, roots sit in water, leading to root rot (which, as mentioned, affects 60% of houseplants when overwatered). Always ensure sufficient holes.
- Overwatering: It’s often more damaging than underwatering. Check the soil moisture before watering. A finger-test is usually sufficient: if the top inch feels dry, water. If it still feels damp, wait.
- Insufficient Sunlight: Most herbs are sun-worshippers. Placing them in too much shade will result in spindly, weak plants with lackluster flavor. Observe your balcony's sun exposure throughout the day.
- Planting Too Deeply: When transplanting seedlings, ensure the base of the stem is at the same level as it was in its original pot. Burying the stem too deep can suffocate it.
- Not Pruning: While it might feel counterintuitive to cut off growth, pruning encourages the plant to branch out, resulting in a bushier, healthier plant with more leaves to harvest. Hesitation to prune often leads to leggy, less productive plants.
- Ignoring Pest Signs: Small problems can quickly escalate. Regularly inspect your plants. Early detection and treatment prevent major infestations.
Maintenance & Storage Tips
Long-term success with your recycled herb garden involves ongoing care and smart storage.
- Seasonal Rotation & Refresh: Over time, the nutrients in your potting mix will deplete. Every 1-2 years, consider repotting your perennial herbs with fresh potting mix. For annuals like basil, start fresh seasons.
- Winter Protection (for Perennials): If you live in a colder climate, bring perennial herbs like rosemary, thyme, or oregano indoors during winter, or provide them with frost protection on the balcony. Move them to a cooler, bright spot indoors and reduce watering.
- Harvesting & Storing: Harvest herbs in the morning after the dew has dried but before the sun is too strong. Fresh herbs are best used immediately. For storage, wash and pat dry, then either wrap in a damp paper towel and refrigerate in a bag, or stand them in a glass of water like a bouquet.
- Drying and Freezing: For longer-term storage, many herbs can be dried (hang small bundles upside down in a cool, dark place) or frozen (chop finely and freeze in ice cube trays with olive oil or water).
- Dealing with Yellow Leaves: Yellow leaves often indicate overwatering, nutrient deficiency, or sometimes natural aging. Check your watering schedule first; if the soil is consistently wet, reduce watering. If that's not it, consider a light dose of balanced liquid fertilizer. Poor drainage is another common culprit, often linked to the success of your clever Recycled Garden Projects.
Conclusion
Embarking on a DIY balcony herb garden using Recycled Garden Projects is an empowering and sustainable journey. You've learned how to transform everyday recyclables into functional, beautiful planters, cultivate vibrant herbs from scratch, and maintain their health with eco-conscious practices. Not only will you enjoy the therapeutic benefits of gardening, but you'll also savor the unmatched flavor of home-grown herbs. This project is a testament to how small, mindful actions can lead to bountiful rewards, proving that anyone can be a successful gardener, regardless of space or budget. So, gather your repurposed containers, choose your favorite herbs, and start growing! Your kitchen and the planet will thank you.
Ready to dig in deeper? Share your progress and questions in the comments below, or tag us in your garden photos! We love seeing your green thumb in action.
FAQ
Q1: What are the best herbs to start with for a recycled garden project on a balcony?
A1: For beginners, basil, mint, parsley, chives, oregano, and thyme are exceptionally forgiving and thrive in containers. They adapt well to balcony conditions and are perfect for Recycled Garden Projects.
Q2: How often should I water my herbs in recycled containers?
A2: Generally, check the top inch of soil daily. If it feels dry, water thoroughly until it drains from the bottom. The frequency depends on temperature, humidity, and the size of your recycled container.
Q3: Can I use any recycled plastic container for planting?
A3: Most plastic containers are fine, as long as they are clean and you can easily drill or poke drainage holes in the bottom. Avoid any containers that previously held harsh chemicals. This aligns perfectly with the spirit of Recycled Garden Projects.
Q4: My herbs are looking leggy and sparse. What could be wrong?
A4: Leggy growth is a classic sign of insufficient sunlight. Most herbs require at least 6 hours of direct sun daily. Try relocating your recycled pots to a sunnier spot on your balcony.
Q5: Do I need special soil for container herbs, particularly in recycled planters?
A5: Yes, a good quality, lightweight potting mix is essential. Garden soil is too dense for containers and doesn't drain well. Look for organic options or create your own with compost, coco coir, and perlite.
Q6: How can I prevent pests naturally in my balcony herb garden?
A6: Regularly inspect your plants, use a strong spray of water for small infestations, and consider companion planting with natural pest deterrents like marigolds. Neem oil spray can also be effective.
Q7: What’s the biggest mistake beginners make with container herbs?
A7: The two most common mistakes are overwatering (leading to root rot) and insufficient drainage holes in their containers. Always ensure your Recycled Garden Projects have proper drainage!
You may also enjoy reading: 10 Easy Herbs to Grow Indoors, DIY Indoor Herb Garden for Small Kitchens, and Small Apartment Indoor Gardening Hacks. For more visual inspiration, explore our gardening boards on Pinterest.
