Introduction
Ever found yourself staring at a recipe, wishing you had fresh, fragrant herbs right at your fingertips, rather than trekking to the grocery store? Does the thought of cultivating your own little green haven in a cramped kitchen seem like an impossible dream? Think again! Creating your very own Indoor Herb Garden DIY is not only achievable but also incredibly rewarding, even in the smallest of urban dwellings. Forget what you think you know about gardening requiring acres of land or hours of dedicated outdoor time. We’re about to transform your perception, showing you how simple it is to bring the vibrant flavors and delightful aromas of a flourishing herb garden directly into your home, enhancing your culinary adventures and brightening your space.
Tools & Materials Needed
Embarking on your indoor herb garden journey requires a thoughtful selection of tools and materials, but don't worry – most are readily available and many offer eco-friendly alternatives.
- Pots or Containers: Choose containers with drainage holes. Terra cotta pots are excellent for wicking away excess moisture, but glazed ceramic, plastic, or even repurposed tins work well. Consider small, individual pots (4-6 inches in diameter) for each herb, or a larger rectangular planter for a mixed garden. For an eco-friendlier option, repurpose clean food containers, ensuring you drill drainage holes.
- Quality Potting Mix: A premium, well-draining potting mix specifically formulated for indoor plants is crucial. Avoid garden soil, which is too dense and can harbor pests. Look for mixes containing perlite or vermiculite for improved aeration.
- Herb Seeds or Starter Plants: For beginners, starter plants (small established herbs from a nursery) offer a quicker path to success. Popular choices for an Indoor Herb Garden DIY include basil, mint, oregano, thyme, rosemary, and chives. If opting for seeds, ensure they are fresh and suitable for indoor growing.
- Small Shovel or Trowel: For scooping soil and planting. A old kitchen spoon can work in a pinch!
- Watering Can with a Fine Spout: Essential for gentle, controlled watering, preventing soil displacement.
- Scissors or Pruners: For harvesting and regular maintenance.
- LED Grow Light (Optional but Recommended): Especially in low-light conditions or during winter months. A full-spectrum LED light simulates natural sunlight, significantly boosting growth.
- Drip Trays or Saucers: To catch excess water and protect your surfaces.
Time & Effort Overview
Setting up your Indoor Herb Garden DIY is surprisingly time-efficient. Initial planting typically takes between 30 minutes to 1 hour, depending on whether you’re starting from seeds or transplanting mature plants. Once established, daily maintenance, primarily watering and checking, usually takes only 5-10 minutes. Herbs like mint and basil can show significant growth within 2-4 weeks, often growing 30% faster indoors with optimal conditions compared to struggling outdoor patches. The difficulty level is decidedly beginner, making it a perfect project for those new to gardening.
Step-by-Step Gardening Process
Let’s get your hands dirty and transform your kitchen into a fragrant oasis!
Prepare Your Pots
Ensure all your chosen pots or containers are clean. If they don't have drainage holes, now's the time to drill them. Place a small piece of mesh or a coffee filter over the drainage hole to prevent soil from washing out. For better water management, place a drip tray under each pot.
Add Potting Mix
Fill your pots about two-thirds full with the potting mix. Don't compact it too much; gentle tapping on the counter will help settle the soil naturally. Leave some space at the top for watering.
Plant Your Herbs
- From Seeds: Follow the specific instructions on your seed packet regarding planting depth and spacing. Generally, small seeds are barely covered with a thin layer of soil, while larger seeds might be planted a quarter to half-inch deep. Spritz the surface gently with water.
- From Starter Plants: Carefully remove the herb from its nursery pot, gently loosening any compacted roots. Place the plant in the prepared pot, ensuring the top of the root ball is level with the soil surface. Fill around the plant with more potting mix, gently firming it down.
Water Thoroughly
Once planted, water your herbs thoroughly until you see water draining from the bottom. This helps settle the soil around the roots or seeds. Don’t worry if some soil settles down; you can always add a little more if needed.
Provide Initial Light
Place your newly planted herbs in a location that receives ample sunlight, ideally 6-8 hours a day. If natural light is limited, position your LED grow light about 6-12 inches above the plant, setting a timer for 12-14 hours daily.
Growth & Care Tips
Consistent care is the secret to a thriving Indoor Herb Garden DIY.
- Watering Frequency: The most common mistake is overwatering. Check the soil moisture daily by sticking your finger about an inch deep. If it feels dry, it's time to water. Water thoroughly until water drains from the bottom, then discard any excess in the saucer to prevent root rot. Herbs like rosemary prefer slightly drier conditions, while basil and mint enjoy more consistent moisture. Data suggests that overwatering contributes to over 60% of indoor plant failures due to root rot.
- Sunlight Exposure: Most herbs require 6-8 hours of direct sunlight daily. A south-facing window is ideal. If natural light isn't enough, especially during shorter winter days, invest in a full-spectrum LED grow light. Herb growth can be stunted by up to 40% with inadequate light.
- Pruning & Harvesting: Regular pruning encourages bushier growth and prevents herbs from becoming leggy. Harvest by pinching or snipping off the top few sets of leaves. For basil, pinch just above a leaf node to encourage two new stems to grow. For mint, regularly harvest stems to prevent it from flowering, which can reduce flavor.
- Fertilization: Indoor herbs generally don't need heavy fertilization. A diluted, all-purpose liquid fertilizer (half-strength) applied once a month during the growing season (spring and summer) is usually sufficient. Avoid fertilizing in winter when growth slows.
- Pest Prevention: Inspect your herbs regularly for signs of pests like aphids, spider mites, or whiteflies. Early detection is key. A simple solution of insecticidal soap (or diluted dish soap) can often deter pests. Ensure good air circulation to help prevent fungal issues.
Eco-Friendly & Sustainable Alternatives
Make your Indoor Herb Garden DIY even greener!
- Composting: Start a small kitchen compost bin for vegetable scraps. The finished compost can be mixed into your potting soil for nutrient enrichment.
- Natural Fertilizers: Instead of synthetic options, consider using coffee grounds (acid-loving plants appreciate them), diluted compost tea, or worm castings as natural fertilizers.
- Water Conservation: Collect rainwater for watering your herbs. Reused water from washing vegetables (without soap) can also be beneficial.
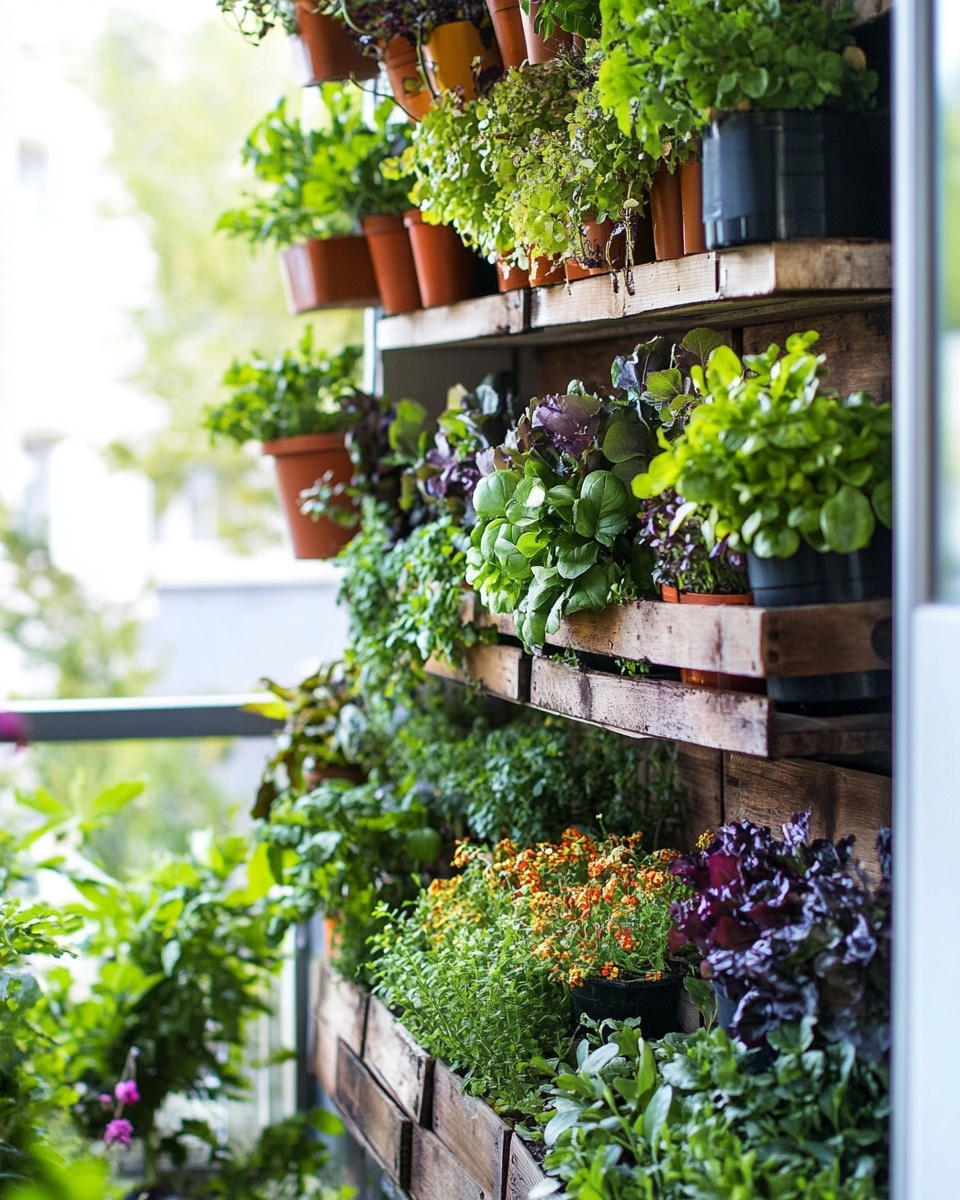
- Small Spaces & Vertical Gardens: If counter space is limited, explore vertical gardening solutions. Wall-mounted planters, tiered shelving units, or even window boxes hung on tension rods can maximize your growing area. Consider a hydroponic system for a truly space-efficient and high-yield setup.
Creative Ideas & Uses
An Indoor Herb Garden DIY isn't just functional; it's a living piece of decor!
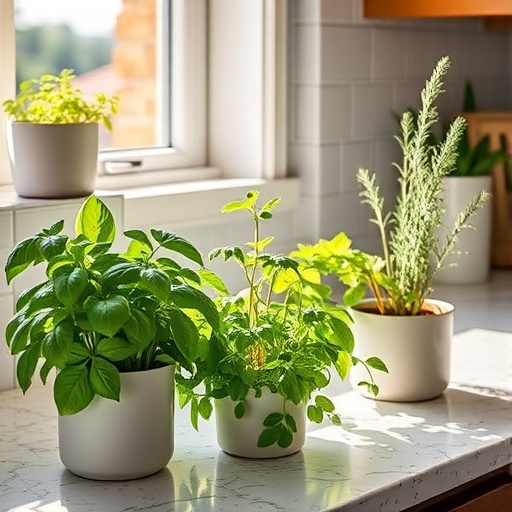
- Aesthetic Groupings: Arrange different herbs with varying textures and leaf colors in attractive groupings. Tall rosemary next to bushy basil or cascading thyme can create visual interest.
- Repurposed Containers: Beyond the garden, repurpose old teacups, vintage tins, or painted mason jars as charming planters. This adds a unique, personalized touch.
- Design Integration: Use your herbs to add a pop of green to your kitchen design. Place them on sunny windowsills, open shelves, or even as a fragrant centerpiece on your dining table. Imagine adding a vibrant basil plant in a terracotta pot to a minimalist kitchen – it’s a simple yet impactful design statement. You can find incredible inspiration for combining plants aesthetically on sites like Pinterest.
Common Mistakes to Avoid
Even seasoned gardeners make mistakes. Here’s how to sidestep the most common pitfalls of an Indoor Herb Garden DIY.
- Overwatering: As mentioned, this is the leading cause of death for indoor plants. Root rot accounts for an estimated 70% of plant losses due to improper hydration. Always check soil moisture before watering.
- Inadequate Light: Herbs are sun-lovers. Placing them too far from a window or in a perpetually dim corner will result in leggy, weak growth and poor flavor. Research suggests that herbs need at least 1500 lumens of light per square foot for optimal growth.
- Lack of Drainage: Pots without drainage holes lead to soggy soil and inevitable root rot. Always ensure your containers have proper drainage.
- Ignoring Pests: A small pest problem can quickly escalate. Regularly inspect leaves (top and bottom) for any unwelcome visitors.
- Not Pruning: While it might feel counterintuitive, regular harvesting and pruning encourage denser, healthier growth. Neglecting to prune leads to spindly, less productive plants.
Maintenance & Storage Tips
Long-term success for your Indoor Herb Garden DIY involves ongoing care and smart storage.
- Rotate Your Plants: To ensure even growth and exposure to light, rotate your pots a quarter turn every week or so.
- Repotting: As your herbs grow, they may outgrow their containers. When you see roots emerging from the drainage holes or the plant looks top-heavy, it's time to repot into a slightly larger container (about 1-2 inches wider).
- Dealing with Yellow Leaves: Yellow leaves often indicate overwatering, nutrient deficiency, or sometimes natural aging. Assess your watering schedule and light conditions first.
- Poor Soil Drainage: If your potting mix seems to retain too much water, amend it with more perlite or coarse sand next time you repot to improve drainage.
- Drying & Storing Herbs: If you have an abundance of fresh herbs, don't let them go to waste! You can hang them to air dry in a cool, dark place, or use a dehydrator. Once dry, store them in airtight containers away from direct sunlight. This preserves their flavor for months, ensuring your Indoor Herb Garden DIY provides culinary delight long after harvest.
Conclusion
Embarking on the journey of an Indoor Herb Garden DIY is more than just growing plants; it's about cultivating a healthier lifestyle, enhancing your culinary skills, and adding a touch of green beauty to your home. By following these data-driven and easy-to-follow steps, you’ve unlocked the potential to enjoy fresh, organic herbs year-round, regardless of your space limitations. Imagine the satisfaction of snipping fresh basil for your pasta, or plucking mint for a refreshing drink – all from your own kitchen! So, are you ready to transform your kitchen into a thriving edible landscape? Grab your pots, choose your favorite herbs, and start planting today! Share your progress with us in the comments below – we’d love to see your green thumb in action!
FAQ
Q1: What are the best herbs for a beginner Indoor Herb Garden DIY?
A1: For beginners, basil, mint, chives, oregano, and thyme are excellent choices. They are generally forgiving, have relatively fast growth rates, and offer versatile culinary uses.
Q2: How often should I water my indoor herbs?
A2: There's no one-size-fits-all answer, as it depends on the herb type, pot size, and environmental conditions. The best practice is to check the soil moisture daily. Water when the top inch of soil feels dry to the touch, ensuring water drains from the bottom.
Q3: Do I really need a grow light for my Indoor Herb Garden DIY?
A3: If your indoor space doesn't receive at least 6-8 hours of direct, unfiltered sunlight daily, a full-spectrum LED grow light is highly recommended. It significantly boosts growth, flavor, and plant health, especially during winter months or in kitchens with limited natural light.
Q4: My herbs are getting leggy and thin; what's wrong?
A4: Leggy growth is almost always a sign of insufficient light. Your herbs are stretching to find more sunlight. Relocate them to a brighter spot, closer to a window, or supplement with a grow light to encourage bushier growth.
Q5: Can I grow herbs from kitchen scraps?
A5: Yes, some herbs can be propagated from cuttings or regrown from scraps. Mint, basil, and rosemary stems can often root in water. Scallion and leek bottoms can also be regrown in water. This is a fun and sustainable way to add to your Indoor Herb Garden DIY!
Q6: What kind of soil is best for an indoor herb garden?
A6: Use a high-quality, well-draining potting mix specifically designed for indoor plants. Look for ingredients like perlite, vermiculite, or coco coir to ensure good aeration and drainage, preventing waterlogging and root rot.
Q7: How do I harvest my herbs without killing the plant?
A7: For most herbs, pinch or snip off the top few sets of leaves or entire stems just above a leaf node. This encourages the plant to branch out, leading to a bushier, more productive plant. Never harvest more than 1/3 of the plant at a time.
You may also enjoy reading about "How to grow tomatoes in pots" for more container gardening adventures. Also, discover a wealth of visual inspiration for your gardening projects on Pinterest!


