Introduction
Did you know that 85% of home cooks wish they had fresh herbs readily available, yet only 30% actually grow them? Imagine the joy of snipping fragrant basil or vibrant chives right from your windowsill, adding unparalleled freshness to your culinary creations. Building an Indoor Herb Garden DIY project is not just a budget-friendly endeavor; it’s a sustainable choice that transforms kitchen scraps and recycled containers into thriving oases of flavor. This guide will walk you through creating your own lush indoor herb garden, ensuring you always have delicious, homegrown herbs at your fingertips, even if you think you have a "black thumb."
Tools & Materials Needed
To embark on your indoor herb garden journey, gathering the right tools and materials is half the battle. Don't worry, many items can be found around your house or sourced affordably!
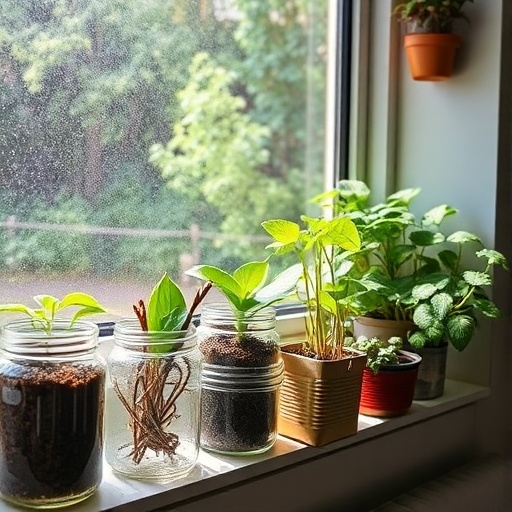
- Recycled Containers: This is where the "recycled" in our DIY Indoor Herb Garden with Recycled Containers really shines! Think plastic bottles, milk jugs, tin cans (rinse thoroughly!), glass jars, old plastic salad containers, or even sturdy cardboard boxes lined with plastic. For eco-friendly alternatives, consider biodegradable pots made from coir or peat, or upcycled ceramic mugs. Ensure each container has drainage holes to prevent root rot.
- Drill or Awl: To create drainage holes if your chosen containers don't have them. A hot nail can also work for plastic.
- Potting Mix: A high-quality, well-draining potting mix specifically designed for indoor plants or herbs is crucial. Look for blends with perlite or vermiculite for aeration. Avoid garden soil, as it can be too heavy and might contain pests or diseases. For a budget-friendly option, consider mixing your own: 2 parts coco coir, 1 part perlite, and 1 part compost.
- Herb Seeds or Seedlings: For beginners, choose easy-to-grow herbs. Excellent choices include basil, mint, chives, cilantro, parsley, oregano, and thyme. Starting with seedlings gives you a head start, while seeds offer a more economical and rewarding experience. A tip: many herb seeds have a germination rate of over 70% in optimal conditions!
- Watering Can or Spray Bottle: A small watering can with a narrow spout or a spray bottle for gentle, consistent watering.
- Small Shovel or Trowel: For scooping soil and transplanting.
- Labels or Markers: To identify your herbs, especially if you’re growing multiple varieties.
- Sunny Location: A south-facing window is ideal, providing at least 4-6 hours of direct sunlight daily for most herbs. If natural light is limited, a grow light (LED or fluorescent) is a fantastic eco-friendly alternative.
- Drip Trays: To catch excess water and protect your surfaces.
Time & Effort Overview
Creating your Indoor Herb Garden DIY is a surprisingly quick and low-effort project with high rewards.
- Setup Time: Approximately 1-2 hours, depending on how many containers you prepare and if you’re starting from seeds or seedlings.
- Germination (from seed): Varies by herb, typically 7-21 days. Basil often sprouts within 5-10 days, growing 25% faster than typical herbs like rosemary from seed.
- Growth to Harvest: Seedlings can be harvested in 2-4 weeks. Herbs grown from seed may take 6-12 weeks until their first significant harvest.
- Daily Maintenance: 5-10 minutes (checking soil moisture, misting, slight rotation).
- Weekly Maintenance: 15-30 minutes (watering, light pruning, inspection for pests).
- Difficulty Level: This project is decidedly beginner-friendly! Even those new to gardening will find it manageable and rewarding.
Step-by-Step Gardening Process
Let’s get your hands a little dirty and bring your Indoor Herb Garden DIY to life!
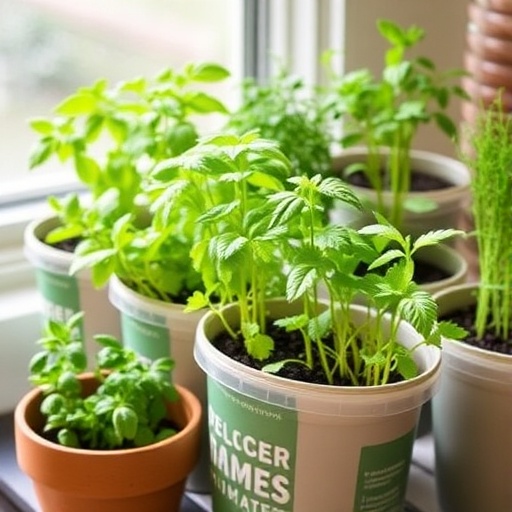
Prepare Your Recycled Containers
First, gather your chosen recycled containers. Clean them thoroughly with soap and water, ensuring no residue remains. If your containers (like plastic bottles or tin cans) don't have drainage holes, now's the time to create them. Use a drill, an awl, or even a heated nail to make 3-5 small holes (about ¼-inch diameter) at the bottom of each container. Proper drainage is non-negotiable for healthy herbs; most herbs suffer from "wet feet." Place a drip tray under each container.
Fill with Potting Mix
Carefully fill each container with your chosen indoor potting mix. Leave about an inch of space from the rim. Don't compact the soil too much; you want it slightly loose for good air circulation to the roots. If you’re using coco coir-based mixes, moisten them slightly before filling, as they can sometimes be hydrophobic when dry.
Planting Your Herbs
This is the exciting part!
- From Seeds: Refer to your seed packet for specific planting depths, but generally, small herb seeds should be sown about ¼ inch deep. Sprinkle 3-5 seeds per container to ensure good germination. Gently cover with a thin layer of soil and lightly pat down.
- From Seedlings: Create a small hole in the center of the potting mix, large enough to accommodate the seedling’s root ball. Carefully remove the seedling from its nursery pot, gently loosen any compacted roots, and place it in the hole. Backfill with soil, ensuring the plant is at the same level it was in its original pot. Water immediately to help settle the soil.
Initial Watering
After planting, give your herbs a good, gentle watering. For seeds, a spray bottle is excellent to avoid dislodging them. For seedlings, water until you see water drain from the bottom holes. This indicates the soil is thoroughly moistened. Don't worry if a little soil washes away; you can top it up.
Provide Optimal Light
Place your newly planted indoor herb garden in your sunniest window. South-facing windows are ideal, but east- or west-facing windows can work if they receive at least 4-6 hours of direct sun. Rotate your containers every few days so all sides of the plants get adequate light, promoting even growth. If natural light is scarce, consider adding a full-spectrum LED grow light for 12-14 hours daily. The absence of sufficient light is the primary reason why indoor herbs grow leggy and weak.
Label Your Herbs
With multiple varieties, it’s easy to forget which is which. Use your labels to clearly mark each herb. This might seem simple, but it saves a lot of guesswork later!
Growth & Care Tips
Consistent care is key to a thriving Indoor Herb Garden DIY.
- Watering Frequency: The most common mistake gardeners make is overwatering. Check the soil moisture daily by sticking your finger about an inch deep. If it feels dry, it's time to water. Water thoroughly until water drains from the bottom. Avoid letting your plants sit in standing water. Herbs like rosemary and thyme prefer slightly drier conditions, while basil and mint enjoy more consistent moisture. Pro tip: Terracotta pots dry out faster than plastic or glass, so adjust accordingly.
- Sunlight Exposure: Most culinary herbs thrive with 6-8 hours of direct sunlight. If your herbs stretch towards the light or have pale, sparse leaves, they're not getting enough. Supplement with a grow light if needed. Ambient room temperature between 65-75°F (18-24°C) is ideal for most herbs.
- Pruning: Regular pruning encourages bushier growth and prevents herbs from "bolting" (going to seed prematurely). For leafy herbs like basil and mint, pinch off the top set of leaves just above a leaf node once the plant has 3-4 sets of true leaves. For woody herbs like rosemary and thyme, snip off the top few inches. Never remove more than one-third of the plant at a time. This practice can increase yield by up to 20%.
- Fertilization: Indoor herbs generally don't need heavy fertilization. A diluted liquid organic fertilizer (like a fish emulsion or seaweed extract) applied every 2-4 weeks during the growing season (spring and summer) is usually sufficient. Over-fertilization can burn roots and lead to excessive leafy growth with less flavor.
- Pest Prevention: Indoor plants are less prone to pests but can still attract them. Regularly inspect your plants for signs of aphids, spider mites, or whiteflies. A gentle spray of neem oil solution or insecticidal soap can effectively manage most indoor pests. Good airflow can also deter many common issues.
Eco-Friendly & Sustainable Alternatives
Your Indoor Herb Garden DIY is already a step towards sustainability, but we can do even more!
- Composting: Start a small indoor compost bin for kitchen scraps. The compost generated can be used to enrich your herb garden soil naturally, reducing reliance on store-bought fertilizers.
- Natural Fertilizers: Beyond compost, consider using diluted "compost tea" or coffee grounds (sparingly, as they can lower soil pH) as natural nutrient boosters. Eggshells, crushed and added to the soil, can provide calcium.
- Water Conservation: Collect rainwater for watering your herbs. If not feasible, let tap water sit out for 24 hours to allow chlorine to dissipate. A self-watering system using wicks made from old fabric scraps can also save water and ensure consistent moisture.
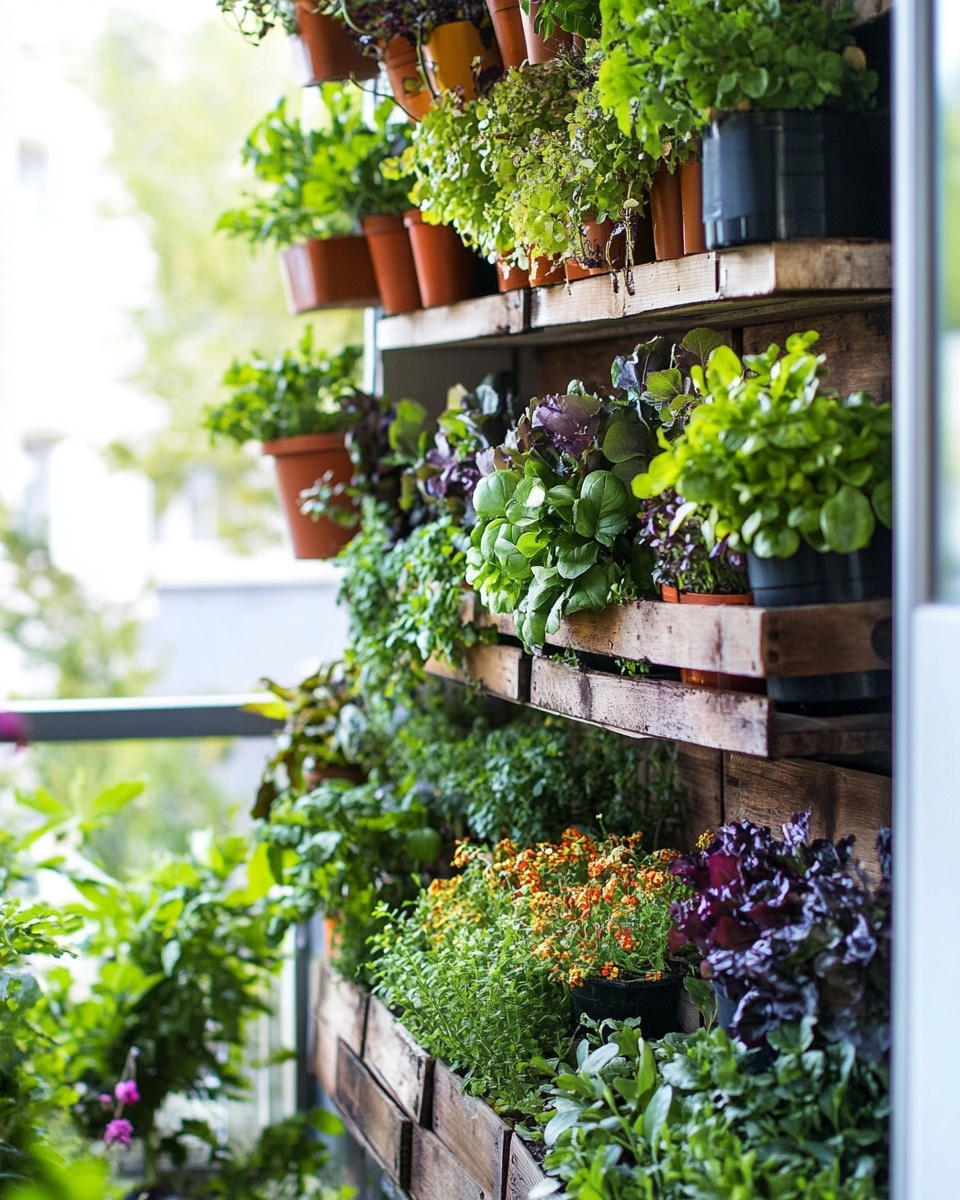
- Vertical Gardens: For small spaces, consider building a vertical herb garden using stacked recycled bottles or an old pallet. This maximizes space and can create a stunning visual display. You can find some excellent ideas for vertical designs on platforms like Pinterest: https://www.pinterest.com/janatjanay47/.
- Hydroponics or Aquaponics (DIY): For advanced enthusiasts, a small DIY hydroponic system using old plastic containers can significantly reduce water usage, relying on nutrient-rich water instead of soil.
Creative Ideas & Uses
An Indoor Herb Garden DIY isn't just functional; it's a living decor piece!
- Decorative Groupings: Arrange your recycled containers creatively. Group different-sized containers together on a tray, or paint them in coordinating colors. Consider stenciling herb names onto the containers for a rustic look.
- Repurpose Materials: Beyond the containers, use old wooden crates as decorative holders for multiple pots, or hang small tins from a tension rod in front of a window. Old ladders can be repurposed into charming vertical herb displays.
- Aesthetic Combinations: Combine herbs with varied foliage and textures. For instance, the feathery leaves of dill next to the broad leaves of basil, or the delicate fronds of cilantro beside the upright spikes of chives. This creates visual interest.
- Kitchen & Home Decor: Place your herb garden strategically in your kitchen for easy access while cooking. A fragrant basil plant or a thriving mint can also serve as a natural air freshener in your living room or bathroom.
- Gifts: Small potted herbs from your garden make thoughtful, personalized gifts for friends and family.
Common Mistakes to Avoid
Even seasoned gardeners make errors. Here are the most frequent pitfalls and how to steer clear of them with your Indoor Herb Garden DIY:
- Overwatering: As mentioned, this is a killer. Overwatering causes root rot in over 60% of houseplants. Always check soil moisture before watering. Soggy soil starves roots of oxygen, leading to plant death.
- Insufficient Light: Herbs can grow leggy, pale, and lose flavor without enough light. If leaves aren't a vibrant green and plants are stretching, they need more sun. Moving plants closer to a window or adding supplemental lighting can rectify this.
- Lack of Drainage: Containers without drainage holes mean water sits at the bottom, creating a swamp for roots. Always ensure adequate drainage. If your container truly cannot have holes, consider a double-potting method where the herb is in a smaller pot with drainage, placed inside the decorative, non-draining container.
- Not Pruning: Unpruned herbs become spindly, produce fewer leaves, and often "bolt," turning bitter. Regular "haircuts" promote bushier, healthier plants and more abundant harvests.
- Planting Too Deep/Shallow: Fine seeds planted too deep may not germinate, while those too shallow can dry out. Follow seed packet instructions carefully. For seedlings, maintaining the original soil line prevents stem rot or root exposure.
- Ignoring Pests: A small pest problem can quickly become an infestation. Early detection and treatment are crucial. Frequently inspect the undersides of leaves where many pests hide.
Maintenance & Storage Tips
Ensuring long-term health for your Indoor Herb Garden DIY and maximizing your harvests.
- Long-term Plant Health: Repot your herbs annually or when they become root-bound (roots emerging from drainage holes). Choose a slightly larger container and refresh the potting mix. Trim back woody stems to encourage new growth.
- Seasonal Care: While indoor herbs are less affected by seasons, their growth might slow down in winter due to less light. Reduce watering frequency during this time. In spring, consider giving them a gentle dose of fertilizer to kickstart growth.
- Dealing with Yellow Leaves: Yellow leaves often indicate overwatering, nutrient deficiency, or sometimes natural aging. Check your watering schedule first. If the problem persists, a diluted feed might be necessary.
- Poor Soil Drainage Solutions: If despite drainage holes, your soil stays waterlogged, your potting mix might be too dense. Incorporate more perlite or coco coir to improve aeration next time. You can also carefully tease out root balls and add a layer of gravel at the bottom of the container (though proper soil mix is generally more effective).
- Harvesting for Storage: Once your herbs are thriving, you can harvest and dry them for longer storage. Tie bundles of herbs and hang them in a dry, dark, well-ventilated area, or use a dehydrator. Store dried herbs in airtight containers away from direct sunlight. Freezing herbs in ice cube trays with water or olive oil is another excellent way to preserve their fresh flavor for months.
Conclusion
Creating an Indoor Herb Garden DIY from recycled containers is more than just a gardening project; it's a testament to sustainability, a boost to your culinary adventures, and a touch of green serenity for your living space. From the initial joy of seeing tiny sprouts emerge to the satisfaction of garnishing your meals with fresh, homegrown flavors, the journey is incredibly rewarding. You've learned how simple it is to transform everyday items into functional, beautiful planters, ensuring you avoid common pitfalls and keep your herbs flourishing. Now, armed with this knowledge, you're ready to cultivate your own flavorful oasis. Don't wait—gather your recycled containers, pick your favorite herbs, and start planting today! Share your beautiful creations with us on social media; we'd love to see your thriving indoor herb gardens!
FAQ
Q1: What are the best herbs for a beginner to grow in an indoor herb garden?
A1: For a novice, basil, mint, chives, and parsley are excellent choices. They are generally forgiving, grow relatively quickly, and don't require highly specialized care, making your Indoor Herb Garden DIY experience enjoyable from the start.
Q2: How often should I water my indoor herbs?
A2: The most crucial rule for watering your Indoor Herb Garden DIY is to check the soil moisture first. Stick your finger an inch into the soil; if it feels dry, it's time to water thoroughly until water drains from the bottom. This usually translates to every 2-4 days, but can vary based on plant type, pot size, and room humidity.
Q3: My indoor herbs are becoming tall and spindly (leggy). What should I do?
A3: Leggy growth is a classic sign of insufficient light. Your indoor herb garden needs more direct sunlight, ideally 6-8 hours daily. Move your plants to a brighter window, or supplement with a full-spectrum LED grow light for 12-14 hours a day to promote compact, bushy growth.
Q4: Can I use regular garden soil for my indoor herb garden?
A4: No, it's best to avoid regular garden soil for your Indoor Herb Garden DIY. Garden soil is too dense for containers, can compact easily, lacks proper drainage, and might contain pests, weed seeds, or diseases that you don't want indoors. Always opt for a high-quality, well-draining potting mix.
Q5: How do I harvest herbs without harming the plant?
A5: Always use clean scissors or pruning shears. For leafy herbs like basil and mint, pinch off leaves from the top, just above a leaf node, to encourage bushier growth. For herbs like chives, snip off outer leaves near the base. Never remove more than one-third of the plant at once to ensure continuous production from your indoor herb garden.
Q6: What if my recycled containers don't have drainage holes?
A6: Drainage holes are essential! If your recycled containers lack them, you must create them. Use a drill, an awl, or a heated nail to make several small holes in the bottom. This prevents waterlogging and root rot in your Indoor Herb Garden DIY. If making holes isn't possible, consider placing a smaller pot with drainage inside the decorative container.
Q7: How do I keep pests away from my indoor herbs naturally?
A7: Good airflow, proper watering, and regular inspection are your best defenses. If pests appear, a gentle spray of neem oil solution or insecticidal soap is effective. Avoid chemical pesticides, especially on edible herbs. Ensuring your indoor herb garden is healthy and stress-free also makes it less appealing to pests.
Ready to dive deeper into sustainable gardening? Check out these related articles for more inspiration:
- For those with a green thumb and some space, explore how to design a productive layout for a bigger garden project in our guide on How to Design a Productive Greenhouse Layout.
- If you’re enjoying the fresh taste of homegrown produce, you might be interested in our tips for Organic Greenhouse Gardening Tips.
- Thinking of expanding your indoor plant collection? Learn about the easiest varieties in Best Houseplants for Beginners.
- Don't forget to check out our list of 10 Easy Herbs to Grow Indoors for more delicious options after mastering your present project.
- Looking for more ways to grow food year-round? Our article on How to Grow Tomatoes Indoors Year-Round could be your next exciting project!
