Introduction
Ever found yourself staring at vibrant garden catalogs or beautiful garden photos online, only to feel a pang of intimidation? Many aspiring gardeners believe cultivating a stunning floral display requires a green thumb passed down through generations or countless hours of intricate care. But what if I told you that creating a thriving flower garden, even if you’ve never touched a trowel, is entirely within your reach? It’s true! There are countless flowers easy to grow that promise abundant beauty with minimal fuss. This guide is dedicated to demystifying gardening, proving that anyone can enjoy the simple pleasure of watching a seed transform into a glorious bloom. Let’s explore how easy it can be to welcome nature’s artistry into your life.
Tools & Materials Needed
Starting your floral journey doesn’t require an arsenal of expensive equipment. With a few basic items, you’ll be well-equipped to nurture your chosen flowers easy to grow.
- Hand Trowel: Essential for digging small holes, transplanting seedlings, and breaking up soil. Look for one with a sturdy handle and a durable metal blade.
- Gardening Gloves: Protect your hands from dirt, thorns, and blisters. Opt for comfortable, breathable options.
- Watering Can or Hose with a Gentle Nozzle: For consistent, even watering without dislodging seeds or delicate seedlings. A watering can is perfect for pots or small beds.
- Quality Potting Mix or Garden Soil: The foundation of healthy plants. For container gardening, a well-draining potting mix is crucial. For garden beds, consider amending your existing soil with compost to improve fertility and texture.
- Eco-friendly tip: You can often find locally sourced compost or create your own from kitchen scraps and yard waste. This not only enriches your soil but reduces landfill waste.
- Seeds or Starter Plants: For beginners, starter plants (small plants already growing) are often easier than seeds, offering a head start. If starting from seed, choose reputable brands.
- Pots or Planters (if container gardening): Ensure they have drainage holes to prevent waterlogging. Terracotta pots look classic and allow roots to breathe, while plastic pots are lighter and retain moisture longer.
- Budget-friendly tip: Repurpose old containers like food-grade plastic tubs (drill drainage holes!), tin cans, or even sturdy laundry baskets.
- Fertilizer (Optional but recommended): A slow-release granular fertilizer or a balanced liquid feed can boost growth. Look for organic options where possible.
Time & Effort Overview
Planting flowers easy to grow is a rewarding endeavor that won’t demand your every waking moment. The initial planting phase might take an afternoon, depending on the number of plants or seeds. For many beginner-friendly varieties, you can expect to see germination within 7-14 days if starting from seed, and observable growth in just a few weeks.
Compared to more demanding plants like orchids or intricate rose varieties, the flowers we’ll discuss are significantly less labor-intensive. Think of it as a weekly check-in rather than a daily chore. Most of these easy-care bloomers require approximately:
- Planting Time: 1-2 hours for a small to medium-sized bed or a few pots.
- Weekly Maintenance: 15-30 minutes for watering, light deadheading, and checking for pests.
- Overall Difficulty: Beginner-friendly! These plants are incredibly forgiving, making them ideal for those new to gardening. They’re designed to thrive with minimal intervention, allowing you to enjoy the process without constant worry.
Step-by-Step Gardening Process
Ready to get your hands dirty? Let’s walk through the simple steps to bring your garden dreams to life with flowers easy to grow.
Step 1: Choose Your Spot Wisely
Before you even touch a seed, observe your chosen planting area. Most flowering plants need at least 6 hours of direct sunlight daily. Is your balcony sunny? Does a particular spot in your yard soak up the morning rays? Understanding sunlight is paramount. Consider where your chosen flowers will thrive best.
Step 2: Prepare the Soil
Good soil is the bedrock of a healthy garden. If planting in a garden bed, loosen the soil to a depth of about 6-8 inches. Mix in some compost or well-rotted manure; this enriches the soil, improves drainage, and provides vital nutrients. For containers, use a fresh, high-quality potting mix. This ensures your plants have the best possible start.
Step 3: Planting Seeds or Starter Plants
For Seeds:
Read the seed packet carefully! It will tell you how deep to plant the seeds and how far apart. Generally, a good rule of thumb is to plant seeds at a depth equal to about twice their diameter. Cover lightly with soil and gently water. Patience is key here; germination takes time.
For Starter Plants:
Dig a hole slightly wider and as deep as the plant’s root ball. Gently remove the plant from its container, loosening any circling roots at the bottom. Place the plant in the hole so that the top of the root ball is level with the surrounding soil. Backfill with soil, gently patting around the base of the plant. Water thoroughly. This helps settle the soil and reduce transplant shock. Don’t be afraid to give those roots a little massage – it encourages them to spread!
Step 4: Initial Watering
After planting, give your new garden a good, thorough watering. This helps settle the soil around the roots (or seeds) and eliminates air pockets. For seeds, a gentle shower is best to avoid washing them away. Always water the soil, not just the foliage.
Step 5: Mulch (Optional but Recommended)
Apply a 1-2 inch layer of mulch around your plants, keeping it a few inches away from the stems. Mulch helps retain soil moisture, suppress weeds, and regulate soil temperature. Organic mulches like wood chips or straw will also break down over time, adding nutrients to the soil.
Step 6: Initial Care and Observation
For the first few weeks, keep a close eye on your new plantings. Water regularly, especially during dry spells. Look for signs of growth, and also watch out for any early pests or diseases. Early detection makes treatment much easier. Celebrate those first sprouts! It’s an incredible feeling to witness life emerge from the soil.
Growth & Care Tips
Once your flowers easy to grow are established, a consistent (but not overbearing!) care routine will ensure they flourish.
Watering Frequency
This is often where new gardeners go wrong. The key is consistency, not excess. Check the soil moisture daily by sticking your finger about an inch into the soil. If it feels dry, it’s time to water. Most flowers prefer deep, infrequent watering rather than shallow, frequent sprinkles. This encourages roots to grow deeper, making the plant more resilient.
- Data-backed tip: Soil moisture sensors can be a great investment for precision, especially in varied climates. Overwatering is a common killer of young plants, leading to root rot.
Sunlight Exposure
As mentioned, most flowering plants yearn for at least 6 hours of direct sun. Some, however, prefer partial shade, especially in hotter climates, which can prevent scorching. Always match the plant’s needs to your garden’s conditions.
Pruning and Deadheading
- Deadheading: This is the act of removing spent flowers. It’s crucial for many annuals, as it signals the plant to produce more blooms rather than putting energy into seed production. Simply snip off the faded flower head just above a set of healthy leaves.
- Pruning: For bushier plants, occasional pruning can encourage new growth and a denser form. If a plant gets leggy (stretchy with few leaves), a quick trim can rejuvenate it.
Fertilization
While good soil provides initial nutrients, blooming plants are heavy feeders. A balanced liquid fertilizer applied every 2-4 weeks or a slow-release granular fertilizer mixed into the soil at planting can significantly enhance bloom production. Look for fertilizers with an NPK ratio (Nitrogen-Phosphorus-Potassium) that’s higher in phosphorus (the middle number) for flowers.
Pest and Disease Prevention
Healthy plants are naturally more resistant to pests and diseases. Ensure good air circulation, avoid overwatering, and always inspect new plants before introducing them to your garden. If you spot pests like aphids, try a strong spray of water or an insecticidal soap as a first line of defense.
- Scientific Insight: Neonicotinoids, a class of systemic pesticides, can persist in plants and harm pollinators. Opt for organic, targeted solutions whenever possible.
Eco-Friendly & Sustainable Alternatives
Gardening with consciousness not only benefits the planet but often leads to healthier, more resilient plants. Embrace these sustainable practices for your flowers easy to grow.
Composting for Richer Soil
Composting kitchen scraps and yard waste creates a nutrient-dense amendment for your soil, reducing the need for chemical fertilizers and decreasing landfill waste. A steady supply of compost means healthier, more robust plants that are better equipped to handle environmental stresses.
Water Conservation Techniques
- Drip Irrigation/Soaker Hoses: These systems deliver water directly to the plant roots, minimizing evaporation and waste compared to overhead sprinklers.
- Rain Barrels: Collect rainwater from your roof to use for irrigation. Rainwater is free of chlorine and other chemicals often found in tap water, making it excellent for plants.
- Mulching: As mentioned, mulch significantly reduces water evaporation from the soil, meaning you water less often.
- Watering in the Early Morning: This allows water to penetrate the soil before the heat of the day causes excessive evaporation, reducing fungal issues.
Planting Natives & Pollinator-Friendly Choices
Choose native plant species that are adapted to your local climate and soil conditions, requiring less water and fewer interventions. Many easy-to-grow flowers are also fantastic for pollinators. Sunflowers, zinnias, and marigolds are all attractive to bees and butterflies, contributing to crucial ecosystem health. You can find more information on local native plants through cooperative extension offices.
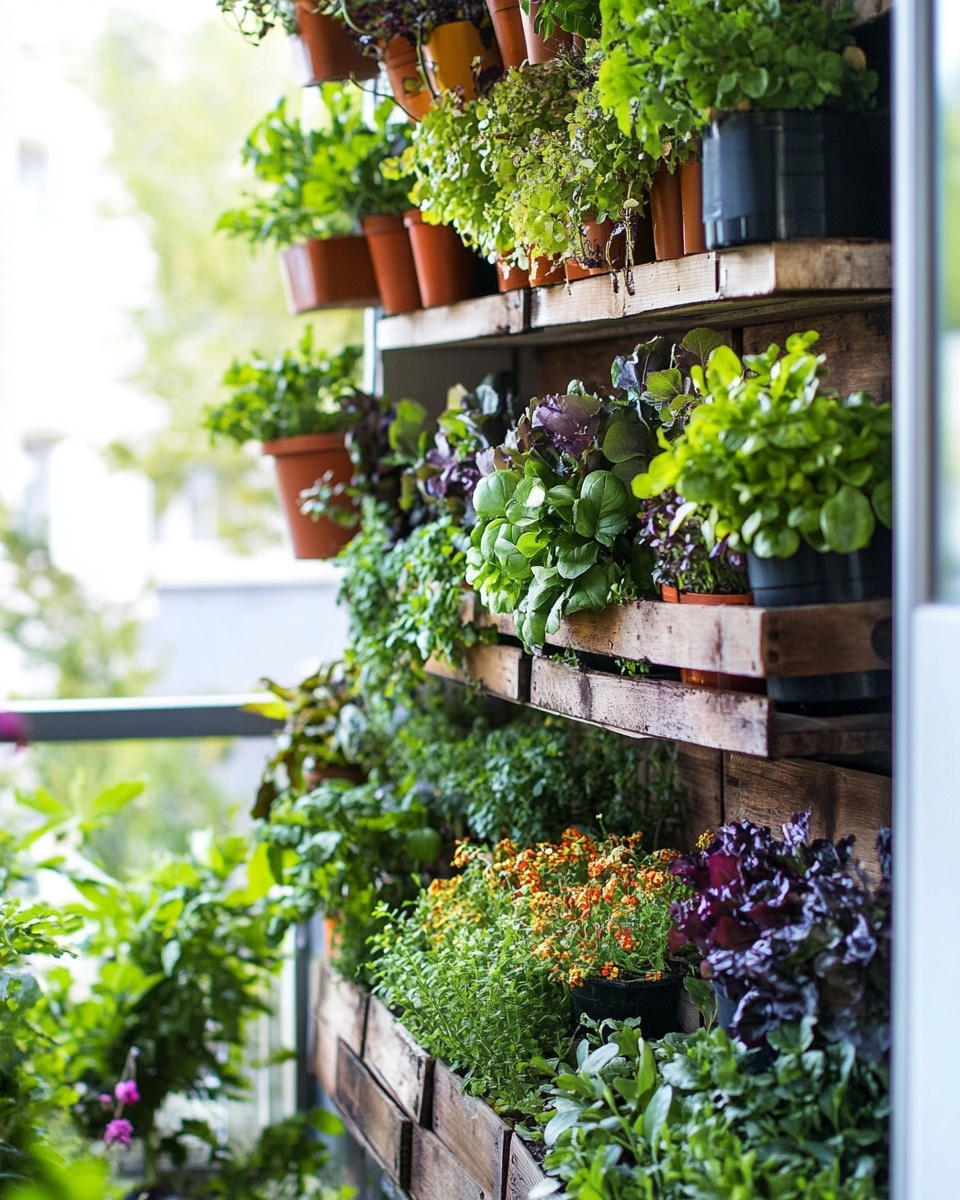
Small Spaces and Vertical Gardens
Don’t have a sprawling yard? No problem! Many flowers easy to grow thrive in containers, making them perfect for balconies, patios, or even windowsills.
- Balcony Gardens: Herbs and compact flowers do wonderfully in pots. You may also enjoy reading:
- Vertical Gardens: Utilize vertical space with hanging planters or tiered garden structures. This is an excellent solution for maximizing growing area in urban environments. You may also enjoy reading:
Creative Ideas & Uses
Beyond adding a splash of color, your flowers easy to grow offer a myriad of creative possibilities.
Decorating with Your Blooms
- Fresh Cut Bouquets: Many easy-to-grow flowers like zinnias, cosmos, and sunflowers make stunning cut flowers. Snip them in the morning after the dew has dried and arrange them in vases to brighten your indoor spaces.
- Dried Flowers: Certain varieties, like celosia or strawflowers, dry beautifully and can be used in wreaths, potpourri, or everlasting arrangements. Hang them upside down in a cool, dark place for best results.
- Edible Flowers: Some blooms are not only pretty but delicious! Pansies, nasturtiums, and calendula can add a vibrant, delicate touch to salads, desserts, or drinks. Always ensure flowers are organically grown and positively identified before consuming.
- Gifts: A small potted flower or a hand-tied bouquet from your garden makes a thoughtful, personalized gift.
Landscaping Inspirations
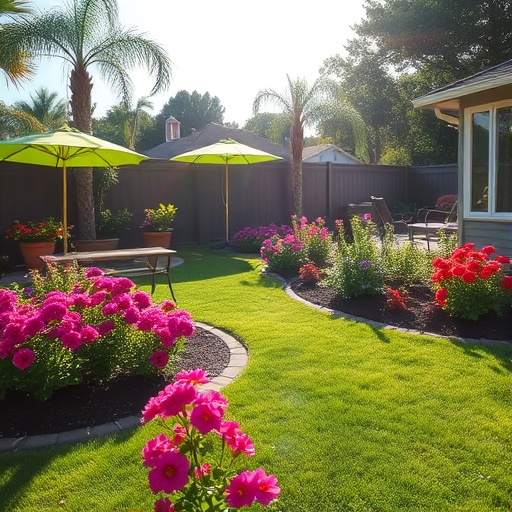
Integrate your easy-to-grow beauties into your existing landscape or design new beds.
- Border Plants: Use low-growing, vibrant annuals like impatiens or petunias to line walkways or define garden beds.
- Container Groupings: Create dynamic focal points by grouping pots of varying sizes and heights. Combine flowers with different textures and colors for visual interest.
- Pollinator Gardens: Design a specific area with a mix of blooming plants that will attract bees, butterflies, and hummingbirds. This creates a lively, beautiful ecosystem right in your backyard.
- Design Tip: When combining plants, consider their mature size, light requirements, and bloom times to ensure continuous color and healthy growth.
Common Mistakes to Avoid
Even with flowers easy to grow, missteps can occur. Being aware of these common errors can save you frustration and lead to greater gardening success.
- Overwatering (or Underwatering): The most frequent mistake! Too much water suffocates roots, leading to rot. Too little causes dehydration. Expert Insight: “More plants die from overwatering than underwatering,” says a horticultural expert from the Royal Horticultural Society. Always check soil moisture before adding more water.
- Ignoring Soil Quality: Planting in poor, compacted soil is like trying to build a house on sand. Plants struggle to establish roots and absorb nutrients. Reasoning: Healthy soil provides aeration, water retention, and essential nutrients. Without it, even the toughest plants will fail to thrive.
- Improper Sunlight Assessment: Placing a sun-loving plant in shade or a shade-lover in scorching sun guarantees a sad plant. Data Point: Studies show plants placed in incorrect light conditions can see up to a 50% reduction in bloom production. Observe your garden’s light patterns throughout the day.
- Planting Too Close Together: While tempting to get a full look immediately, overcrowding leads to poor air circulation, increased disease risk, and competition for resources. Reasoning: Plants need space to grow, spread roots, and receive adequate light.
- Forgetting to Deadhead: For many annuals, failing to remove spent blooms signals the plant to stop producing new flowers and focus on seed production, prematurely ending its blooming season. Tip: Make deadheading a regular part of your garden routine.
- Neglecting Pest and Disease Checks: Small problems can quickly escalate. Ignoring early signs of trouble allows pests and diseases to take hold, potentially spreading to other plants. Recommendation: Daily brief checks can save a lot of heartache.
Maintenance & Storage Tips
Ensuring the longevity of your gardening efforts and preparing for future seasons are crucial aspects of successful gardening.
Long-Term Plant Health
- Seasonal Fertilization: Depending on your climate and plant type, applying a slow-release granular fertilizer at the beginning of the growing season can provide ongoing nutrients. For container plants, a weaker liquid feed every few weeks is beneficial.
- Pest and Disease Management: Continue your vigilant checks. Organic pest control methods like neem oil or insecticidal soaps can address issues without harming beneficial insects.
- Support for Tall Plants: Some of the taller flowers easy to grow, like sunflowers or cosmos, may benefit from staking to prevent them from flopping over in wind or heavy rain.
- Winterizing (for Perennials): If you’ve chosen easy-to-grow perennials (flowers that come back year after year), research their specific winterizing needs. This might involve cutting back foliage, mulching the root zone, or in colder climates, lifting bulbs for indoor storage.
Seed Storage for Next Season
If you’ve allowed some of your easy-to-grow varieties to go to seed, you can collect them for the following year.
- Harvest Seeds: Wait until the seed pods are completely dry and brown.
- Clean Seeds: Remove any chaff or remaining plant material.
- Dry Thoroughly: Ensure seeds are completely dry to prevent mold. Spread them on a paper towel in a cool, dry place for several days.
- Store: Place dried seeds in airtight containers (envelopes, glass jars, plastic bags) in a cool, dark, and dry spot. Label them with the plant name and date.
Solutions for Common Issues
- Yellow Leaves: Can indicate overwatering, nutrient deficiency (especially nitrogen), or poor drainage. Check soil moisture first.
- Poor Soil Drainage: If water puddles after rain, your soil is likely too heavy. Amend with compost, perlite, or grit to improve structure. For containers, ensure drainage holes aren’t blocked.
- Lack of Blooms: Often due to insufficient sunlight, over-fertilization with nitrogen (which promotes leafy growth over flowers), or a need for deadheading. Reassess light and feeding habits.
Conclusion
Embarking on a gardening journey, especially with flowers easy to grow, is one of the most rewarding experiences you can undertake. It’s a practice in patience, observation, and delight. From the first sprout to the full bloom, you’ll witness nature’s incredible resilience and beauty firsthand. Remember, gardening is a continuous learning process, and every success, and even every setback, offers valuable lessons. Don’t let perceived challenges hold you back; the joy of nurturing life and adding vibrant color to your surroundings is truly unparalleled.
So, what are you waiting for? Pick a few of these forgiving flowers, grab some basic tools, and start digging today! Share your progress with us – we love seeing what you grow! Post photos of your blooming beauties on social media using #EasyGrowFlowers and tag us! You can also share your garden stories and connect with other enthusiasts on places like Pinterest: https://www.pinterest.com/janatjanay47/.
You may also enjoy reading:
- Best Houseplants for Beginners
- Easy Indoor Gardening Setup for Beginners
- DIY Indoor Herb Garden for Small Kitchens
FAQ
Q1: What are the absolute easiest flowers to grow from seed for a complete beginner?
A1: For a complete beginner, some of the absolute easiest flowers easy to grow from seed include Marigolds, Zinnias, and Cosmos. These varieties germinate quickly, grow vigorously, and produce abundant blooms with minimal effort. They are very forgiving of minor gardening mistakes.
Q2: How much sun do most easy-to-grow flowers need?
A2: Most standard flowers easy to grow thrive in full sun, which means they require at least 6 hours of direct sunlight per day. However, always check the specific plant tag or seed packet, as some varieties prefer partial shade, especially in very hot climates.
Q3: Can I grow easy-to-grow flowers in pots or containers?
A3: Absolutely! Many flowers easy to grow are perfectly suited for container gardening. Varieties like Petunias, Impatiens, Marigolds, and Nasturtiums do exceptionally well in pots, hanging baskets, or window boxes. Just ensure the containers have good drainage holes.
Q4: How often should I water my newly planted easy flowers?
A4: During the initial planting phase, and for the first few weeks, it’s crucial to keep the soil consistently moist but not waterlogged. Check the soil daily by poking your finger an inch deep; if it feels dry, it’s time to water. Once established, watering can often be reduced to every few days, depending on weather and plant needs.
Q5: What kind of soil is best for easy-to-grow flowers?
A5: While these flowers are forgiving, starting with good soil dramatically increases success. For garden beds, aim for well-draining soil enriched with compost. For containers, always use a high-quality potting mix formulated for flowering plants, as it provides optimal drainage and aeration.
Q6: Do I need to fertilize my easy-to-grow flowers? If so, how often?
A6: While not strictly mandatory for all varieties, fertilizing will generally lead to more vigorous growth and abundant blooms. For most easy-to-grow flowers, especially in containers, a balanced liquid fertilizer applied every 2-4 weeks during the growing season is beneficial. For garden beds, a slow-release granular fertilizer applied at planting time often suffices.
Q7: What if my easy flowers aren’t blooming as much as expected?
A7: Several factors can cause a lack of blooms in flowers easy to grow. The most common culprits are insufficient sunlight, over-fertilization with nitrogen (which encourages leafy growth at the expense of flowers), or simply forgetting to deadhead (remove spent blooms). Ensure they get enough sun and consider a fertilizer higher in phosphorus.
