Introduction
Ever wondered if you could cultivate a thriving green oasis right inside your home, even if you’ve never successfully kept a succulent alive? Many aspiring gardeners believe that a green thumb is a prerequisite for successful indoor gardening, but I’m here to tell you that’s simply not true. With the right approach and a little patience, anyone can transform their living space into a vibrant haven of growing plants. This comprehensive guide will demystify the process, providing you with everything you need for an easy indoor gardening setup, transforming your home into a lush, breathable sanctuary. Forget complex horticulture; we’re diving into simple, actionable steps that guarantee success, even for the absolute beginner. Ready to discover the joy of harvesting your own fresh herbs and vegetables, right from your kitchen counter?
Tools & Materials Needed
Embarking on your indoor gardening journey doesn’t require a massive investment. In fact, many of the essentials might already be lurking in your home! Here’s a detailed list of what you’ll need:
- Growing Medium: Skip the traditional garden soil for indoor plants. A high-quality, well-draining potting mix is crucial. Look for mixes specifically designed for containers, often containing perlite or vermiculite to improve aeration and drainage. For an eco-friendly alternative, consider using coco coir, a sustainable byproduct of coconut processing, known for its excellent water retention and aeration properties. Peat-free options are also gaining popularity for their environmental benefits.
- Containers: The options are endless! Terracotta pots are classic, offering good breathability, but they dry out quickly. Plastic pots retain moisture longer. Fabric grow bags are fantastic for root aeration and preventing root circling. For budget-friendly options, repurpose plastic food containers (with drainage holes added!), old mugs, or even tin cans. Just ensure any container has drainage holes to prevent waterlogging, which is a common killer of indoor plants.
- Seeds or Seedlings: For beginners, starting with established seedlings can offer a quicker path to success and a confidence boost. However, seeds are more economical and offer a wider variety. Consider easy-to-grow options like basil, mint, lettuce, spinach, or cherry tomatoes.
- Grow Lights (Optional but Recommended): While a sunny south-facing window can suffice for some low-light plants, most edibles and flowering plants will thrive under artificial grow lights. LED grow lights are energy-efficient and come in various spectrums, with full-spectrum options being ideal for general plant growth. A simple clamp light with a full-spectrum LED bulb can be a great budget-friendly starter.
- Watering Can/Spray Bottle: A small watering can with a narrow spout allows for precise watering without disturbing delicate seedlings. A spray bottle is excellent for misting foliage, especially for humidity-loving plants.
- Hand Trowel/Small Shovel: Essential for scooping soil and transplanting.
- Pruning Shears/Scissors: For harvesting and light pruning. Clean, sharp blades prevent disease transmission.
- Labels/Plant Markers: Essential for remembering what you’ve planted, especially if you’re growing multiple varieties from seed. Craft sticks or repurposed plastic tags work perfectly.
- Fertilizer: A balanced liquid fertilizer, fed at half strength, can provide essential nutrients once your plants are established. Look for organic options if you plan to eat your harvest.
Time & Effort Overview
Don’t let the idea of indoor gardening intimidate you. This isn't a full-time job! The beauty of indoor setups, especially for beginners, is their relatively low demand once established.
- Initial Setup: Expect to spend about 1-2 hours gathering materials, preparing your potting mix, and planting your seeds or seedlings. This is a one-time effort.
- Daily Maintenance: Depending on your planting choices, you’ll spend approximately 5-10 minutes per day checking on your plants, watering if needed, and observing for any signs of pests or disease. This quick check can save a lot of trouble down the line.
- Weekly Maintenance: Around 30-60 minutes per week might be dedicated to more thorough watering, fertilizing (if necessary), light pruning, and rotating plants for even light exposure.
- Growth Rate: Many common indoor herbs like basil and mint can be ready for their first harvest in as little as 3-4 weeks, growing roughly 25% faster than typical outdoors herbs due to controlled environments. Leafy greens like lettuce can offer continuous harvests within a similar timeframe.
- Difficulty Level: This setup is firmly in the beginner-friendly category. We’re focusing on resilient and forgiving plants that don’t require complex care routines.
Step-by-Step Gardening Process
Let's break down how to get your indoor garden thriving, step by easy step.
Step 1: Choose Your Plants Wisely
Before you even touch soil, decide what you want to grow. For your easy indoor gardening journey, focus on beginner-friendly options. Herbs like basil, mint, chives, and parsley are excellent. Leafy greens such as lettuce, spinach, and arugula are also fantastic. Small varieties of cherry tomatoes or dwarf peppers can also work with adequate light. Consider your space, light availability, and what you’ll genuinely use in your kitchen.
Step 2: Prepare Your Containers
Ensure your chosen containers have adequate drainage holes. If not, carefully drill or poke several holes in the bottom. This is non-negotiable for healthy plants! Cover the holes with a piece of coffee filter or mesh tape to prevent soil from escaping while still allowing water to drain.
Step 3: Mix and Fill Your Potting Medium
Fill your containers with your selected potting mix, leaving about an inch or two from the rim. Don't compact the soil too tightly; roots need room to breathe. If using coco coir, hydrate it according to package instructions first. Here's a tip: pre-moisten your potting mix slightly before adding it to pots. This helps ensure even moisture distribution.
Step 4: Plant Your Seeds or Seedlings
If planting seeds, follow the depth guidelines on the seed packet. Generally, tiny seeds are best surface-sown and lightly covered with soil, while larger seeds might need to be planted deeper. If you're using seedlings, gently remove them from their nursery pots, being careful not to disturb the root ball too much. Dig a small hole, place the seedling in, and backfill with soil, gently firming around the base. Don't worry if a few leaves get dirty; they'll clean up.
Step 5: Initial Watering
After planting, give your containers a good, thorough watering until water drains from the bottom. This helps settle the soil around the seeds or roots. For seeds, a gentle misting might be better to avoid dislodging them.
Step 6: Provide Adequate Light
This is where grow lights can be a game-changer for effective indoor gardening. Position your grow light a few inches above your seedlings, adjusting it as they grow. Most plants need 12-16 hours of light per day for optimal growth. If relying on natural light, place your plants in the sunniest window possible, ideally south-facing in the Northern Hemisphere. Rotate your plants weekly to ensure even growth.
Step 7: Label Your Plants
Seriously, don’t skip this! You might think you'll remember what that tiny sprout is, but trust me, after a few weeks, all new sprouts look similar. Clearly label each pot with the plant type and planting date.
Growth & Care Tips
Consistent care is key to a thriving indoor garden.
- Watering Frequency: This is often the trickiest part for beginners. The golden rule is to water when the top inch of soil feels dry to the touch. Stick your finger in! Overwatering is a leading cause of indoor plant demise, causing root rot. Underwatering leads to wilting. The frequency will depend on your plant type, pot size, and ambient humidity. On average, you might water every 3-7 days. During warmer months or under grow lights, plants may need more frequent watering.
- Sunlight Exposure: As mentioned, 12-16 hours under grow lights or a bright, sunny window is generally ideal. Observe your plants; leggy, stretching plants indicate insufficient light, while scorched leaves suggest too much intense light. Basil, for example, thrives on at least 6 hours of direct sun daily, while mint tolerates slightly less.
- Pruning for Bushier Growth: Don’t be afraid to prune! For herbs like basil and mint, pinching off the top few sets of leaves encourages bushier growth and prevents them from bolting (going to seed). This simple act boosts your yield significantly. Prune leafy greens by removing outer leaves, allowing the inner ones to continue growing.
- Fertilization: Most potting mixes contain a starter dose of nutrients, but these get depleted over time, usually after 4-6 weeks. Begin fertilizing with a balanced liquid fertilizer at half strength every 2-4 weeks. For edible plants, an organic fish emulsion or seaweed extract is excellent. Remember the scientific fact: plants require a steady supply of nitrogen, phosphorus, and potassium (NPK) for robust growth, along with micronutrients.
- Pest Prevention: Indoor plants are less susceptible to pests than outdoor ones, but they can still occur. Inspect your plants regularly for tiny bugs (aphids, spider mites) or sticky residue on leaves. A simple solution of neem oil (diluted per instructions) or insecticidal soap can effectively treat most common indoor pests if caught early. Maintaining good air circulation can also deter pests.
Eco-Friendly & Sustainable Alternatives
Making your indoor gardening practices more sustainable benefits both your plants and the planet.
- Composting: Start a small indoor compost bin for kitchen scraps like fruit and vegetable peels. The "black gold" you produce is an incredible, nutrient-rich amendment for your potting mix, reducing waste and enriching your soil.
- Natural Fertilizers: Beyond your own compost, consider options like worm castings, coffee grounds (use sparingly and balance pH), or banana peel "tea." These are natural, gentle, and packed with plant-beneficial nutrients.
- Water Conservation: Collect rainwater if feasible, or reuse water from washing vegetables (as long as it's not soapy). Grouping plants together can increase local humidity, reducing individual plant water needs.
- Repurposed Containers: As mentioned earlier, get creative with old food containers, milk jugs, or even discarded plastic bottles as planters. Sustainability starts with reducing, reusing, and recycling.
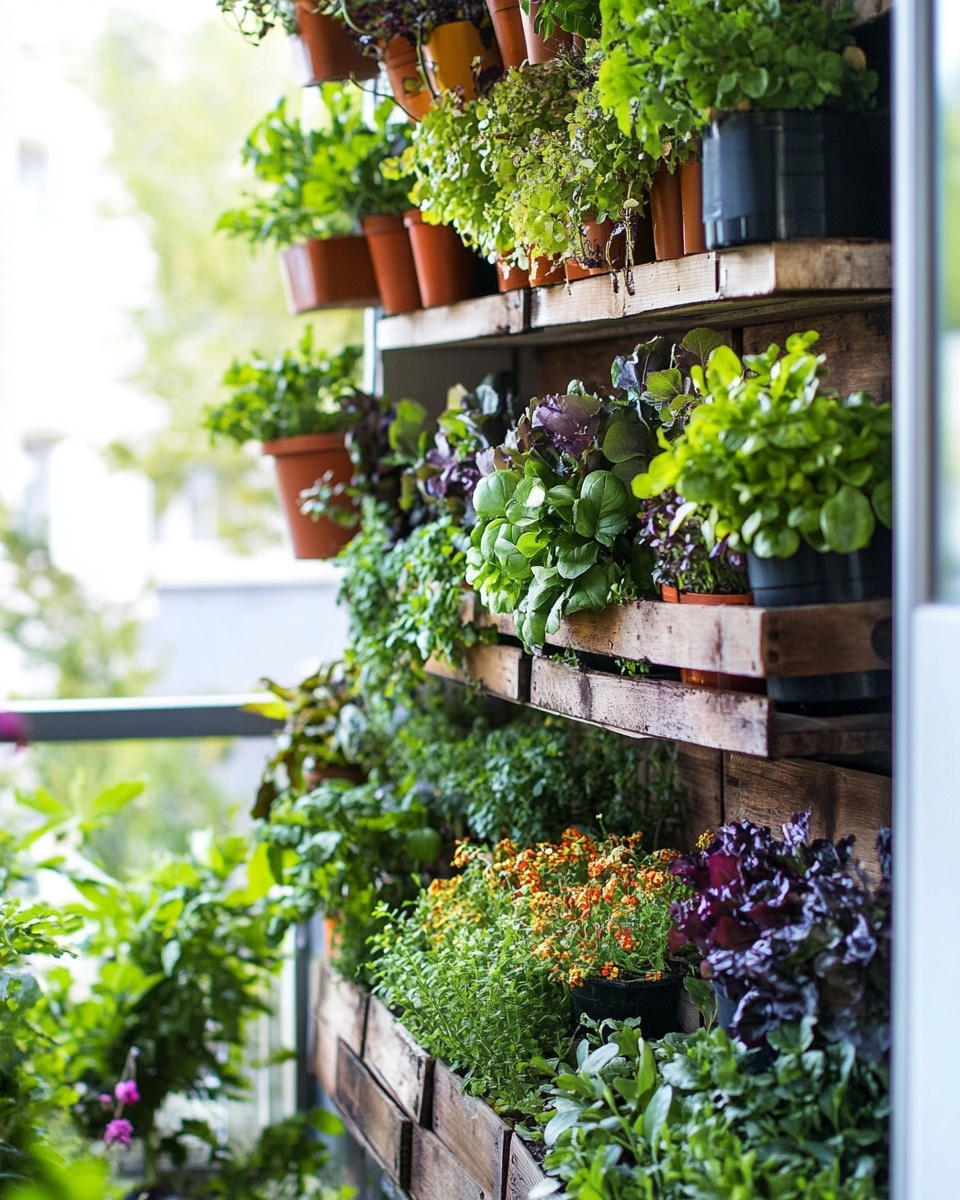
- Vertical Gardens for Small Spaces: If floor space is limited, a vertical garden system is an ingenious solution. These can range from simple tiered shelves to more elaborate hanging pockets or wall-mounted systems, allowing you to grow a surprising amount of produce in a small footprint. Balcony gardens, while technically outside, leverage small urban spaces similar to indoor setups.
Creative Ideas & Uses
Your indoor garden isn’t just for food; it's also a source of beauty and creativity!
- Decorating with Plants: Use plants to enhance your home’s aesthetic. Group different plant sizes and textures for visual interest. Hanging plants add dimension and save counter space. Consider stylish ceramic pots or woven baskets as decorative elements.
- Repurpose Garden Materials: Old watering cans can become charming decorative pieces. Use dried herbs from your garden to create fragrant potpourri or decorative sachets.
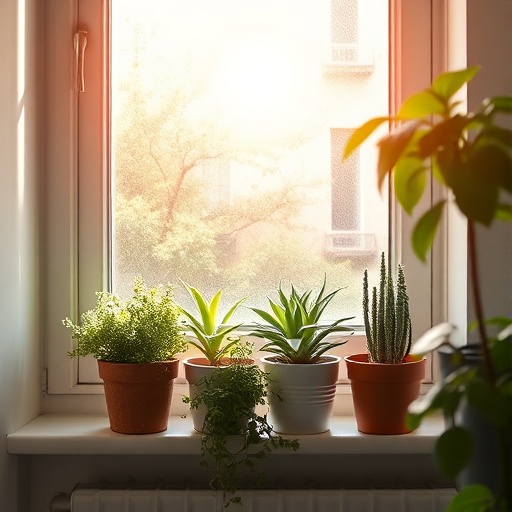
- Combine Plants Aesthetically: Create miniature plant compositions. A tall rosemary plant might be nestled next to trailing ivy, with colorful pansies at the base (if you have enough light for flowers indoors). Think about varying heights, leaf shapes, and textures for a visually appealing display that complements your home décor. Placing your edible herbs in decorative pots on your kitchen windowsill not only provides easy access but also adds a fresh, inviting touch to your culinary space.
Common Mistakes to Avoid
Even with the best intentions, new gardeners can make a few common missteps. Knowing them helps you avoid them!
- Overwatering: This is arguably the most common indoor gardening error. Excess water saturates the soil, suffocating roots and leading to root rot. Studies show that overwatering accounts for approximately 60% of houseplant deaths among beginners. Always check the soil moisture before watering.
- Insufficient Light: Plants trying to survive in low light will become leggy, pale, and produce very little. Don't underestimate a plant's need for direct light, especially for edibles. If your plant is stretching towards the window, it's begging for more light.
- Ignoring Drainage: Pots without drainage holes are a recipe for disaster. Standing water at the bottom of the pot creates an anaerobic environment where roots cannot thrive.
- Planting too Deeply/Shallowly: For seeds, planting too deep prevents light absorption and emergence, while too shallow can lead to drying out. For seedlings, planting at the same depth as their nursery pot is usually best, unless specifically instructed otherwise (like tomatoes, which benefit from deeper planting).
- Neglecting Pest Checks: Pests can quickly decimate an indoor garden if left unchecked. A small infestation can quickly become a major problem. Make daily visual checks a habit; it takes mere moments.
- Fertilizing Too Soon or Too Much: While nutrients are vital, over-fertilizing can burn roots. Wait until plants are established and follow fertilizer instructions precisely, erring on the side of less for new gardeners.
Maintenance & Storage Tips
Ensuring the longevity of your indoor gardening efforts involves thoughtful maintenance and smart storage.
- Long-term Plant Health: Regularly inspect your plants. Yellowing leaves can indicate overwatering, nutrient deficiency, or pest issues. Brown, crispy leaves usually mean underwatering or low humidity. Addressing these signs promptly can save your plant. Rotate your plants every week or two to ensure all sides get exposure to light, leading to symmetrical growth.
- Pruning for Production: For herbs like basil, don't just harvest leaves; "pinch back" the plant by removing the central stem above a set of leaves. This encourages two new stems to grow, resulting in a bushier plant and more harvestable material.
- Seed Storage: If you bought more seeds than you planted, store them in a cool, dry, dark place in an airtight container. A sealed jar in the refrigerator can extend their viability for years. Proper seed storage is key to success next growing season.
- Seasonal Care: While indoor gardening largely escapes seasonal extremes, some plants might benefit from altered care in winter. Reduced daylight hours mean plants may need less water and fertilizer. If using grow lights, simply maintain your consistent light schedule. Ensure your plants aren't near drafty windows or heat vents, which can cause excessive drying.
Conclusion
Embarking on an easy indoor gardening setup is more than just growing plants; it's about cultivating a deeper connection with nature, enjoying fresh produce, and adding a touch of vibrant life to your home. We've covered everything from selecting the right tools and plants to effective care and sustainable practices. Remember, every master gardener started as a beginner, and with these data-driven tips and a dash of patience, you're well on your way to a flourishing indoor oasis. The benefits are immense: improved air quality, stress reduction, and the sheer joy of harvesting your own food.
Ready to get your hands dirty and bring that botanical beauty indoors? Start planting today, share your progress with us, and watch your indoor garden thrive! We’d love to see photos of your thriving plants in the comments below.
FAQ
Q1: How much light do indoor plants really need?
Most edible indoor plants, like herbs and leafy greens, ideally need between 12 to 16 hours of bright light per day. While a sunny south-facing window can work for some, many benefit significantly from supplemental grow lights to ensure robust growth. Insufficient light is a common reason for leggy, weak plants in indoor gardening.
Q2: How often should I water my indoor garden?
The best approach is to water when the top inch of soil feels dry to the touch, rather than sticking to a rigid schedule. Overwatering is a leading cause of root rot. Factors like pot size, plant type, and ambient humidity all influence watering frequency, which can range from every few days to once a week.
Q3: What are the easiest plants for beginner indoor gardening?
For beginners, herbs like basil, mint, chives, and parsley are excellent choices. Leafy greens such as lettuce, spinach, and arugula also perform well indoors and offer continuous harvests. These plants are relatively forgiving and don't demand complex care.
Q4: My plant's leaves are turning yellow. What's wrong?
Yellowing leaves are a common sign of distress and can indicate several issues. The most frequent culprits are overwatering (leading to root rot), underwatering (plant isn't getting enough moisture), or a nutrient deficiency. Check your soil moisture, ensure proper drainage, and consider a light feeding if plants haven't been fertilized recently.
Q5: Can I use regular garden soil for potted indoor plants?
No, regular garden soil is typically too heavy and dense for indoor containers. It compacts easily, leading to poor drainage and suffocating plant roots. Always opt for a high-quality potting mix specifically designed for containers, which contains ingredients like perlite and vermiculite for better aeration and drainage, crucial for a thriving indoor gardening setup.
Q6: Do I need to fertilize my indoor plants?
Yes, eventually. Most potting mixes contain nutrients that last for about 4-6 weeks. After this, your plants will deplete these nutrients. A balanced liquid fertilizer, applied at half strength every 2-4 weeks, will provide the essential nutrients (NPK and micronutrients) your plants need for continued healthy growth and production.
Q7: How do I keep pests out of my indoor garden?
Regular inspection is your best defence. Catching pests early makes them much easier to control. Maintain good air circulation around your plants, and if you spot any pests, a gentle wiping with a damp cloth or applying an insecticidal soap or neem oil solution can usually resolve the issue without harsh chemicals.
You may also enjoy reading about how to nurture your green friends further:
For more design inspiration, visit:
