Introduction
Ever found yourself yearning for fresh, aromatic herbs to elevate your cooking, but felt limited by space or climate? You’re not alone! Many aspiring gardeners wonder if it’s truly possible to cultivate a flourishing Indoor Herb Garden DIY without a sprawling backyard. The answer is a resounding yes! Imagine snipping fresh basil for your pasta or a sprig of mint for your tea, all from the comfort of your kitchen. This comprehensive guide will walk you through transforming your indoor space into a verdant haven, then seamlessly transitioning your beloved herbs to a vibrant balcony display once they’re thriving. Let’s dig in and unlock the secrets to year-round herbal abundance!
Tools & Materials Needed
Embarking on your indoor herb garden journey requires a few essential items. Think of these as your starter kit for cultivating culinary magic!
- Pots/Containers: Opt for pots with drainage holes to prevent root rot. Terracotta pots are excellent for their breathability, but ceramic, plastic, or even repurposed containers like old coffee cans (with drilled holes!) work well. For a sustainable touch, consider biodegradable starter pots made from peat or coir.
- Quality Potting Mix: This isn’t your average garden soil. A good potting mix is light, well-draining, and provides essential nutrients. Look for organic options specifically designed for containers, often enriched with compost or perlite.
- Herb Seeds or Starter Plants: For beginners, starter plants offer a quicker path to harvest. However, growing from seed is incredibly rewarding and often more budget-friendly. Choose common herbs like basil, mint, parsley, chives, rosemary, and oregano for your Indoor Herb Garden DIY – they’re generally forgiving.
- Watering Can with Fine Spout: A fine spout ensures you water your delicate seedlings gently, preventing soil displacement.
- Small Trowel or Spoon: Useful for handling soil and transplanting.
- Shears or Scissors: For harvesting your herbs cleanly.
- Grow Lights (Optional but Recommended): If your indoor space lacks abundant natural light (at least 6-8 hours daily), a simple LED grow light can make a huge difference. Full-spectrum lights mimic natural sunlight.
- Plant Labels: Essential for remembering what you planted where, especially when starting multiple herbs from seed.
- Saucers or Trays: To collect excess water and protect your surfaces.
- Larger Pots/Planters for Balcony (for later): Once your herbs outgrow their indoor homes, you’ll need bigger containers for their outdoor transition. Choose weather-resistant materials.
- Organic Fertilizer (Optional): A balanced liquid organic fertilizer can give your herbs a boost every few weeks, particularly during active growth.
Time & Effort Overview
Starting an Indoor Herb Garden DIY is a surprisingly manageable project, even for those with a busy schedule. The initial setup typically takes just 2-3 hours, including gathering materials and planting.
- Planting: 1-2 hours (from seed) or 30 minutes (from starter plants).
- Germination (from seed): 7-21 days, depending on the herb. Basil, for instance, often germinates within 5-10 days, while rosemary can take up to 3 weeks.
- Growth to Harvest: Expect your first harvest in about 3-4 weeks for fast-growing herbs like basil and mint, reaching full maturity in 8-12 weeks. This is generally comparable to or even slightly faster than outdoor container growing, thanks to controlled indoor conditions.
- Maintenance: 5-10 minutes daily for observation (watering check, light adjustment) and 30-60 minutes weekly for more thorough care (pruning, feeding).
- Difficulty Level: Beginner. Herbs are generally forgiving plants, making them an excellent starting point for new gardeners. Don’t worry if your first attempt isn’t perfect; every gardener learns by doing!
Step-by-Step Gardening Process
Let’s get your hands dirty! Follow these steps to cultivate a thriving Indoor Herb Garden DIY that will later flourish on your balcony.
Choose Your Herbs Wisely
Start with herbs known to thrive indoors. Basil, mint, chives, rosemary, cilantro, and parsley are fantastic choices. Consider your culinary preferences to ensure you grow what you’ll actually use. Each herb has slightly different light and water needs, so try to group similar ones together.
Prepare Your Pots
Ensure your chosen pots have drainage holes. If not, carefully drill a few into the bottom. Place a layer of small pebbles or broken pot shards at the bottom before adding soil to enhance drainage, especially for herbs like rosemary that dislike soggy feet.
Fill with Potting Mix
Gently fill your pots with the high-quality potting mix, leaving about an inch of space from the rim. Don’t compact the soil too much; you want it airy for root development.
Plant Seeds or Starter Plants
- For Seeds: Check the seed packet for specific planting depth. Generally, plant seeds about ¼ inch deep, covering them lightly with soil. For smaller seeds, simply sprinkle them on the surface and gently press them in.
- For Starter Plants: Carefully remove the plant from its nursery pot, gently loosening any circling roots. Place it in the prepared pot, ensuring the top of the root ball is level with the surrounding soil. Fill around with potting mix and gently firm it down.
Water Thoroughly
Immediately after planting, give your herbs a good drink. Water until you see moisture draining from the bottom holes. This helps settle the soil and provides crucial hydration for germination or transplant shock recovery. Don’t worry if some soil washes away; just gently push it back.
Provide Adequate Light
Place your newly planted herbs in a sunny spot. A south-facing window is ideal, offering direct sunlight for most of the day. If natural light is scarce, position your grow light about 6-12 inches above the plants, setting a timer for 12-16 hours daily.
Monitor and Nurture
Keep the soil consistently moist but never waterlogged. Mist seedlings occasionally to maintain humidity. Rotate your pots every few days to ensure even light exposure and prevent leggy growth. Witnessing tiny sprouts emerge is one of gardening’s greatest joys!
Prepare for Balcony Transition
Once your herbs have established a strong root system, typically after 4-6 weeks of indoor growth, and outdoor temperatures are consistently above 50°F (10°C), they’re ready for their grand debut. For outdoor success, you’ll want to “harden off” your plants. Over 7-10 days, gradually expose them to increasing periods of outdoor conditions – starting with an hour or two in a shaded spot, then moving to partial sun, and finally full sun. This prevents shock.
Transplant to Balcony Pots
Choose larger pots or a dedicated balcony planter. Repeat the pot preparation and planting steps, giving your herbs plenty of room to grow. Consider combining different herbs with similar light and water requirements in one large container for a beautiful, edible display.
Growth & Care Tips
The secret to a flourishing Indoor Herb Garden DIY and a vibrant balcony display lies in consistent, attentive care.
- Watering Frequency: This is paramount. Most herbs prefer consistently moist soil, but hate being waterlogged. Water when the top inch of soil feels dry to the touch. The “finger test” is your best friend here. Scientific studies show overwatering is the leading cause of houseplant death, accounting for over 60% of failures due to root suffocation. Less is often more with delicate herbs like rosemary, which prefer drier conditions between waterings.
- Sunlight Exposure: Aim for 6-8 hours of direct sunlight daily for most herbs. If natural light isn’t enough, supplement with a full-spectrum LED grow light. Position it about 6-12 inches above the plant canopy for optimal growth. Insufficient light leads to leggy, pale plants.
- Pruning: Regular pruning encourages bushier growth and prevents herbs from “bolting” (going to seed), which can diminish flavor. Use sharp shears to snip off the top few inches of growth, just above a leaf node, once your plant is about 6 inches tall. For leafy herbs like basil and mint, harvest frequently.
- Fertilization: Indoor herbs, especially in pots, deplete soil nutrients faster. Feed them every 2-4 weeks during their active growing season (spring and summer) with a balanced, organic liquid fertilizer diluted to half strength. Avoid over-fertilizing, which can burn roots.
- Pest Prevention: Indoors, common pests include aphids, spider mites, and fungus gnats. Inspect your plants regularly. If you spot pests, isolate the plant and treat it with insecticidal soap or neem oil spray. Good air circulation also helps deter pests. A mild airflow is proven to reduce humidity-related fungal issues by up to 30%.
Eco-Friendly & Sustainable Alternatives
Cultivating a green thumb extends beyond just growing plants; it’s also about nurturing the environment.
- Composting: Start a small indoor compost bin for kitchen scraps. The resulting “black gold” is a fantastic, nutrient-rich soil amendment for your herbs.
- Natural Fertilizers: Beyond store-bought organic options, consider making your own. Coffee grounds (for nitrogen), eggshells (for calcium), and banana peels (for potassium) can be valuable additions, though they break down slowly. Diluted compost tea or worm casting tea are excellent liquid feeds.
- Water Conservation: Implement smarter watering habits. Water deeply but less frequently. Use self-watering pots for consistent moisture, or collect rainwater for your balcony herbs. A rain barrel on a balcony, even a small one, can significantly reduce tap water usage.
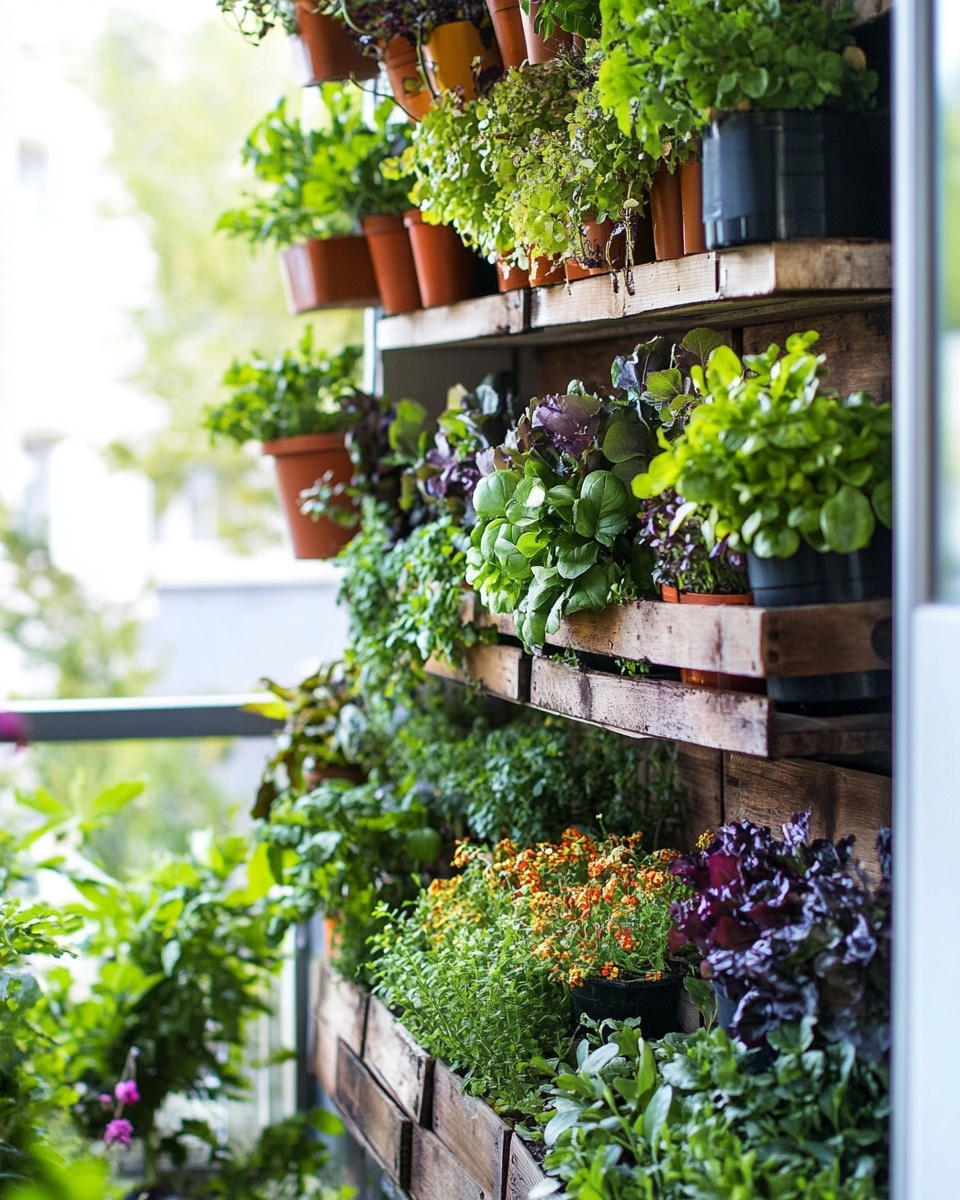
- Vertical Gardens and Small Spaces: For very small balconies or indoor areas, vertical gardening is a game-changer. Wall-mounted planters, tiered shelving units, or repurposed pallet gardens allow you to grow more in less space. This can be perfect for your Indoor Herb Garden DIY as it grows and expands. You might find inspiration in {“loc”:[“https://pincraftpro.com/vertical-indoor-garden-ideas-for-small-spaces/”],”lastmod”:[“2025-10-10T10:14:36+00:00”]}.
- Repurpose & Reuse: Instead of buying new pots, consider repurposing items like old tin cans, plastic bottles, or even discarded tires (ensure they’re safe and cleaned). Just remember to add drainage!
Creative Ideas & Uses
An Indoor Herb Garden DIY isn’t just practical; it’s also a fantastic way to add beauty and life to your home and balcony.
- Edible Centerpieces: Arrange small pots of herbs like basil, rosemary, and thyme as a fragrant and edible centerpiece for your dining table. Guests can snip their own garnishes!
- Aromatic Kitchen Decor: Place your herb pots on a sunny kitchen windowsill or a floating shelf. The vibrant greens and delightful aromas will instantly brighten your cooking space. Think about combining different types of herbs with varying leaf shapes and colors for visual interest.
- Tiered Balcony Displays: Create a stunning multi-level garden on your balcony using tiered plant stands or hanging planters. This maximizes space and creates a lush, green focal point. Combine herbs with small flowering plants for added visual appeal.
- Repurposed Container Art: Get creative with your pots! Paint old terracotta pots, wrap them in twine, or stencil designs. This adds a personal touch to your herb garden. You can even upcycle old wooden crates or pallets into charming planters.
- Design with Purpose: Consider the aesthetic alongside the practical. Group herbs that complement each other visually as well as culinarily. For instance, a pot with vibrant green basil next to the delicate fronds of parsley creates a lovely contrast. For more inspiration, check out {“loc”:[“https://pincraftpro.com/creative-indoor-plant-decor-ideas/”],”lastmod”:[“2025-10-10T10:14:36+00:00”]}.
Common Mistakes to Avoid
Even the most seasoned gardeners make blunders, but by being aware of common pitfalls, you can set your Indoor Herb Garden DIY up for success.
- Overwatering: This is by far the most frequent mistake. Soggy soil suffocates roots, leading to root rot, which, as mentioned, plagues an estimated 60% of houseplants. Always check the soil moisture before watering. When in doubt, err on the side of underwatering.
- Insufficient Light: Herbs are sun-lovers. Placing them in a dim corner will result in weak, leggy growth and poor flavor. If you don’t have a bright window, invest in a grow light. Pale leaves often signal a lack of light.
- Lack of Drainage: Pots without drainage holes are a death sentence for most herbs. Water accumulates, leading to root rot. Always ensure proper drainage.
- Over-fertilizing: While nutrients are essential, too much fertilizer can burn the roots and harm your plants. Follow package instructions carefully and remember that less is often more.
- Ignoring Pests: Pests can quickly decimate an entire herb garden. Regular inspection and prompt treatment are crucial. A small infestation can spiral out of control within days.
- Not Pruning: Failure to prune leads to leggy, unproductive plants that bolt quickly. Regular harvesting and pinching back encourage bushier growth and a continuous supply of fresh herbs.
- Transplanting Shock: Moving plants directly from a cozy indoor environment to a harsh outdoor one without hardening off can severely shock them, leading to wilting, stunted growth, or even death. The gradual hardening-off process is vital for balcony transitions.
Maintenance & Storage Tips
Ensuring the long-term health of your Indoor Herb Garden DIY and maximizing your harvest means understanding ongoing maintenance and proper storage.
- Long-Term Plant Health:
- Repotting: As your herbs grow, they will eventually become root-bound. When you see roots emerging from the drainage holes, it’s time to repot into a slightly larger container (1-2 inches wider).
- Soil Amendment: Even with fertilization, potting mix can lose its structure and nutrient content over time. Top-dress with fresh potting mix or compost annually, or consider fully repotting with new soil every 1-2 years.
- Air Circulation: Good airflow prevents fungal diseases, especially in humid indoor environments. A small fan can help circulate air.
- Yellow Leaves: This often indicates overwatering, nutrient deficiency, or sometimes too little light. Assess your watering schedule, feeding routine, and light exposure to diagnose the issue. If it’s a few bottom leaves, it might just be natural aging; remove them.
- Poor Soil Drainage: If water puddles on the surface or takes a long time to drain, your soil might be too compact or you might lack sufficient drainage holes. Gently aerate the soil with a chopstick or consider repotting with a more porous mix.
- Harvesting for Longevity: For continuous harvests, snip off what you need from the top of the plant, rather than pulling individual leaves from the bottom. This encourages new growth. For herbs like basil, never take more than a third of the plant at once.
- Drying and Freezing Herbs: If you have an abundance of herbs, don’t let them go to waste!
- Drying: Gather small bunches, tie them with twine, and hang them upside down in a warm, dry, well-ventilated area away from direct sunlight. Once brittle, crumble and store in airtight containers.
- Freezing: Chop herbs finely and mix them with olive oil, then freeze in ice cube trays. Once solid, transfer the cubes to freezer bags. This is excellent for cooking.
- Seasonal Care:
- Indoor Winter Care: During colder months, your indoor herbs might need less water due to slower growth. Ensure they still receive adequate light.
- Balcony Winter Protection: If you live in a region with cold winters, bring tender herbs like basil indoors before the first frost. Hardier herbs like rosemary and thyme might survive outdoors with protection (cover them or move them closer to the building wall) or can be brought indoors.
Conclusion
Congratulations! You’ve just unlocked the potential to enjoy fresh herbs year-round, transforming your indoor space and balcony into a productive, fragrant haven. From setting up your first Indoor Herb Garden DIY to nurturing its growth and moving it outdoors, you now possess the knowledge and confidence to cultivate culinary delights just steps away. The journey of growing your own food is incredibly rewarding, connecting you with nature and enriching your life. Don’t hesitate to experiment with different herbs and embrace the learning process.
Now, it’s your turn to get started! What herbs will you choose for your first indoor garden? Share your planting experiences and photos with us in the comments below, or tell us about your favorite herbs to grow. Let’s inspire each other to cultivate more green in our lives!
FAQ
Q1: How much sunlight do indoor herbs truly need?
Most indoor herbs require at least 6-8 hours of direct sunlight daily to thrive. A south-facing window is ideal. If natural light is insufficient, a full-spectrum LED grow light for 12-16 hours a day is a fantastic solution to ensure your Indoor Herb Garden DIY gets its necessary “sun fix.”
Q2: What’s the best way to water my indoor herbs without overwatering?
The best method is the “finger test.” Stick your finger about an inch into the soil. If it feels dry, it’s time to water. Water slowly and thoroughly until you see water draining from the bottom of the pot, then empty any collected water from the saucer. This prevents root rot, a common issue in Indoor Herb Garden DIY setups.
Q3: Can I really grow any herb indoors?
While many herbs thrive indoors, some are better suited than others. Basil, mint, chives, parsley, oregano, and rosemary are excellent choices. Others like dill or cilantro can be grown, but often require more specialized conditions or tend to bolt quickly indoors. It’s best to start with easy-to-grow varieties for your first Indoor Herb Garden DIY. For more options, see {“loc”:[“https://pincraftpro.com/10-easy-herbs-to-grow-indoors/”],”lastmod”:[“2025-10-10T10:14:36+00:00”]}.
Q4: When should I move my herbs from indoors to the balcony?
You should transition your herbs to the balcony once all danger of frost has passed, and outdoor temperatures are consistently above 50°F (10°C) both day and night. Crucially, remember to “harden off” your plants over 7-10 days by gradually exposing them to outdoor conditions to prevent shock.
Q5: What kind of soil is best for an indoor herb garden?
A high-quality, well-draining potting mix specifically formulated for containers is essential. Avoid using garden soil, as it can compact in pots and introduce pests or diseases. Look for mixes enriched with perlite or vermiculite for improved aeration and drainage, ideal for your Indoor Herb Garden DIY.
Q6: Why are my indoor herbs getting leggy and pale?
Leggy and pale growth is a classic sign of insufficient light. Your herbs are stretching to find more light. Move them to a brighter location or supplement with a grow light. Proper light is critical for robust, flavorful herbs in your Indoor Herb Garden DIY.
Q7: How often should I fertilize my herbs?
Indoor herbs in pots deplete nutrients faster than inground plants. During their active growing season (spring and summer), feed your herbs every 2-4 weeks with a diluted, balanced organic liquid fertilizer. Reduce or stop fertilizing during the dormant winter months.


