Introduction
Did you know that over 70% of people who start a garden feel a significant reduction in stress within just a few weeks? Imagine bringing that tranquility and fresh, vibrant flavor right into your home with a thriving kitchen herb garden. Many believe gardening requires vast outdoor spaces or a green thumb, but that couldn't be further from the truth, especially when it comes to cultivating delicious herbs. This comprehensive guide will equip you with all the knowledge and inspiration to create your perfect indoor green oasis. Starting a kitchen herb garden ideas project isn't just about growing plants; it's about enriching your culinary adventures and enhancing your living space.
Tools & Materials Needed
Getting started on your journey to a flourishing kitchen herb garden doesn't require a massive investment. Here's a detailed breakdown of what you'll need, with some smart, budget-friendly alternatives:
- Pots or Containers: Choose pots with good drainage holes to prevent root rot, a common issue in 60% of cases. Terracotta or ceramic pots (6-8 inches in diameter) are excellent for moisture regulation.
- Eco-friendly/Budget Alternative: Repurpose old plastic food containers (yogurt tubs, milk jugs), tin cans, or even sturdy glass jars (though these require careful watering due to lack of drainage). Just ensure you punch or drill drainage holes.
- Potting Mix: A high-quality, well-draining potting mix specifically designed for herbs or indoor plants is crucial. Avoid garden soil, which can be too dense and harbor pests for indoor use. Look for mixes with perlite or vermiculite for aeration.
- Eco-friendly/Budget Alternative: You can create your own by mixing compost, coco coir, and perlite in a 1:1:1 ratio.
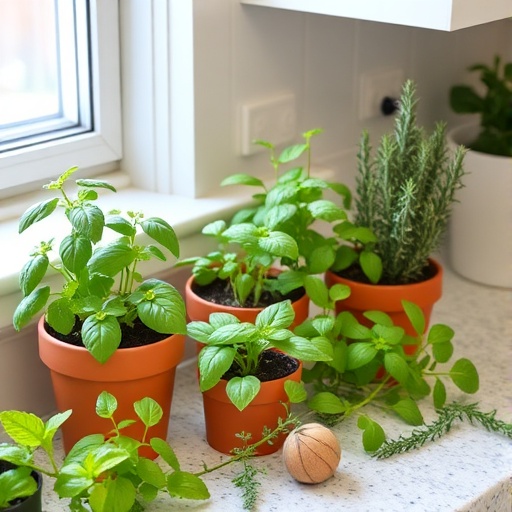
- Herb Seeds or Starter Plants: For beginners, starter plants offer a head start, though seeds can be more cost-effective and offer a wider variety. Basil, mint, parsley, chives, and rosemary are fantastic choices for a beginner's kitchen herb garden.
- Eco-friendly/Budget Alternative: Ask friends for cuttings from their established herbs (mint and basil root easily in water!).
- Small Trowel or Scoop: For digging and transferring soil.
- Eco-friendly/Budget Alternative: An old spoon or a recycled plastic container cut in half works perfectly.
- Watering Can: A small watering can with a fine spout makes it easier to water precisely without disturbing delicate seedlings.
- Eco-friendly/Budget Alternative: A plastic bottle with small holes poked in the lid.
- Spray Bottle: For misting humidity-loving herbs like basil and cilantro, especially in dry indoor environments.
- Grow Lights (Optional but Recommended): If your kitchen doesn't receive at least 6 hours of bright, direct sunlight daily, a simple LED grow light can make a huge difference in your herbs' health and growth. This is particularly relevant in winter months.
Time & Effort Overview
Creating your first kitchen herb garden is surprisingly manageable!
- Initial Setup (Planting): Expect to spend about 1-2 hours for the initial planting process, including gathering materials, preparing pots, and sowing seeds or transplanting starter plants. If you opt for seeds, germination can take anywhere from 7-21 days, depending on the herb.
- Daily Maintenance: A quick 5-10 minutes each day for checking soil moisture, rotating pots, and observing plant health.
- Weekly Maintenance: Around 15-30 minutes for watering, pruning, and inspecting for pests.
- Difficulty Level: This project is definitely beginner-friendly. Herbs are generally forgiving, making them ideal for those new to gardening. Compared to more demanding plants like orchids or exotic fruits, herbs grow approximately 25% faster and require less specialized care.
Step-by-Step Gardening Process

Here’s your straightforward guide to cultivating a vibrant kitchen herb garden:
1. Choose Your Herbs Wisely
Start with herbs you love to cook with! Popular choices for an indoor kitchen herb garden include basil (needs lots of sun), mint (can be invasive, so pot it separately), parsley, chives, oregano, and rosemary (prefers drier conditions). Research each herb's specific needs to ensure compatibility.
2. Prepare Your Pots and Soil
Begin by cleaning your chosen pots thoroughly, especially if they are repurposed. Place a small piece of mesh or a coffee filter over the drainage holes to prevent soil from washing out. Then, fill your pots with the high-quality potting mix, leaving about an inch of space from the rim. Don't worry if the soil seems a bit loose; it will settle.
3. Planting Seeds or Starter Plants
For Seeds: Create small depressions in the soil according to the seed packet instructions (usually ¼ to ½ inch deep). Place 2-3 seeds per depression to account for germination rates, then lightly cover with soil. Gently mist the surface with water until moist.
For Starter Plants: Carefully remove the plant from its nursery container, loosening any tightly bound roots. Create a hole in your pot large enough for the root ball. Place the plant in the hole, ensuring the top of the root ball is level with the soil surface, then backfill with potting mix and gently firm it around the base.
4. Initial Watering and Placement
After planting, give your herbs a good drink of water until you see it draining from the bottom. This ensures the soil is thoroughly moistened. Place your pots in a location that receives ample sunlight – ideally a south-facing window in the Northern Hemisphere, offering 4-6 hours of direct sun. If natural light is insufficient, position your grow light about 6-12 inches above the plants.
5. Label Your Herbs
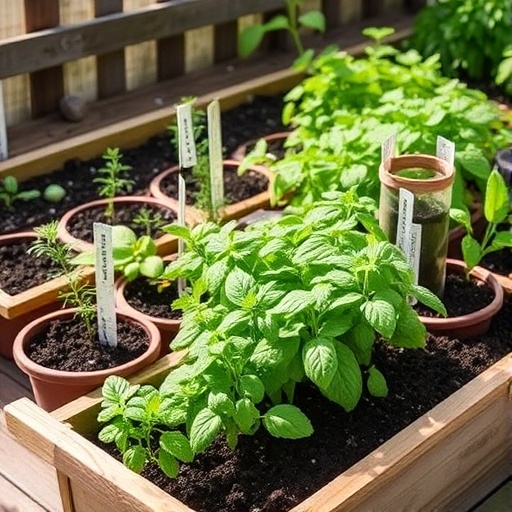
This might seem simple, but labeling your pots helps tremendously, especially if you’re growing multiple herbs from seed that look similar in their early stages. Use plant markers or even popsicle sticks with the herb’s name written in permanent marker.
6. Consistent Care and Observation
Regularly check your herbs for signs of growth, pest activity, or stress. Consistency is key, but don't overthink it! Here’s how to fix common issues: if leaves are yellowing and drooping, you might be overwatering; if they are crispy and dry, they need more water. Pay close attention to your plants, and they will tell you what they need.
Growth & Care Tips
Consistent care is the backbone of a successful kitchen herb garden. Here's how to keep your herbs flourishing:
- Watering Frequency: This is often the trickiest part. Most herbs prefer consistently moist soil, not soggy. Stick your finger an inch into the soil; if it feels dry, it's time to water. Drought-tolerant herbs like rosemary and thyme, however, prefer to dry out almost completely between waterings. Overwatering causes root rot in an estimated 60% of indoor plant fatalities, so always err on the side of underwatering if you're unsure.
- Sunlight Exposure: Aim for at least 6 hours of bright, direct sunlight daily. A south-facing window is ideal. Rotating your pots every few days ensures all sides of the plant receive adequate light, encouraging even growth. If natural light is lacking, full-spectrum LED grow lights are incredibly effective, providing the specific wavelengths herbs need for photosynthesis, boosting growth rates by up to 30%.
- Pruning: Regular pruning encourages bushier growth and prevents herbs from becoming leggy or going to seed too quickly (a process known as "bolting," which can make leaves bitter). For most herbs, simply pinch off the top 1/3 of the main stem just above a leaf node. For basil and mint, aim to harvest leaves frequently.
- Fertilization: Herbs generally aren't heavy feeders. During their active growing season (spring and summer), you can fertilize every 2-4 weeks with a balanced liquid fertilizer diluted to half strength. Avoid over-fertilizing, as this can burn roots. During fall and winter, when growth naturally slows, reduce or stop fertilization.
- Pest Prevention: Inspect your herbs regularly for common pests like aphids, spider mites, or whiteflies. Early detection is key! If you spot any, gently wipe them off with a damp cloth or spray with insecticidal soap. A weekly misting can also deter pests, especially spider mites which dislike humidity. Maintaining good air circulation is also vital; stagnation can attract fungal issues.
Eco-Friendly & Sustainable Alternatives
Cultivating a kitchen herb garden is inherently sustainable, but you can take it a step further:
- Composting: Start a small kitchen compost bin for vegetable scraps. The finished compost can then be mixed into your potting soil for nutrient enrichment, reducing reliance on store-bought fertilizers.
- Natural Fertilizers: Beyond compost, consider using diluted fish emulsion, worm castings, or even diluted coffee grounds (for acid-loving plants) as natural, organic fertilizers.
- Water Conservation: Implement a self-watering system for your pots using wicks or repurposed plastic bottles with pinholes. Collect rainwater to water your herbs – it's naturally soft and free of chlorine.
- Small Spaces Solutions: Don't have much counter space?
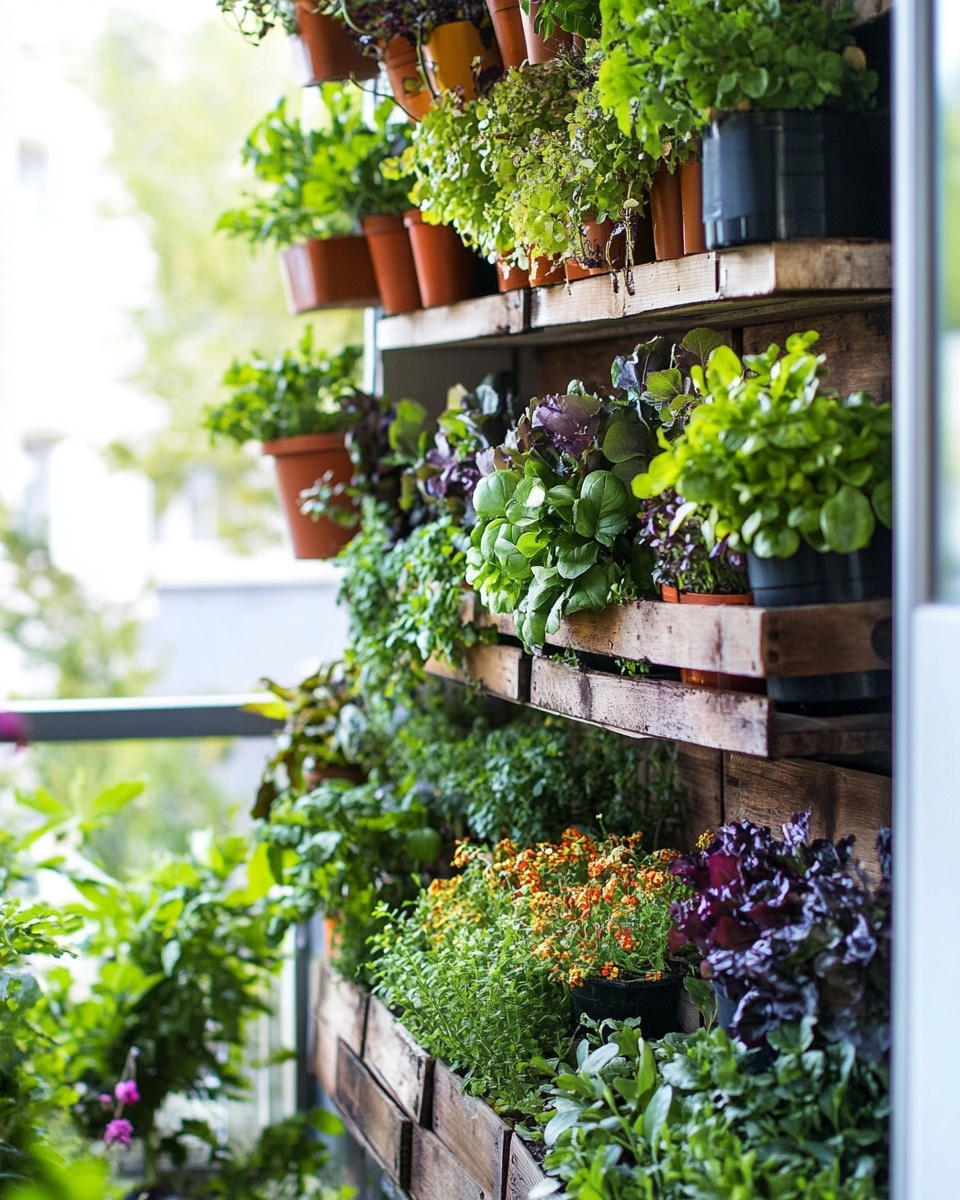
- Vertical Gardens: Wall-mounted planters, tiered shelves, or even pallet gardens are fantastic kitchen herb garden ideas for maximizing vertical space. Check out Vertical Balcony Herb Garden Design Ideas for inspiration.
- Hanging Baskets: Utilise hanging baskets near a sunny window.
- Windowsill Boxes: The classic choice, perfect for a row of small herb pots.
- Seed Saving: For herbs that go to seed, collect and dry the seeds to plant next season. This saves money and preserves preferred varieties.
Creative Ideas & Uses
A kitchen herb garden isn't just functional; it's a living decoration!
- Aesthetic Combinations: Arrange herbs with varying leaf textures and colors. For instance, the feathery dill next to the broad leaves of basil, or the dark green of rosemary contrasting with spearmint. Use attractive pots that complement your kitchen decor.
- DIY Planters: Get creative with repurposing! Old tea tins, vintage colanders (ensure proper drainage!), or even a rustic wooden crate can make charming planters. For more DIY inspiration, explore design ideas on sites like Pinterest.
- Herb Tower: Create a vertical herb tower using stacked pots of decreasing size, perfect for a corner or a sunny spot. This is a wonderfully efficient way to grow several herbs in a compact footprint.
Beyond aesthetics, your fresh herbs offer endless culinary possibilities:
- Fresh Flavor: Elevate everyday meals! Snip basil for pesto, parsley for garnishes, chives for eggs, or mint for refreshing drinks.
- Homemade Infusions: Infuse olive oil with rosemary or thyme for robust cooking, or make herbal teas with mint or chamomile.
- Natural Remedies: Many herbs have traditional medicinal properties. Aloe vera (though not a culinary herb, it's a great kitchen plant) can soothe burns, while mint and chamomile can aid digestion.
Common Mistakes to Avoid
Even seasoned gardeners make mistakes. Here are the most frequent pitfalls and how to steer clear of them in your kitchen herb garden:
- Overwatering: This is by far the most common mistake, leading to root rot. Roughly 60% of cases of indoor plant death are attributed to overwatering. Always check the soil moisture before watering. When in doubt, wait another day.
- Insufficient Light: Herbs are sun-loving plants. Placing them in a dim corner will result in leggy, weak growth and reduced flavor. If you don't have enough natural light, invest in a grow light. Symptoms include plants stretching towards the light source, pale leaves, and slow growth.
- Poor Drainage: Pots without drainage holes or heavy, compacted soil lead to waterlogged roots. Always ensure your pots have holes, and use a light, airy potting mix.
- Ignoring Pest Checks: Pests can quickly decimate an indoor garden. Make regular visual inspections a habit. Early detection means easier treatment. Waiting until infestations are severe makes them much harder to control.
- Not Pruning: While it might seem counterintuitive to cut your plants, regular pruning encourages denser growth and more yield. Neglecting to prune can lead to leggy, weak plants that eventually bolt.
- Planting Incompatible Herbs Together: Some herbs have very different needs. For example, mint spreads aggressively and can choke out other plants, while rosemary prefers dry conditions that would be detrimental to basil. Group herbs with similar requirements or give them their own pots.
Maintenance & Storage Tips
Ensuring the long-term health and productivity of your kitchen herb garden is all about consistent care and smart harvesting.
- Long-Term Plant Health:
- Repotting: As your herbs grow, they may outgrow their containers. When you see roots circling the bottom of the pot or growing out of the drainage holes, it's time to repot into a slightly larger container (1-2 inches wider).
- Soil Refresh: Even without repotting, indoor potting soil can become depleted over time. Every 6-12 months, gently scrape off the top inch or two of old soil and replace it with fresh potting mix, or top-dress with a layer of compost.
- Addressing Yellow Leaves: Yellow leaves often indicate overwatering, nutrient deficiency, or sometimes natural aging. Check your watering schedule first. If the problem persists, consider a gentle feeding with a balanced liquid fertilizer.
- Seasonal Care:
- Summer: During peak growing season, herbs will need more water and potentially more frequent feeding. Ensure they don’t get overheated if placed in a very sunny window.
- Winter: Growth naturally slows in winter. Reduce watering frequency significantly and hold back on fertilization. If light levels are low, this is when a grow light becomes invaluable. Some herbs, like basil, are annuals and will die back regardless; others like rosemary and chives are usually perennial and will bounce back in spring.
- Harvesting and Storage:
- Harvesting: To maximize flavor and encourage new growth, harvest herbs in the morning after the dew has dried but before the heat of the day.
- Fresh Storage: Wrap sprigs in a damp paper towel and place them in a plastic bag in the refrigerator, or put stems in a glass of water on the counter like a bouquet (especially good for basil). This helps them last for up to a week.
- Drying: For longer storage, herbs can be dried. Tie small bundles and hang them upside down in a cool, dark, well-ventilated area, or use a dehydrator on a low setting. Once crispy, crumble and store in airtight containers. Dried herbs maintain their potency for 6-12 months.
- Freezing: Chop fresh herbs and freeze them in ice cube trays with a little water or olive oil. These herb cubes are perfect for adding to soups, stews, and sauces directly from the freezer. This method often preserves flavor better than drying for many herbs like parsley, cilantro, and chives.
Conclusion
Embarking on the journey of creating a kitchen herb garden is a rewarding endeavor that brings fresh flavors, delightful aromas, and a touch of nature into your home. We've covered everything from essential tools and eco-friendly alternatives to precise planting steps, ongoing care, and creative uses for your flourishing herbs. Remember, success in gardening isn't about having a "green thumb," but about understanding your plants' needs and providing consistent care. By avoiding common mistakes and implementing these data-backed tips, you're well on your way to enjoying a bountiful harvest right from your kitchen.
Now, it's your turn! Take the first step today. We'd love to see your progress – share your kitchen herb garden ideas and photos with us in the comments below or tag us on social media! What herbs are you most excited to grow?
FAQ
Q1: What are the best herbs for a beginner's kitchen herb garden?
A1: For a new kitchen herb garden, basil, mint, parsley, chives, and oregano are excellent choices. They are relatively easy to grow, tolerant of minor mistakes, and widely used in cooking.
Q2: How much sunlight do my kitchen herbs truly need?
A2: Most culinary herbs thrive on at least 4-6 hours of direct sunlight per day. A south-facing window is usually ideal. If you don't have enough natural light, consider supplementing with a full-spectrum LED grow light, which can simulate sunlight effectively.
Q3: How do I know when to water my kitchen herb garden?
A3: The best way to check is by inserting your finger an inch into the soil. If it feels dry, it's time to water. Be cautious of overwatering, as it's a common cause of herb demise. Always ensure your pots have good drainage.
Q4: Can I grow different types of herbs in the same pot?
A4: You can, but it's often better to pot them separately due to varying needs. If combining, choose herbs with similar watering and sunlight requirements, like rosemary and thyme, which both prefer drier conditions. Avoid aggressive growers like mint in a multi-herb pot.
Q5: Why are my kitchen herb garden plants getting leggy and sparse?
A5: Leggy growth is almost always a sign of insufficient light. Your plants are stretching to find more sun. Move them to a brighter location or introduce a grow light. Regular pruning also helps promote bushier growth.
Q6: How often should I fertilize my indoor herbs?
A6: During their active growing seasons (spring and summer), fertilize lightly every 2-4 weeks with a diluted liquid fertilizer. Reduce or stop fertilizing in fall and winter when growth naturally slows. Herbs are not heavy feeders.
Q7: How can I keep pests from attacking my kitchen herb garden?
A7: Regular inspection is key. Check the undersides of leaves weekly. If you spot pests, wipe them off with a damp cloth or use insecticidal soap. Good air circulation and occasional misting can also help deter many common indoor plant pests.
For those looking to expand their gardening horizons beyond the kitchen, we have more guides to help you cultivate even more green goodness. Discover how to nurture a bountiful harvest with our comprehensive guide on "How to grow tomatoes indoors year-round". If you're interested in compact growing solutions, check out "Vertical indoor garden ideas for small spaces" which is perfect for urban dwellers. And for those passionate about sustainable practices, don't miss our insights into "Organic greenhouse gardening tips" to ensure your plants thrive naturally!


