Introduction
Ever wondered if your green thumb is secretly a watery monster, inadvertently drowning your beloved balcony herbs? Many aspiring urban gardeners grapple with this very question: how do you keep your potted herbs thriving without the dreaded prospect of overwatering? It’s a common challenge, especially in confined spaces where drainage can be unpredictable. But fear not, because mastering watering & irrigation tips for your balcony herbs is far simpler than you might imagine, and it's key to their lush, aromatic success. This guide will demystify the art of hydration, ensuring your basil, mint, and rosemary flourish for seasons to come.
Tools & Materials Needed
To embark on your journey to perfectly hydrated herbs, you’ll need a few essential items. No need for a massive garden shed; these are straightforward and often multi-purpose.
- Pots with Drainage Holes: Absolutely non-negotiable. Without proper drainage, water collects at the bottom, creating a swampy nightmare for roots. Choose terracotta for excellent breathability, or recycled plastic for a budget-friendly option.
- Quality Potting Mix: Not garden soil! Potting mix is lighter, drains better, and is sterilized to prevent pests and diseases. Look for mixes specifically designed for containers or herbs, often containing perlite or vermiculite for enhanced drainage.
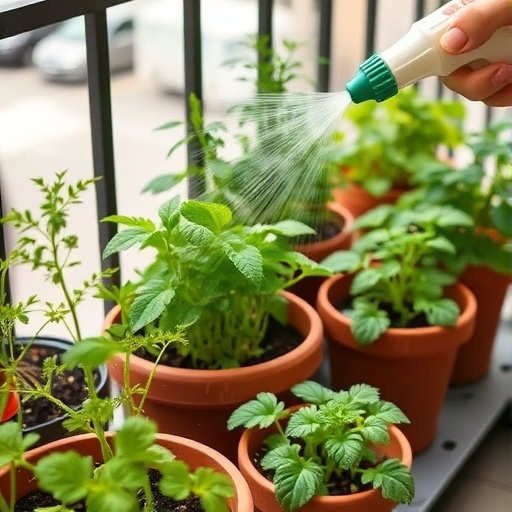
- Watering Can with a Fine Rose: This provides a gentle, even flow of water, preventing soil erosion and ensuring thorough saturation without overwhelming delicate plants. Small, indoor watering cans are perfect for balcony use.
- Moisture Meter (Optional but Recommended): A simple device that tells you exactly how wet the soil is. It removes the guesswork and is a fantastic tool for beginners.
- Hand Trowel: Useful for transplanting, loosening soil, and general maintenance.
- Gloves: Protect your hands from dirt and potential irritants.
- Saucers or Trays: To collect excess water that drains from the pots, protecting your balcony surface and neighbors below.
For eco-conscious gardeners, consider sourcing recycled plastic pots or making your own from repurposed containers (ensure you drill drainage holes!). You can also blend your own potting mix using compost, coco coir, and perlite for a sustainable approach.
Time & Effort Overview
Caring for balcony herbs, particularly when it comes to refining your watering & irrigation tips, is generally a low-effort, high-reward endeavor.
- Initial Setup: 1–2 hours (planting, arranging pots).
- Daily Check-in: 2–5 minutes (to assess soil moisture).
- Watering: 5–15 minutes (depending on the number of plants and conditions).
- Pruning/Harvesting: 5–10 minutes weekly (or as needed).
Compared to growing larger vegetables or fruit trees, herbs are remarkably quick to establish and grow. Many herbs, like basil or mint, can show significant new growth within 2-3 weeks of planting or even faster than typical leafy greens, and will be ready for harvest in under two months. The difficulty level for basic herb care, including effective watering, is firmly beginner. The key is consistency and observation, rather than complicated techniques.
Step-by-Step Gardening Process
Getting your balcony herbs off to a healthy start sets the stage for perfect watering.
1. Choosing Your Herbs and Pots
Select herbs that thrive in similar conditions. For a sunny balcony, consider basil, rosemary, thyme, and oregano. For shadier spots, mint, cilantro, and parsley might do better. Match the pot size to the herb; most herbs prefer snug but not cramped conditions. Ensure every pot has at least one good drainage hole.
2. Preparing the Potting Mix
Fill your chosen pots with a high-quality potting mix. Leave about an inch of space from the rim of the pot. Lightly moisten the soil before planting; it helps prevent dry pockets that repel water later on.
3. Planting Your Herbs
Carefully remove your herb from its nursery pot, gently loosening any circling roots. Place it in the prepared pot, ensuring the base of the plant is at the same level as it was in the original container. Fill in around the roots with more potting mix, patting gently to remove large air pockets.
4. Initial Watering After Planting
After planting, give your herbs a good, thorough watering. Water until you see water draining from the bottom holes. This settles the soil around the roots and eliminates any remaining air pockets. Pour out any water accumulated in the saucer after about 30 minutes to an hour.
5. Mastering Your Watering & Irrigation Tips
This is where the magic happens. The golden rule for watering herbs (and most plants) is to water thoroughly when the plant needs it, not on a strict schedule.
- The Finger Test: Stick your finger about an inch or two into the soil. If it feels dry, it's time to water. If it feels moist, wait. This is your most reliable method.
- Lifting the Pot: Get a feel for the weight of your potted herb when it’s dry versus when it’s well-watered. A lighter pot usually means it's thirsty.
- Moisture Meter Reading: For beginners, a moisture meter is invaluable. Insert it into the soil; it will give you a reading from dry to wet. Aim for the "moist" range.
- Watering Technique: Water slowly and deeply. Apply water around the base of the plant until it starts to drain from the bottom. This ensures the entire root ball receives moisture. Don't worry if it takes a few minutes for the water to soak in; some dry mixes can be hydrophobic initially.
6. Observing Your Plants
Your herbs will tell you what they need! Wilting leaves can indicate thirst, but also overwatering (due to root rot). Yellowing leaves often signal overwatering or nutrient deficiencies. Pay attention to how your plants look and respond to your watering & irrigation tips.
Growth & Care Tips
Beyond the initial setup, consistent care is paramount for healthy, productive balcony herbs.
- Watering Frequency: This varies wildly based on plant type, pot size, weather, and soil. In hot, sunny weather, you might need to water daily or every other day. In cooler, overcast conditions, it could be every few days. The finger test is always king. Overwatering causes root rot in 60% of houseplants, a statistic equally applicable to balcony herbs, so err on the side of slightly dry rather than consistently wet.
- Sunlight Exposure: Most culinary herbs (basil, rosemary, thyme) prefer 6-8 hours of direct sunlight per day. Mint and cilantro can tolerate partial shade. Rotate your pots occasionally to ensure even sun exposure.
- Pruning & Harvesting: Regular pruning encourages bushier growth and prevents herbs from "bolting" (going to seed) too quickly, which can make leaves bitter. Harvest by snipping off the top few sets of leaves, never more than a third of the plant at once.
- Fertilization: Herbs generally aren't heavy feeders. Incorporating a slow-release organic fertilizer into your potting mix at planting is often sufficient for the first few months. Afterwards, a diluted liquid feed (fish emulsion or seaweed extract) every 3-4 weeks during the growing season can boost vigor.
- Pest Prevention: Inspect your herbs regularly for signs of pests like aphids or spider mites. A strong spray of water can dislodge many pests. For persistent issues, use insecticidal soap, following product instructions carefully. Healthy, well-watered plants are more resilient to pests.
Eco-Friendly & Sustainable Alternatives
Embracing sustainability in your balcony herb garden is both rewarding and easy.
- Composting: Start a small vermicompost bin (worm composting) for your kitchen scraps. The resulting "worm tea" is a fantastic natural fertilizer, and the compost can be added to your potting mix.
- Rainwater Harvesting: Collect rainwater in a clean bucket or rain barrel. It’s naturally soft and free of chlorine, which your herbs will appreciate.
- DIY Organic Fertilizers: Instead of synthetic options, use spent coffee grounds (for acid-loving plants like blueberries, not generally for herbs), banana peels (for potassium), or Epsom salts (for magnesium) sparingly.
- Water Conservation: Implement smart watering & irrigation tips like watering in the early morning or late evening to reduce evaporation. Consider self-watering planters or ollas (unglazed clay pots buried in soil that slowly release water) for efficient water delivery, especially useful for smaller spaces or when you're away.
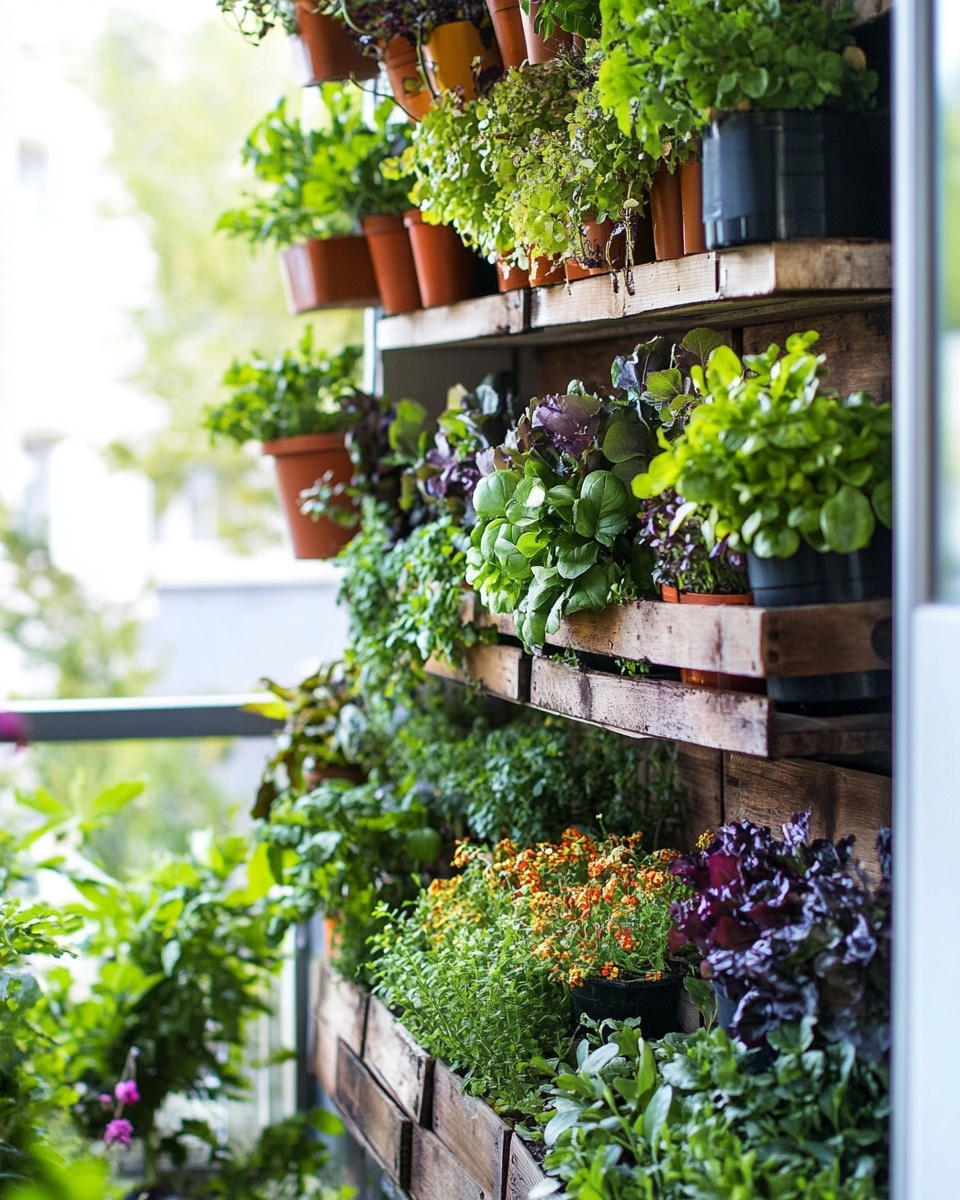
- Vertical Gardening: Maximize your space with vertical planters or wall-mounted systems. This not only looks great but also helps manage airflow around plants, reducing disease risk. For inspiration on maximizing small spaces, check out Pincraftpro's guide to vertical indoor garden ideas for small spaces.
Creative Ideas & Uses
Your balcony herbs aren't just for cooking; they can be a source of beauty and creativity!
- Aesthetic Groupings: Combine herbs with different foliage textures or colors. For example, the feathery leaves of dill next to the broad leaves of basil, or the silvery-green of rosemary contrasting with vibrant green parsley.
- Repurposed Containers: Beyond just pots, plant herbs in old colanders, rustic wooden crates (lined with landscape fabric), or even large, chipped teacups for a quirky aesthetic. Ensure drainage, always.
- Herb Spirals: If you have slightly more space, a small herb spiral provides different microclimates, allowing you to grow a wider variety of herbs that prefer varying moisture levels.
- Edible Landscaping: Design your balcony to be both beautiful and productive. Your herb pots can be interspersed with small flowering annuals or even dwarf vegetables, creating a vibrant, living display.
- Gift-Giving: Potted herbs make lovely, thoughtful gifts. Decorate a terracotta pot with paint or twine, plant a thriving herb, and you have a personalized present.
Common Mistakes to Avoid
Even seasoned gardeners make mistakes. Being aware of these common pitfalls can save your herbs from an untimely demise.
- Overwatering, the Silent Killer: As we've emphasized, this is the most common mistake. Constantly soggy soil suffocates roots, leading to root rot. Symptoms include yellowing leaves, stunted growth, and a foul smell from the soil. Always check soil moisture before watering. It's estimated that overwatering contributes to the demise of over 60% of container plants.
- Underwatering: While less common than overwatering in the short term, letting your herbs repeatedly dry out to the point of wilting stresses them and can lead to browning leaf edges and poor growth. Consistency in watering & irrigation tips is key.
- Pots Without Drainage Holes: A recipe for disaster. No matter how careful you are with watering & irrigation tips, if excess water can't escape, your roots will suffer.
- Using Garden Soil: Garden soil compacts in pots, preventing proper drainage and aeration. Always use a good quality potting mix.
- Neglecting Pruning: While not directly related to watering, ignoring pruning leads to leggy, unproductive plants that may eventually bolt. Regular harvesting keeps plants vigorous.
- Insufficient Sunlight: Most herbs require ample light. Placing them in too much shade will result in weak, spindly growth and diminished flavor.
- Fertilizer Overload: More isn't always better. Too much fertilizer can burn roots and harm your plants. Follow product instructions carefully and err on the side of under-fertilizing.
Maintenance & Storage Tips
Ensuring your herbs remain healthy and vibrant throughout their lifespan requires ongoing attention.
- Seasonal Care: In warmer climates, many herbs can be perennial. In colder regions, tender herbs like basil may need to be brought indoors or replanted annually. Hardier herbs like rosemary and thyme can often overwinter on a protected balcony. Reduce watering significantly in winter for dormant plants.
- Repotting: As your herbs grow, they may become root-bound. This means the roots have filled the entire pot, making it hard for the plant to absorb water and nutrients. Look for roots circling the drainage holes or popping out the top of the soil. Repot into a slightly larger container with fresh potting mix.
- Addressing Yellow Leaves: Yellow leaves often indicate overwatering (leading to root rot) or nutrient deficiency. First, check your watering schedule. If the soil is consistently wet, reduce watering. If the soil is appropriately moist, consider a light dose of balanced liquid fertilizer.
- Poor Soil Drainage: If your potting mix seems to retain water for too long, it might be too dense. Next time you repot, incorporate more perlite or coarse sand to improve drainage. Ensure those drainage holes are clear and not blocked by roots or debris.
- Harvesting for Storage: Extend your herb harvest by drying or freezing your herbs. Bundle sprigs and hang them in a cool, dry place, or spread leaves on a tray to air dry. For freezing, chop herbs and freeze them in ice cube trays with a little water or olive oil.
Conclusion
Mastering the art of watering your balcony herbs, along with these essential watering & irrigation tips, is the cornerstone of a thriving urban garden. It’s about observation, subtlety, and understanding that each herb, and indeed each day, brings unique needs. By avoiding the common pitfalls of overwatering, choosing the right tools, and providing consistent care, you’re not just growing plants; you’re cultivating a vibrant, resilient, and delicious slice of nature right outside your door. So, go ahead, get your hands dirty, and watch your balcony transform into a fragrant oasis.
Now that you're armed with the knowledge, it's time to put these techniques into practice! Share your successful herb gardens with us, or ask any lingering questions in the comments below. Happy gardening!
FAQ
Q1: How often should I truly water my balcony herbs, ignoring specific schedules?
A1: The most reliable method is to check the soil moisture daily. Stick your finger an inch or two into the soil; if it feels dry, it's time to water. This ensures you're applying watering & irrigation tips based on actual plant need, not a rigid schedule.
Q2: My herbs’ leaves are turning yellow. Is this always a sign of overwatering?
A2: While yellowing leaves are often a primary indicator of overwatering and potential root rot, they can also signal nutrient deficiencies or even underwatering if the plant is severely stressed. Always check the soil moisture first to accurately diagnose the problem; consistently wet soil (especially with poor drainage) points to overwatering.
Q3: Can I use tap water for my herbs, or do I need special water?
A3: For most herbs, tap water is perfectly fine, although some sensitive herbs might prefer rainwater or filtered water as tap water can contain chlorine. If your tap water is significantly hard, letting it sit out for 24 hours can help dissipate chlorine.
Q4: What's the best pot material for balcony herbs to help with watering?
A4: Terracotta pots are excellent because their porous nature allows excess moisture to evaporate through the sides, reducing the risk of overwatering. Plastic pots retain moisture more efficiently, which can be good in hot climates but requires more careful watering & irrigation tips. Always ensure any pot has drainage holes.
Q5: How can I tell if my herb is root-bound and needs repotting?
A5: Signs of a root-bound plant include roots growing out of the drainage holes, water sitting on top of the soil for too long (as there's no room for soil to absorb it), and stunted growth despite adequate care. Gently lift the plant from its pot; if the roots are tightly circling the soil ball, it's time to repot.
Q6: Should I water my herbs from the top or the bottom?
A6: Top watering with a fine rose watering can is generally best for balcony herbs as it mimics natural rainfall and flushes out salts. Bottom watering (placing the pot in a tray of water) can be effective for very dry soil but should be done occasionally to ensure the entire root ball is saturated and not just the bottom.
Q7: My balcony gets very windy. How does this affect my watering routine?
A7: Windy conditions significantly increase evaporation from both leaves and soil. In a windy spot, your herbs will likely dry out faster and require more frequent watering. Always account for environmental factors when applying your watering & irrigation tips. You may also want to explore ways to create windbreaks for your plants.
You may also enjoy reading our guides on 10 Easy Herbs to Grow Indoors or DIY Indoor Herb Garden for Small Kitchens. For general indoor gardening setup, check out Easy Indoor Gardening Setup for Beginners. Remember, you can find more inspiration and visualize your balcony herb garden by visiting reputable gardening resources like this one on Pinterest.


