Introduction
Did you know that insufficient light is the number one reason for indoor plant failure, accounting for over 70% of issues reported by new gardeners? It's true! Many aspiring green thumbs jump into indoor gardening with enthusiasm, only to be met with leggy plants, sparse growth, and wilting leaves, especially when trying to cultivate a thriving indoor gardening setup. The quest for fresh herbs year-round, right from your kitchen counter, is incredibly appealing. But how do you replicate the sun’s powerful, life-giving rays indoors without turning your home into a greenhouse? The secret lies in understanding and optimizing your lighting strategy.
Tools & Materials Needed
To embark on your successful indoor herb garden journey, you’ll need a few essential items. Think of these as your basic toolkit for fostering vibrant growth.
- Planting Containers: Small pots (4-6 inches in diameter) with drainage holes are ideal. Terracotta pots allow for better air circulation, while plastic pots retain moisture longer. Eco-friendly alternative: Repurpose old coffee cans (make sure to drill drainage holes!), milk cartons, or even sturdy plastic salad containers.
- Quality Potting Mix: A sterile, well-draining potting mix is crucial. Look for mixes specifically formulated for herbs or indoor plants, often containing peat moss, perlite, or vermiculite. Avoid heavy garden soil, which can compact and suffocate roots indoors.
- Herb Seeds or Seedlings: Start with easy-to-grow herbs like basil, mint, parsley, chives, or cilantro. If buying seedlings, choose healthy, compact plants without yellowing leaves or signs of pests.
- Grow Lights: This is where our focus sharpens! Options include:
- LED Grow Lights: Energy-efficient, long-lasting, and emit less heat. Full-spectrum LEDs are fantastic for mimicking natural sunlight.
- Fluorescent Grow Lights (T5 or T8): A more budget-friendly option, especially for herbs. They typically operate at cooler temperatures.
- Incandescent Bulbs: Avoid these for growing plants. They produce too much heat and insufficient light spectrum for proper growth.
- Timer: An essential tool for consistent lighting schedules. Manual timers are inexpensive, while smart plugs offer programmable scheduling via an app.
- Watering Can or Spray Bottle: A small watering can with a narrow spout allows for precise watering, preventing overwatering. A spray bottle is good for misting humidity-loving herbs.
- Small Hand Trowel or Scoop: For handling soil and transplanting.
- Pruning Shears/Scissors: Sharp tools are vital for clean cuts when harvesting, promoting healthier regrowth. Budget-friendly alternative: A pair of clean, sharp kitchen scissors.
Time & Effort Overview
Setting up your indoor herb garden is surprisingly quick, often taking less than an hour for the initial planting. The beauty of indoor gardening is its relatively low daily time commitment.
- Initial Setup: 30–60 minutes.
- Daily Maintenance: 5–10 minutes (checking moisture, light adjustment, quick observations).
- Weekly Maintenance: 15–30 minutes (watering, rotating pots, minor pruning).
- Growth Rate: Most herbs will show germination within 7-14 days and be ready for light harvesting in 3-4 weeks. Your basil, for instance, might grow 30% faster under optimal grow lights compared to a dim windowsill.
- Difficulty Level: This project is decidedly suitable for beginners. With the right lighting, success rates soar!
Step-by-Step Gardening Process
Ready to grow some green goodness? Let's get our hands dirty (just a little!).
1. Prepare Your Containers
Ensure your chosen pots are clean and have adequate drainage holes. If using repurposed containers, make sure to add several holes to the bottom to prevent waterlogging. Good drainage is non-negotiable for healthy herb roots.
2. Fill with Potting Mix
Fill each container almost to the top (about an inch from the rim) with your quality potting mix. Lightly pat it down, but don't compact it too much; roots need air!
3. Plant Your Seeds or Seedlings
If planting seeds, follow the package instructions for planting depth and spacing. Generally, a good rule of thumb for small herb seeds is to plant them about twice as deep as their size. If planting seedlings, gently remove them from their nursery pots, loosen any bound roots, and place them in the prepared holes, ensuring the top of the root ball is level with the soil surface. Backfill gently.
4. Initial Watering
After planting, give your herbs a thorough watering. Water until you see a little trickle from the drainage holes. This helps settle the soil around the seeds or roots. Don't worry if the soil level drops a bit; you can top it off.
5. Position Your Grow Lights
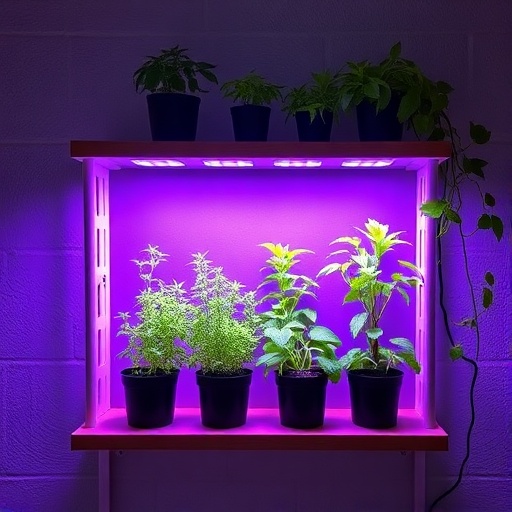
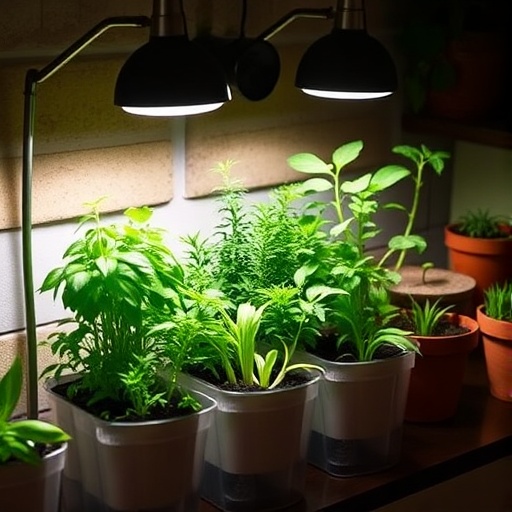
This is the most critical step for successful indoor gardening. Position your selected grow light (LED or fluorescent) directly above your newly planted herbs. The distance between the light and the plant tops is vital:
- LED Grow Lights: Start with LEDs about 12-18 inches above the plant canopy. You can adjust this as plants grow, potentially bringing them closer (6-12 inches) if they show signs of stretching (getting leggy).
- Fluorescent Grow Lights (T5/T8): These can be placed closer, typically 4-6 inches above the plant tops, as they emit less heat.
6. Set Your Lighting Schedule
Herbs generally thrive on 12-16 hours of light per day, followed by a dark period for rest. Use your timer to automate this cycle. For example, set your lights to turn on from 7 AM to 9 PM daily. Consistency is key for simulating natural daylight cycles. Think of it like a plant's sleep schedule!
7. Monitor and Adjust
Over the next few days and weeks, closely observe your herbs. Are they growing upright? Do the leaves look vibrant green? If they're stretching towards the light, lower the light fixture. If leaves look scorched or bleached, raise the light slightly. Here's how to fix stretched or leggy plants: gently prune them back, ensuring new growth points are viable, and then adjust your light closer.
Growth & Care Tips
Once your herbs are established, consistent care will ensure they thrive and provide a continuous harvest.
- Watering Frequency: The most common mistake for indoor plants is overwatering. Check the soil moisture daily by sticking your finger about an inch into the soil. If it feels dry, it's time to water. If it's still damp, wait. Watering frequency depends on humidity, pot size, and plant type, but typically ranges from every 2-5 days. Always water slowly and thoroughly until water drains from the bottom.
- Sunlight Exposure (from Grow Lights): As discussed, 12-16 hours of consistent, full-spectrum light is optimal. Research from university horticulture departments confirms that plants utilize the entire spectrum of light, with specific benefits from blue light for vegetative growth and red light for flowering. Full-spectrum LED grow lights are designed to provide this comprehensive coverage.
- Pruning: Regular pruning encourages bushier growth and prevents herbs from becoming leggy. For most herbs like basil and mint, pinch off the top set of leaves just above a node (where new leaves emerge). This forces the plant to grow two new stems instead of one, doubling your yield! Aim to prune 10-20% of the plant every week or two.
- Fertilization: Indoor herbs will eventually deplete the nutrients in their potting mix. Begin fertilizing about 3-4 weeks after planting. Use a balanced, water-soluble liquid fertilizer (e.g., 5-1-1 NPK ratio for leafy herbs) diluted to half strength, every 2-4 weeks. Be careful not to over-fertilize, as this can burn the roots.
- Pest Prevention: Indoor environments can still attract pests. Inspect your plants regularly for common culprits like spider mites, aphids, or fungus gnats. A simple solution of insecticidal soap or neem oil can often resolve minor infestations. Good air circulation (a small fan can help) and avoiding overwatering (which attracts fungus gnats) are excellent preventative measures. Isolating new plants for a week is also a smart strategy to prevent introducing pests to your existing garden.
Eco-Friendly & Sustainable Alternatives
Sustainability in your indoor gardening practices benefits both your plants and the planet!
- Composting: Don’t toss those kitchen scraps! A small indoor worm composter (vermiculture) can turn vegetable peels and coffee grounds into rich, nutrient-dense compost for your herbs. This 'black gold' significantly improves soil structure and fertility.
- Natural Fertilizers: Beyond homemade compost, consider using diluted fish emulsion, seaweed extract, or even used coffee grounds (in moderation) for a nitrogen boost. These organic options are fantastic for soil health.
- Water Conservation: Collect rainwater or utilize leftover cooking water (unsalted, cooled) for your plants. This reduces tap water usage and provides beneficial trace minerals. A self-watering pot system can also reduce water waste by providing water on demand.
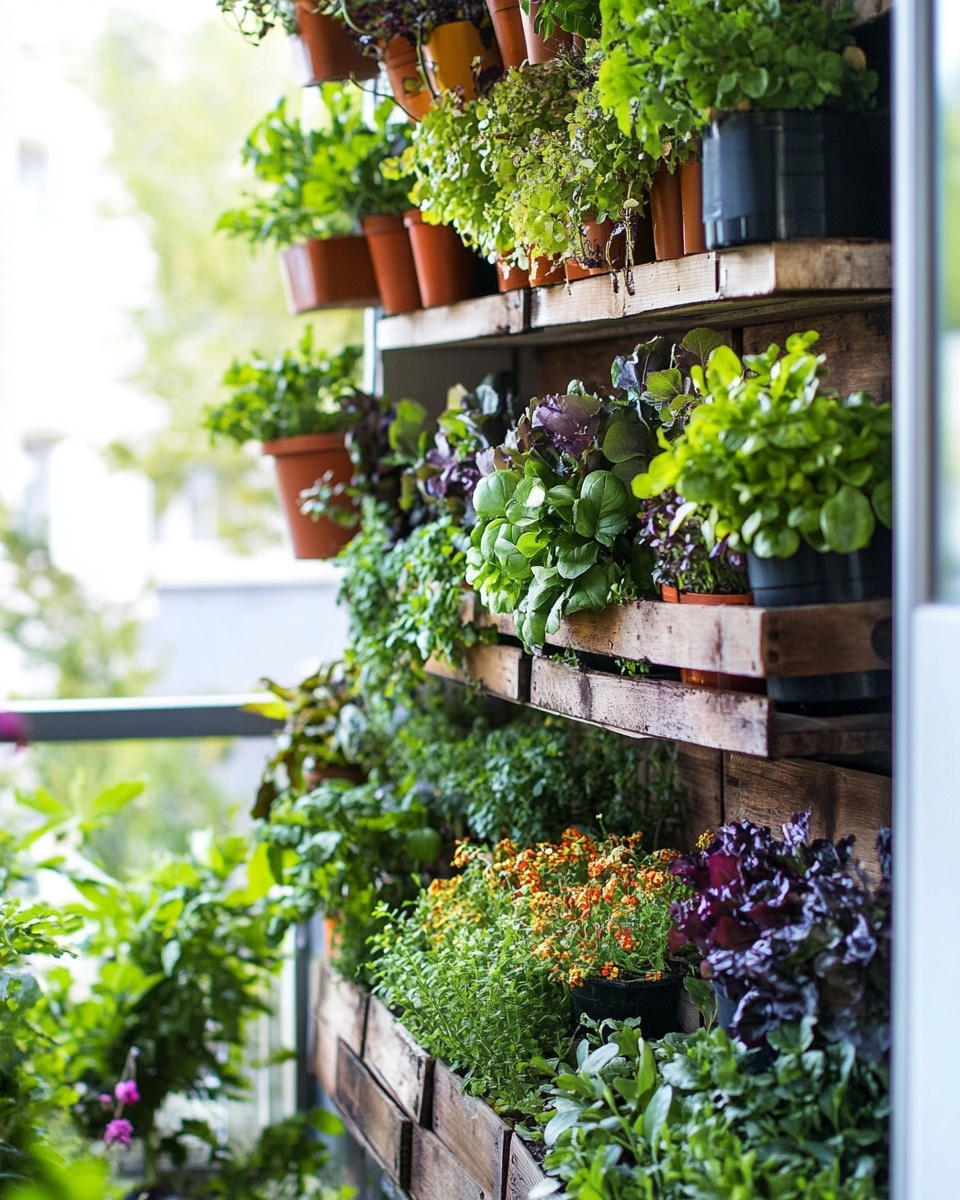
- Small Space Solutions: For those with limited space, vertical garden systems or wall-mounted planters are brilliant. You can find pre-made vertical planters, or DIY one using pallet wood or even stacked soda bottles. Look into vertical balcony herb garden design ideas for inspiration. Hydroponic systems, though a larger initial investment, can grow plants without soil, conserving water and space efficiently.
Creative Ideas & Uses
Your indoor herbs aren't just for cooking; they can be beautiful decor and offer numerous other benefits!
- Edible Decor: Arrange a collection of different herbs on a tiered stand or a dedicated shelf under your grow light. The varying textures and shades of green add natural beauty to any room. Imagine a fresh basil plant cascading gracefully next to vibrant parsley!
- Aromatic Ambiance: Place fragrant herbs like mint, lemon balm, or rosemary in high-traffic areas. A gentle brush against their leaves will release a delightful natural scent, far better than artificial air fresheners.
- DIY Projects: Use dried herbs to make homemade sachets, herbal teas, or infused oils. Create unique pot labels from natural materials like slates or painted wooden sticks.
- Combine Aesthetically: Pair herbs with small, non-demanding succulents or air plants for a diverse display under your grow light. Ensure all plants have similar light and water requirements. You could even integrate small LED strips into shelving for a modern, minimalist look that highlights both your herbs and any decorative elements.
Common Mistakes to Avoid
Even experienced gardeners make mistakes, but knowing what to watch out for can save your indoor herbs.
- Inadequate Lighting: As mentioned, this is the biggest culprit. Your windowsill might seem bright, but it’s rarely enough for vigorous growth. A plant positioned merely 3 feet from a south-facing window typically receives only 5-10% of the light intensity of outdoor sun. Invest in good grow lights! Pale, leggy growth is a sure sign of insufficient light.
- Overwatering: This leads to root rot, the silent killer of many houseplants. Overwatering causes root rot in an estimated 60% of struggling indoor plants. Always check soil moisture before watering and ensure excellent drainage.
- Lack of Air Circulation: Stagnant air can lead to fungal diseases and attract pests. A small, oscillating fan near your indoor garden for a few hours a day can make a significant difference.
- Ignoring Pest Checks: Pests multiply quickly. A quick visual check every few days (under leaves too!) can help catch issues early before they become an infestation.
- Using Garden Soil: Garden soil is too dense for pots and often introduces pests or diseases indoors. Stick to sterile, lightweight potting mix.
- Forgetting to Prune: Unpruned herbs become leggy and produce fewer leaves. Consistent pruning encourages bushiness and higher yields.
Maintenance & Storage Tips
Long-term success with your indoor herb garden involves regular attention and proper techniques.
- Long-term Plant Health: Re-pot your herbs into slightly larger containers every 6-12 months, or as they outgrow their current pots. This provides fresh nutrients and space for root growth. Don't jump to an oversized pot immediately, as this can lead to overwatering issues.
- Seasonal Care: While generally consistent year-round due to grow lights, you might notice slightly slower growth during shorter winter days. Adjust watering as needed during these periods, as plants may consume less water.
- Solutions for Yellow Leaves: Yellowing leaves can indicate several issues:
- Nutrient Deficiency: Fertilize your plants.
- Overwatering: Reduce watering frequency, ensure drainage.
- Underwatering: Water thoroughly.
- Lack of Light: Increase light intensity or duration with your grow light.
- Pests: Inspect closely for any tiny invaders.
- Poor Soil Drainage: If water sits on top of the soil for too long, or roots look soggy, the drainage isn't good enough. You might need to add more perlite or coarse sand to your potting mix during the next re-potting, or drill more drainage holes in your pot. Elevating pots slightly on "pot feet" can also improve airflow around drainage holes.
- Seed Storage: If you haven't used all your seeds, store them in a cool, dark, dry place (like a refrigerator, or a sealed container in a pantry). This preserves their viability for future planting.
Conclusion
Embracing indoor gardening with optimized lighting truly transforms the experience from a challenging endeavor into a rewarding one. By understanding the critical role of grow lights and following these straightforward steps, you can cultivate a thriving herb garden that provides fresh, aromatic ingredients year-round. Remember, consistency in lighting, watering, and pruning is your recipe for success.
Ready to bring the vibrant flavors and calming presence of fresh herbs into your home? Don't wait! Start planting your indoor herb garden today, then head over to Pinterest for incredible indoor garden inspiration. Share your gardening journey with us using #IndoorHerbGardenSuccess – we can't wait to see your flourishing plants! For more guidance on cultivating your green space, explore our related articles:
FAQ
Q1: How much light do indoor herbs really need?
A1: Most indoor herbs require 12-16 hours of bright, full-spectrum light daily to thrive, replicating natural conditions. A sunny windowsill often provides only 4-6 hours of usable light, which is usually insufficient for vigorous indoor gardening growth.
Q2: Can I use regular household LED bulbs instead of grow lights for my indoor gardening?
A2: While some very bright household LEDs might sustain extremely low-light plants, they typically lack the full spectrum and intensity needed for healthy herb growth. Dedicated LED grow lights are formulated to provide the specific light wavelengths (blue for vegetative, red for flowering) that plants need for photosynthesis.
Q3: My herbs are getting leggy and stretched. What does this mean?
A3: Leggy plants with long, weak stems and sparse leaves are a classic symptom of insufficient light. Your herbs are literally "reaching" for more light. Lower your grow light closer to the plants (while ensuring it doesn't burn them) or increase the light duration.
Q4: How often should I water my indoor herb garden?
A4: Focus on soil moisture, not a strict schedule. Check the top inch of soil daily; if it feels dry, it's time to water thoroughly until water drains from the bottom. Overwatering is a common mistake that can lead to root rot.
Q5: What are the best herbs to start with for a beginner's indoor gardening project?
A5: Basil, mint, chives, parsley, and cilantro are excellent choices for beginners. They are relatively forgiving and show quick growth under proper conditions, making them ideal for your first foray into indoor gardening.
Q6: Do I need to fertilize my indoor herbs?
A6: Yes, potting mix nutrients are finite. Begin fertilizing with a diluted, balanced liquid fertilizer about 3-4 weeks after planting, every 2-4 weeks, to support healthy, continuous growth in your indoor gardening efforts.
Q7: How can I prevent pests in my indoor herb garden?
A7: Good air circulation, checking plants regularly (especially under leaves), avoiding overwatering, and quarantining new plants are key preventative measures. For minor infestations, insecticidal soap or neem oil can be effective solutions.
To dive deeper into setting up your indoor garden, consider reading our guide on easy indoor gardening setup for beginners. If you're looking for specific ideas for a kitchen space, check out our insights on DIY indoor herb garden for small kitchens. For those interested in expanding their green thumb, learning about 10 easy herbs to grow indoors can provide even more inspiration.
