Introduction
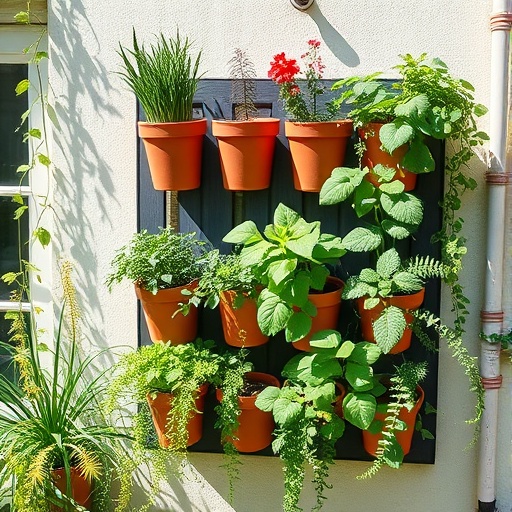
Do you dream of fresh, homegrown produce but think you lack the space? Do you believe bountiful harvests are only for those with sprawling backyards? Think again! Embracing small space vertical vegetable gardening ideas can transform even the tiniest balcony or patio into a thriving edible oasis. This isn’t just about growing a few sad potted herbs; we’re talking about maximizing every inch of vertical real estate to cultivate a diverse array of delicious vegetables, herbs, and even some fruits. With a mindful approach to design and a few clever techniques, anyone can enjoy the unparalleled flavor and satisfaction of garden-fresh ingredients, right at their fingertips.
Tools & Materials Needed
Embarking on your vertical gardening journey requires a specific toolkit, but don’t fret – many items can be repurposed or found affordably. Here’s a breakdown:
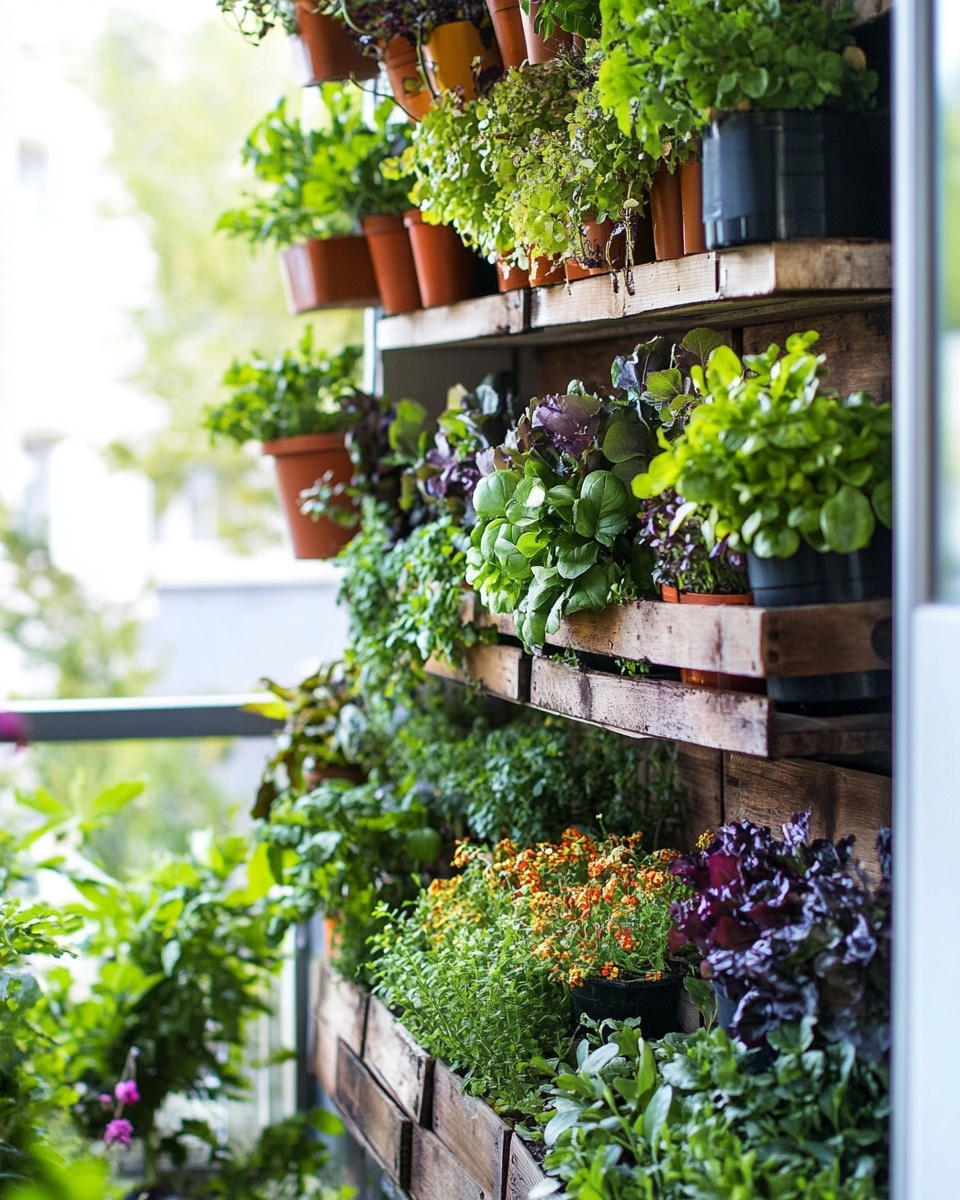
- Vertical Planter System: This is the cornerstone. Options range from ready-made tiered planters, stackable pots, wall-mounted pocket organizers, pallet gardens, or DIY PVC pipe systems. For a budget-friendly option, consider repurposing sturdy plastic bottles or old rain gutters.
- Growing Medium: High-quality potting mix is crucial. Look for a lightweight, well-draining mix specifically designed for containers. For even better results and sustainability, consider mixing your own: 50% coco coir or peat moss, 25% perlite, and 25% compost. This blend offers superior aeration and nutrient retention.
- Pots/Containers: Even within a vertical system, individual pots or compartments are needed. Ensure they have drainage holes to prevent root rot. Eco-friendly alternatives include biodegradable seed pots or repurposed plastic containers.
- Seeds or Seedlings: For faster results, especially with vegetables, opt for starter seedlings from a local nursery. If starting from scratch, choose high-quality seeds from reputable suppliers.
- Gardening Gloves: Protect your hands from dirt and potential irritants.
- Small Trowel and Hand Rake: Essential for digging, planting, and smoothing soil.
- Watering Can with a Fine Rose/Drip Irrigation: Precise watering prevents oversaturation and soil erosion, especially in vertical setups. A simple spray bottle works wonders for delicate seedlings.
- Organic Fertilizer: A balanced, slow-release organic fertilizer or liquid feed (like worm castings tea or fish emulsion) will provide vital nutrients.
- Pruning Shears/Snips: For harvesting and maintaining plant shape.
- Support Structures (Optional): For climbing plants like beans or small cucumbers, small trellises or stakes might be needed within your vertical system.
Time & Effort Overview
Setting up your vertical garden is a rewarding process, typically taking a concentrated effort over a weekend. Planting itself can range from a few hours to a full day, depending on the complexity of your chosen system and the number of plants. Compared to traditional in-ground gardening, initial setup might be slightly more involved, but daily maintenance is often streamlined.
- Initial Setup: 4-8 hours (for research, gathering materials, and assembling the vertical structure).
- Preparation & Planting: 2-4 hours (for filling with soil and transplanting/seeding).
- Daily Maintenance: 10-15 minutes (watering, quick pest checks, light pruning).
- Weekly Maintenance: 30-60 minutes (more thorough inspection, fertilizing, harvesting).
The beauty of vertical gardening is its efficiency. Many herbs and leafy greens in a vertical system can be ready for harvest in as little as 3-4 weeks, often yielding 30% more produce per square foot than traditional horizontal beds. This approach is decidedly beginner-friendly, as it simplifies many aspects of traditional gardening, such as weeding and soil preparation, allowing you to focus on nurturing your plants.
Step-by-Step Gardening Process
Ready to bring your small space vertical vegetable gardening ideas to life? Let’s get dirty!
Step 1: Design Your Vertical Layout
Before you even touch soil, plan your garden. Consider sunlight exposure throughout the day. South-facing balconies usually get the most sun, perfect for tomatoes and peppers. North-facing might suit leafy greens and herbs. Sketch your chosen vertical system – whether it’s a tiered planter, wall pockets, or stacked containers – and decide which plants will go where based on their light and water needs. Taller plants at the bottom, those needing less sun higher up.
Step 2: Assemble Your Vertical Structure
Carefully follow the instructions for your chosen vertical planter system. If you’re building a DIY pallet garden or using wall-mounted pockets, ensure everything is secure and stable. Remember that filled with soil and water, planters can become quite heavy, so proper anchoring is essential, especially for safety on balconies.
Step 3: Prepare Your Growing Medium
Fill your chosen containers or pockets with your high-quality potting mix. Leave about an inch of space from the rim to prevent spillage when watering. If using a custom blend, mix thoroughly in a separate bin before filling. Pre-moisten the soil slightly; it should be damp, not soggy.
Step 4: Plant Your Seeds or Seedlings
For seedlings, gently remove them from their nursery pots. Dig a hole large enough to accommodate the root ball, place the seedling, and backfill with soil, lightly patting around the base. For seeds, follow package instructions for depth and spacing. A general rule of thumb is to plant seeds at a depth twice their diameter. Water immediately after planting to help settle the soil and kickstart germination. Don’t worry if a few seeds don’t sprout; that’s natural! Just plant a few extra.
Step 5: Initial Watering
After planting, give your entire vertical garden a thorough and gentle watering. Ensure water drains from the bottom of each container. This helps eliminate air pockets and provides initial hydration. For delicate seedlings, use a watering can with a fine rose or a gentle stream from a hose to avoid disturbing them.
Step 6: Label Your Plants
This might seem minor, but it’s crucial! Especially when you’re growing multiple varieties or starting from seed. Use waterproof labels or even craft sticks to mark what you’ve planted and the date. This helps track growth and prevents confusion when planning your next harvest.
Growth & Care Tips
Consistent care is the secret to a high-yielding vertical garden.
- Watering Frequency: This is paramount for vertical gardens, as containers dry out faster than in-ground beds. Check soil moisture daily by sticking your finger an inch or two into the soil. If it feels dry, it’s time to water. Hotter weather or direct sun exposure will increase watering needs. Data suggests that container plants can require watering up to 2-3 times more frequently than their in-ground counterparts, especially for drought-sensitive crops like lettuce.
- Sunlight Exposure: Most vegetables need at least 6-8 hours of direct sunlight daily. Observe how the sun hits your vertical garden throughout the day. If some plants aren’t getting enough, consider rotating your vertical structure or moving pots around if possible.
- Pruning for Productivity: Regular pruning encourages bushier growth and better yields. Pinch back the tops of herbs like basil to prevent them from flowering too soon. For tomatoes, snip off “suckers” (small shoots growing in the crotch of two branches) to direct energy into fruit production.
- Fertilization: Since nutrients leach out of containers, regular feeding is vital. Start with a slow-release organic granular fertilizer mixed into the soil at planting. Supplement every 2-4 weeks with a liquid organic fertilizer. Soil testing can pinpoint specific nutrient deficiencies, ensuring optimal plant health.
- Pest Prevention: Inspect your plants regularly for signs of pests. Early detection makes prevention easier. Simple solutions include a strong spray of water to dislodge aphids, or an organic insecticidal soap for persistent infestations. Companion planting (e.g., marigolds near tomatoes) can also naturally deter pests.
Eco-Friendly & Sustainable Alternatives
Making your vertical garden sustainable benefits both your plants and the planet.
- Composting: Start a small worm farm or a kitchen counter compost bin for food scraps. The resulting “black gold” compost is a nutrient-rich amendment for your vertical garden.
- Natural Fertilizers: Beyond store-bought organic options, consider homemade solutions. Comfrey tea, banana peel infusions (for potassium), or coffee grounds (for nitrogen) can boost plant health naturally.
- Water Conservation: Implement drip irrigation or self-watering systems tailored for vertical planters to minimize water waste. Collect rainwater if feasible. Mulch the top of your containers with straw or coco coir to retain soil moisture.
- Repurposed Materials: Your vertical garden itself can be a testament to sustainability. Use old pallets, plastic bottles, tires, or even old clothes organizers. For more indoor ideas, check out our guide on DIY indoor herb garden for small kitchens.
Creative Ideas & Uses
Vertical gardens are not just functional; they’re living art installations!
- Decorative Touches: Incorporate small fairy lights for evening ambiance, hang miniature wind chimes, or add decorative stones around the base of your system. Paint repurposed containers in vibrant colors to create a modern aesthetic.
- Plant Combinations: Group plants not just by light needs but also by color and texture. For instance, combine the feathery foliage of carrots (yes, you can grow them vertically!) with the broad leaves of lettuce and the bright green of parsley.
- Herb Spirals: For a truly attractive and productive vertical garden, consider an herb spiral. This tiered stone or brick structure naturally creates microclimates, allowing you to grow herbs with varying moisture needs in close proximity.
- Repurposing Materials: Imagine a vertical planter made from an old bookshelf, its shelves lined with various herbs and small vegetables. Or a vertical garden created from upcycled rain gutters, mounted creatively on a fence or wall.
- Edible Walls: Imagine a living wall of edibles – strawberries cascading down, pockets of different lettuces, and fragrant herbs. This transforms an otherwise bland wall into a vibrant, productive feature. For more vertical insights, explore vertical indoor garden ideas for small spaces.
Common Mistakes to Avoid
Even experienced gardeners make errors. Being aware of these common pitfalls will save you time and frustration.
- Overwatering: The #1 killer of container plants! Overwatering suffocates roots, leading to root rot. A study found that over 60% of houseplant failures are attributed to improper watering. Always check soil moisture before watering. Symptoms include yellowing leaves and a general droopy appearance, often mistaken for underwatering.
- Under-fertilizing: As mentioned, nutrients deplete rapidly in containers. If your plants are stunted, pale, or producing poorly, they likely need more food. Don’t neglect this step, especially with heavy feeders like tomatoes and peppers.
- Inadequate Sunlight: Placing sun-loving plants in too much shade will result in leggy, weak growth and poor yields. Always match plants to their specific light requirements.
- Using Garden Soil: Never use heavy garden soil in containers. It compacts easily, preventing drainage and aeration, which chokes roots. Always opt for a high-quality, lightweight potting mix.
- Ignoring Pest & Disease Signs: A tiny infestation can quickly become an overwhelming problem in a contained space. Regularly inspect your plants and act quickly at the first sign of trouble.
- Lack of Drainage: Containers without drainage holes are death traps for most plants. Excess water drowns roots. Ensure every pot, pocket, or level has sufficient drainage.
Maintenance & Storage Tips
Long-term success with your vertical garden comes down to consistent, thoughtful care.
- Seasonal Rotation: As seasons change, some plants will naturally decline. Remove spent plants promptly to prevent pests and diseases, and free up space for new plantings. Consider cool-season crops (lettuce, spinach, radish) for spring and fall, and warm-season crops (tomatoes, peppers, basil) for summer.
- Soil Amendment: After a growing season, the potting mix will be depleted. Replenish nutrients by mixing in fresh compost or a balanced organic fertilizer before new plantings. You can reuse potting soil for several seasons, but it benefits greatly from revitalization.
- Tool Care: Clean and sharpen your pruning shears regularly to prevent the spread of diseases and ensure clean cuts, which are better for plant health. Store tools in a dry place to prevent rust.
- Seed Storage: If you’re saving seeds from your harvest or keeping unused seeds, store them in cool, dark, and dry conditions in airtight containers. This maximizes their viability for future plantings.
- Winterizing: For perennial herbs or tender vegetables, consider bringing small pots indoors during winter. For larger vertical systems, empty and clean them, storing components protected from harsh weather. This prolongs the life of your equipment and prevents damage.
Conclusion
Transforming your compact living area into a vibrant, productive edible haven with small space vertical vegetable gardening ideas is not just a dream – it’s an incredibly achievable reality. From fresh, aromatic herbs to crisp, leafy greens and juicy cherry tomatoes, the bounty you can cultivate in a small vertical footprint is truly astounding. We’ve covered everything from essential tools and the step-by-step planting process to crucial care tips, sustainable practices, and even creative design ideas.
So, whether you’re a seasoned gardener looking for a new challenge or a complete beginner eager to taste homegrown goodness, there’s never been a better time to embrace the vertical revolution. The satisfaction of harvesting your own food, knowing exactly where it came from, is unparalleled. Don’t let limited space be an excuse; let it be an inspiration! Grab your trowel, choose your favorite plants, and start building your vertical dream garden today.
Share your vertical garden creations with us – we’d love to see what you grow!
FAQ
Q1: What are the best vegetables for small space vertical vegetable gardening ideas?
A1: Leafy greens like lettuce, spinach, and Swiss chard are excellent choices, along with herbs (basil, mint, parsley, rosemary), strawberries, cherry tomatoes (bush varieties do best), radishes, and small peppers. Bush beans and compact cucumber varieties can also thrive with proper support.
Q2: How often should I water my vertical garden?
A2: The watering frequency depends on your climate, the type of plants, the container size, and the growing medium. A general rule is to check the soil moisture daily by sticking your finger an inch or two deep. If it feels dry, water thoroughly until you see drainage. In hot weather, you might need to water more than once a day.
Q3: Do vertical gardens attract more pests?
A3: Not necessarily. In fact, being elevated can sometimes make them less susceptible to ground-dwelling pests. However, all gardens can attract pests. Regular inspection, good air circulation, and organic pest control methods are key. Keep an eye out for common issues like aphids or spider mites.
Q4: Can I grow a vertical garden indoors?
A4: Absolutely! Many small space vertical vegetable gardening ideas are perfectly suited for indoor environments. You’ll need adequate light, which might mean supplementing with grow lights, especially for fruiting vegetables. Leafy greens and herbs do very well indoors. For more, see our guide on easy indoor gardening setup for beginners.
Q5: What kind of fertilizer is best for vertical gardens?
A5: For vertical container gardens, a balanced, slow-release organic granular fertilizer incorporated into the soil at planting is a great start. Supplement with a liquid organic feed every 2-4 weeks. Look for products specifically designed for vegetables or general plant food.
Q6: How do I ensure my vertical garden gets enough sunlight?
A6: Most vegetables require 6-8 hours of direct sunlight. Observe your chosen spot throughout the day to determine its sun exposure. If natural light is insufficient, especially for indoor vertical gardens, consider supplementing with full-spectrum LED grow lights. Placing taller, sun-loving plants on higher tiers or southern-facing spots within your vertical system helps.
Q7: Can I compost directly in my vertical garden?
A7: While you shouldn’t put large amounts of raw organic waste directly into your planters (it can attract pests and impede growth), you can certainly amend your potting mix with well-rotted compost or vermicompost (worm castings). This acts as a superb slow-release fertilizer and improves soil structure.
Related Resources
- 10 Easy Herbs to Grow Indoors
- DIY Indoor Herb Garden for Small Kitchens
- Vertical Indoor Garden Ideas for Small Spaces
- For even more gardening inspiration, check out this great resource: Pinterest Gardening Ideas


